
The comic artist, Rube Goldberg, is the only person ever to be listed in the Merriam Webster Dictionary as an adjective. … A Rube Goldberg Machine is “a comically involved, complicated invention, laboriously contrived to perform a simple operation” (Webster’s New World Dictionary).
Project Description & Objectives
Create a 10 second animation of an Rube Goldberg Machine of your own design with a total of 3 chain reactions. The elements and composition of your machine will be created in Adobe Illustrator using the sketches as a template. All drawn elements of you final machine composition will utilize an analogous color scheme.
Minimum action sequence requirements:
Action 1 causes Action 2 to begin
Action 2 causes Action 3 to begin
Action 3 causes the final result of the machine.
TIP! Design your composition backward. What is the end action? Turning on a light switch? Starting a fan? Etc. Start at the end and use your imagination to work your way 3 ridiculous steps backward.
Notes
Rube Goldberg:
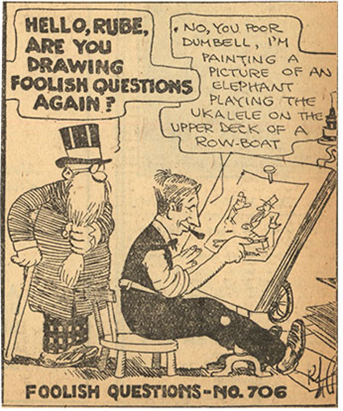
•RUBE GOLDBERG (1883-1970) was a cartoonist, an inventor, and the only person ever to be listed in Merriam-Webster’s Dictionary as an adjective. •Of the nearly 50,000 cartoons he drew in his lifetime, Rube is best known for the zany contraptions of Professor Butts. These inventions, also known as Rube Goldberg Machines, solved a simple task in the most overcomplicated, inefficient, and hilarious way possible
•Rube Goldberg lives on in pop culture and is referenced daily in both print and digital media. His name is searchable, hash-taggable, and at best viral. But nowhere is his legacy more celebrated than through the competitions that bear his name.

2017
OK Go music video


Visit this link to see more examples of comics:
Contemporary Examples

https://nothingsuspicio.us/comic/0019-rube-goldberg

https://patrick-dias.com/rube-goldberg-editorial-piece

https://www.behance.net/gallery/22700215/Rube-Goldberg-Machine-Infography

“The whole idea of a machine is outdated,” Christoph Niemann says about “Coffee Break,” his cover for this week’s issue. “I started drawing beakers and pipes, a cartoon of a machine,” he continues. “But then I decided to update the outdated technology. I put things like a Death Star, a SyQuest drive (it had a translucent case so you actually saw the disk inside, and it always made this very peculiar sound, chk chk chk chk chk), a razr flip phone (I just remember that being the hottest thing), and a ZX81. Starting at the coffee cup, you go up to the round thing, then you go left where there’s a big cog, and to the left of that there’s something that looks a bit like a typewriter–that’s the Sinclair ZX81. That was my first computer, back in maybe 1984 or ’85. It was super lightweight: you could program three lines of code and that was that. It didn’t have a monitor—you used your TV. And when you unplugged it, everything was gone because it didn’t have any way to store anything. I just loved it. I have a romantic attachment to these things—I wanted to anoint them into cartoon heaven.”

https://www.saatchiart.com/art/Collage-Dentist-Recommended/924696/3725036/view


https://julia-geiser.ch


*Terry Gilliam was the animator for the Monty Python’s Flying Circus tv series (1969 – 1974). These animations were created with cut paper and stop motion. Not all of the animations are cause and effect but they may give you some inspiration for a collage-based project.
Getting Started
- Complete Exercise 4.1 & 4.2 BEFORE starting Project 4 to learn the tools.
- Complete the artist research and required sketches
- Carefully review the project sheet to make sure you fulfill all requirements and read over important project tips.
- Contact Erin at Erin.Anfinson@mtsu.edu with any questions.
Project:
Step 1: Project Research & Sketches
Review the Project 5 Power Point on D2L
Watch the required 5-minute video on D2L about Rube Goldberg.
Research and a write brief reflections about Goldberg’s work and 2 contemporary examples of chain reaction videos, illustrations or other artwork you research from the Power Point. In your written response be sure to address what aspects of each artists’ work that you want explore in your own animated project. Copy and paste 2 images of each artists’ work or links to videos, along with your reflections, into a Word document.
In the same Word document, write a brief proposal about your idea for the project. What simple and mundane task will you create a comically complex series of 3 chain reactions to accomplish? Write a list and brief explanation for each reaction in the chain.
Create a sketch of your idea, including directional arrows and notes about the chain reactions you plan. Take a photo of your sketch to submit it in the D2L Dropbox with your written research.
Submit your completed research to the class D2L Dropbox by the due date.
Step 2: Illustrator document set up
Create a new Project 5 Asset folder on your computer. Label this folder LastName_FirstName Project 5. (example: Anfinson_Erin Project 5)
Create a new Illustrator document with the following size specifications for your collage:
Save as LastName_FirstName Project 5.psd (example: Anfinson_Erin Project 5.psd
RGB Color Space
72ppi resolution (for screens)
Height: must be 1080 pixels
Width: between 1080 pixels – 1920 pixels. Select a size proportionate to your composition sketch. For example: Your sketch on paper is 8 ½” x 11” then Illustrator artboard would be 834 pixels x 1080 pixels. To solve, cross multiply and divide the proportions to solve for the missing pixel width dimension using this online calculator by inchcalculator.com.

Step 3: Draw your machine in Illustrator
Using your scanned sketch/map as your guide, re-draw your Rube Goldberg machine background and elements in Illustrator.
Remember to carefully label and draw each element on your machine that is to be animated on separate layers!
Draw your machine elements like puppets with separate moving parts, if necessary.
Use an Analogous color harmony for your entire composition. Select 1 key color from the harmony and use the secondary colors as accents. Remember to fully utilize the light/dark values from each color!

Step 4: Import the Illustrator document into After Effects and animate your machine!
Follow the same procedure in Exercise 4.1 to import your Illustrator drawing into an After Effects composition.
Where necessary for animated scale change, motion paths, and/or rotations, remember to move the anchor points using the Anchor Point tool (Y) before you begin animating!
Animate the cause and effect actions of your machine in a 10 – 15 second animation. To change the duration of your animation on the timeline, go to Composition Settings (Command K) and reset the duration in the dialogue box.
Project Requirements (Assessment Criteria)
Machine Illustrator drawing and composition:
Overall composition effectiveness. Placement of machine parts, consideration for background elements, etc.
Effectiveness of the applied analogous color harmony
Overall stylistic consistency and approach to the machine drawing. i.e. Are the drawings tied together visually through the use of color, stroke, style, line width variation, etc?
3 total reactions must be animated:
Action 1 causes action 2 to start
Action 2 causes action 3 to start
Action 3 causes the final result of your machine (i.e. the completion of the mundane task)
Required animation techniques:
Anchor points of individual animated layers are moved to more effective placements for animated motion, scale change, and/or rotation
Use of animated motion paths with curved paths where necessary
At least 1 instances of animated rotation
At least 1 instance of animated scale change
1 use of a Parented layer (Can leave another object behind using the Split layer command (review from Exercise 4.2))
Keyframe Easing used to improve the motion on all keyframed layers (easing in/out)
Effort to explore a variety of timing and speed throughout the chain of reactions through the distance of keyframed events as related to the Principles of Animation.
Workspace organization: Labeling layers, etc.
Completion of Project 5 Self-Reflection
Exporting and submitting your Project:
Export a looping .gif of your animation with Photoshop
Export a high quality .mov file from After Effects
In After Effects, go to Composition > Add to Render Queue
In the Queue window, open the Format dropdown menu and set to Lossless. Click on Lossless.
In Output, click on your file and navigate to your Project 5 Asset folder to save the export.
Click the Render button to render. A .mov version of your animation will be saved.
Use Photoshop to export a looping animated GIF of your animation
Open Photoshop, then open your .mov animation
Go to File>Export>Save for Web (Legacy)…
In the new dialogue box change the Preset to 128 Dither and make sure looping is set to Forever.
Hit Save and save your exported GIF to your Project 5 Asset folder.
Compress your Project 5 Asset folder and submit your project via WeTransfer.com:
Go to your Exercise 4.1 Asset folder containing all of the following:
Project 5 Illustrator .ai file
Project 5 After Effects .aep file
Exported .mov
Exported animated .gif
Any and all included sound effects files (if used)
Right-click, Control-click, or go to File > Compress to compress or zip the folder
A .zip file will be created next to the folder

Go to WeTransfer.com, upload the .zip file, type your name and “Project 5” in the Message box, and send it to Erin.Anfinson@mtsu.edu
