Learning Objectives
- Students will be able to define the role that monuments play in society.
- Students will be able to demonstrate an understanding of scale, proportion, texture, and value.
- Students will be able to demonstrate an understanding of the need for research and how to appropriately develop ideas that are enriched by that research and explored through their visual work.
- Students will be able to demonstrate excellent craftsmanship and attention to detail.
Project Overview / Considerations
For this project, you will create a monument to the unheard and unseen parts of history using cardboard. This project will require extensive research and planning. The aim of this project is to get you thinking about both aesthetic and conceptual ideas.
For the aesthetic portion, I want you to investigate the use of form, balance, scale, proportion, texture, and value. You will need to consider how the scale of your project informs the viewer – does the scale of your monument feel imposing, welcoming, or threatening? When the scale changes, so does the texture. You will need to consider how you use texture on a potentially much larger work of art. Monuments are typically located in outdoor areas or places with uncontrolled lighting. Use that uncontrollable and unpredictable nature as part of your work.
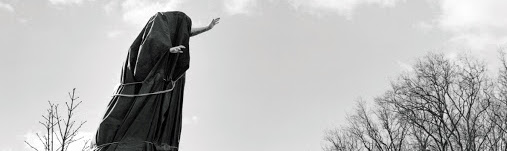
Conceptually you will be asked to create the opposite of the traditional monument. Although your final project might (or might not) look like a traditional monument, what it memorializes is up to you. Focus on institutions, ideas, and beliefs that you admire or despise. Pick them apart.
Texture and Scale
Click on the two sections below to learn how texture and scale should be considered when designing your monument.
Texture – describes surface quality either actual or implied. Actual texture is how something feels when you touch it. A rock feels rough, a feather smooth. Implied texture is how an object appears to feel. A drawing of a rock appears or implies that the texture is rough but if we touch the sheet of paper it feels smooth. Texture has degrees of roughness or smoothness and relies heavily on value and lighting. If you want to take a really youthful photo of yourself use as much light as possible. The light will fill in any wrinkles and wash out any hard shadows. Lighting your face from a really harsh angle will enhance the texture of your face, creating a photo that is creative but might not be the most flattering.
Since you are not painting your cardboard anti monuments, consider how you will use texture and value to create areas of interest in the work. Focus on using lighting and values, that can be created by pushing and pulling the cardboard in and out, to create both texture and volume.
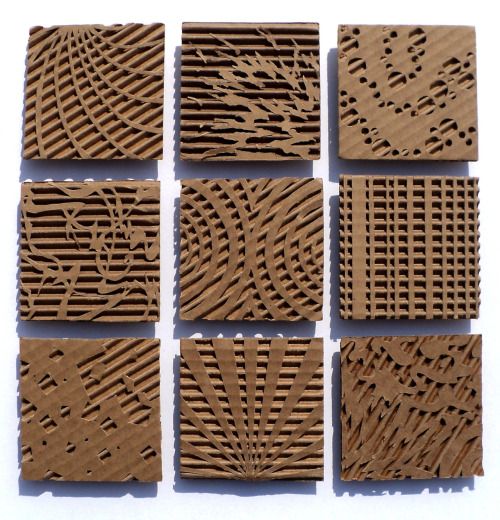
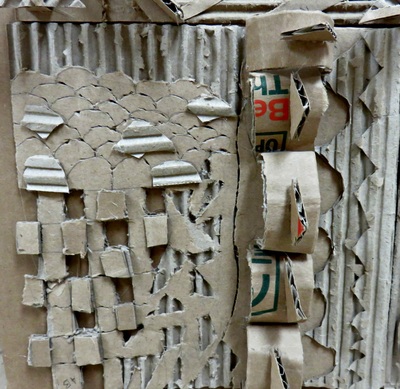
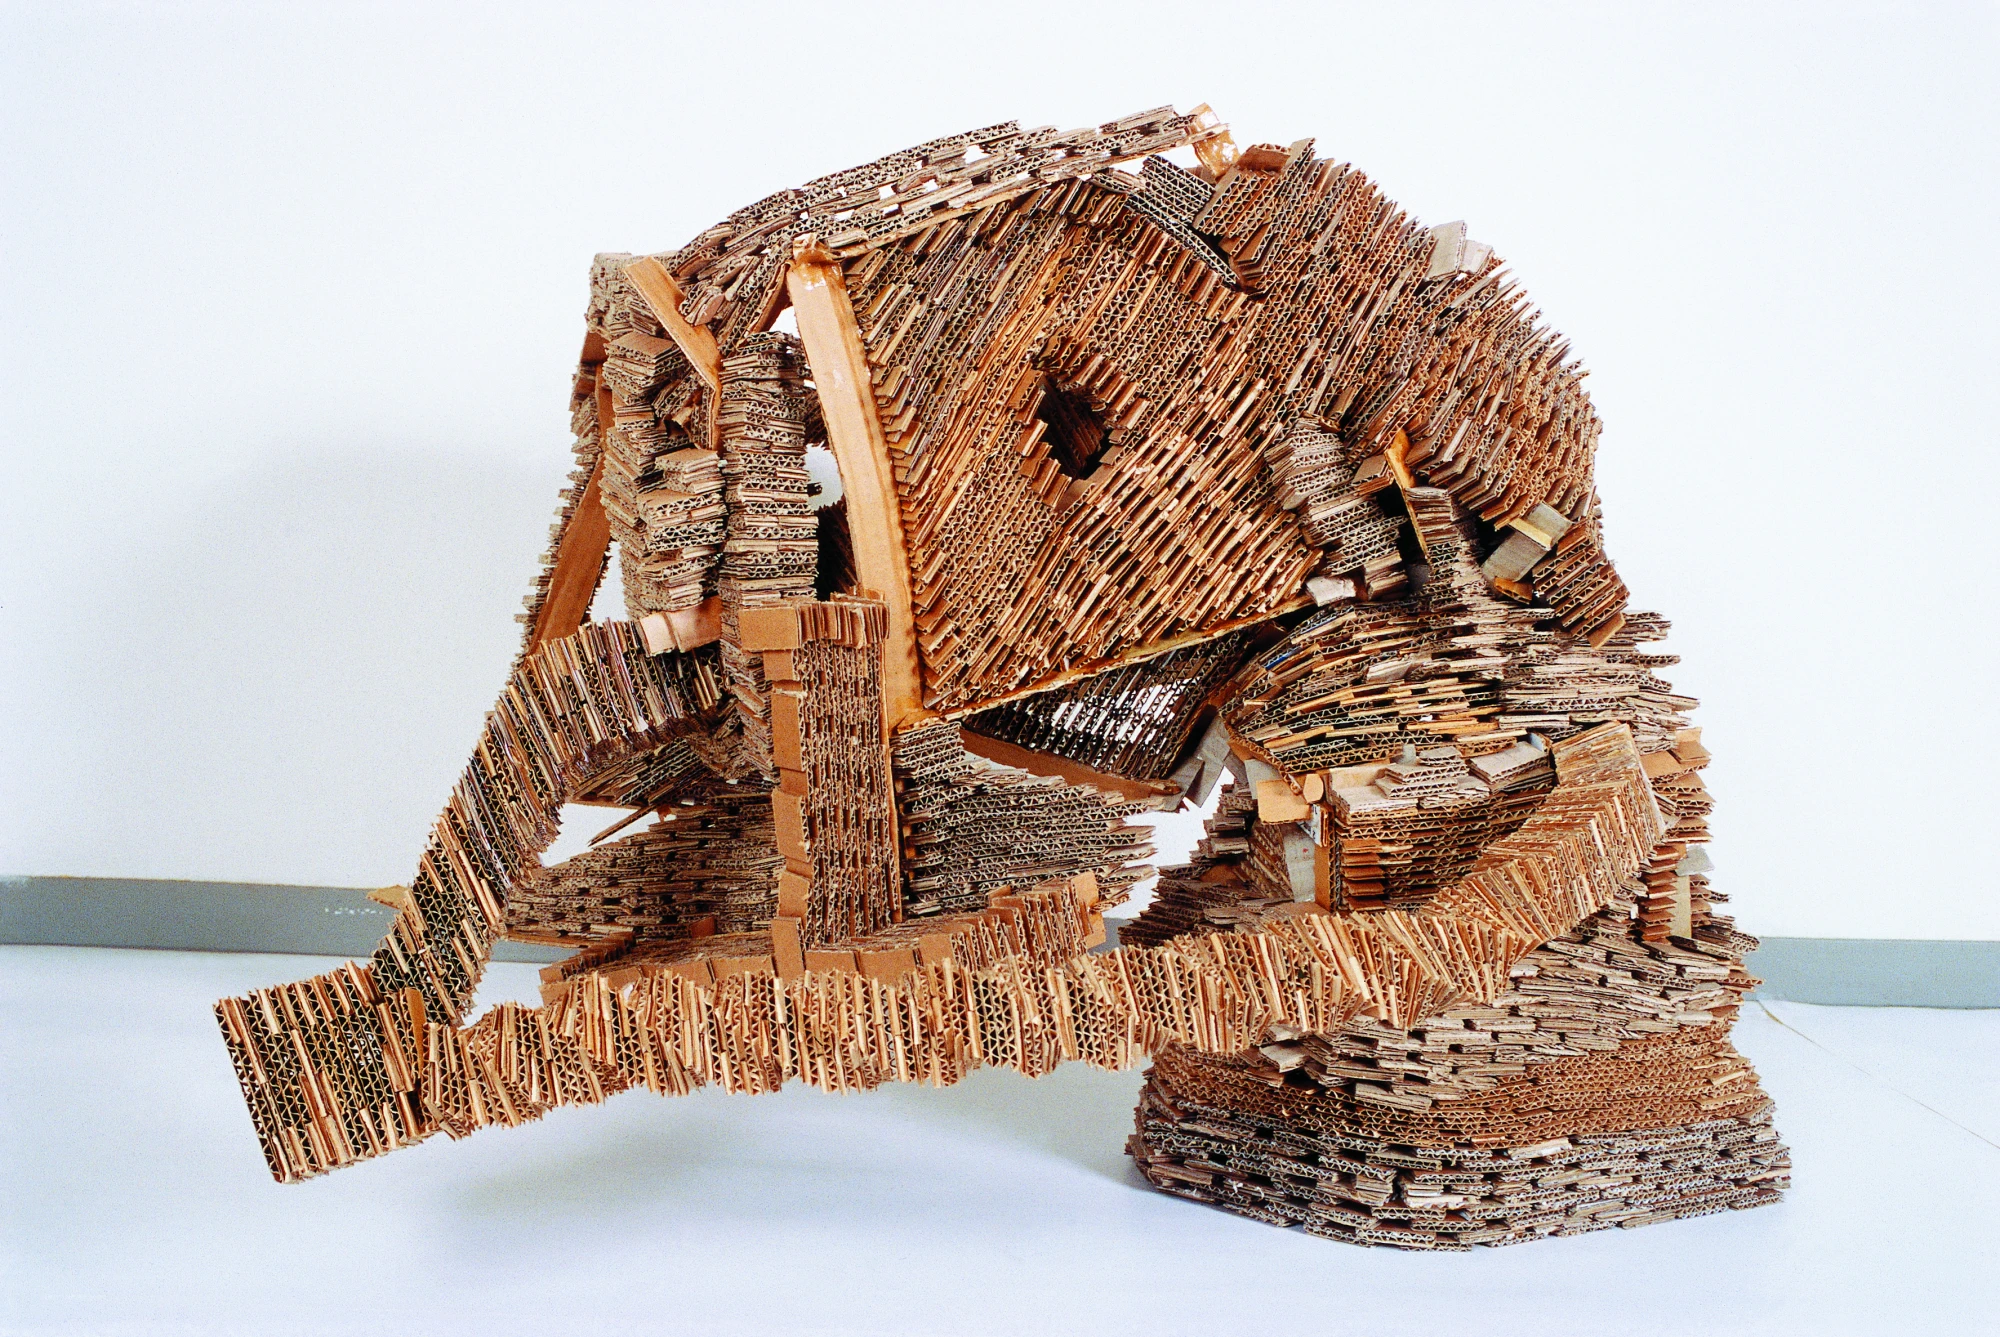
Consider creating contrast through texture, the inherent textures of the material, texture that is created by process or by hand, the natural color of the material, and woven, carved, layered, deconstructed textures.
Proportion and Scale – Proportion is the size relationship of parts to a whole and to one another. Babies are cute because their heads and eyes disproportionally large when compared to the rest of their body. Whenever you start a drawing, you can check proportions by comparing one object to another and asking if it’s too big, too small, too flat, too round… Scale refers to relating size to a constant, such as a human body. If you look on the box of a model car kit, you’ll see numbers such as 1:24th scale. This means that the car in the box with be 1/24 the size of a real car. Some artworks work better on a small scale (creates intimacy) while others on a much larger scale (commands attention).
Think about how the scale of your anti monument can inform the viewer. If you’re trying to create empathy a smaller scale might allow the viewer to feel a connection with the work. If you’re trying to confront the viewer with a political or social idea, going larger may challenge them to react.
Large Scale
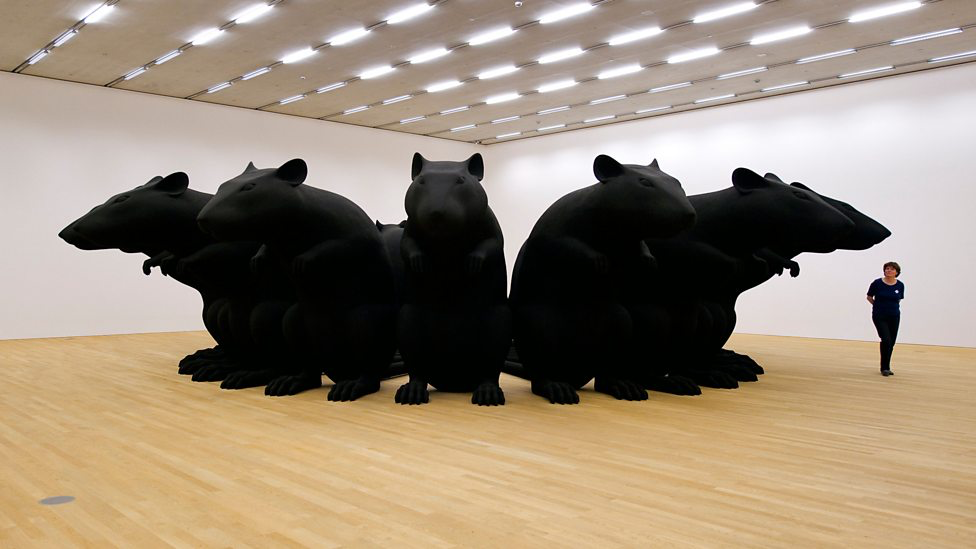
Katharina Fritsch’s Rat King (1993) has scaled up a group of rats in order to increase the impact of her sculpture. The rats are twice the height of a person.
Their size makes them seem monstrous and combines with their posture to make them feel threatening to the viewer.
Artists can use the land and environment around them to create pieces of work on a monumental scale.

One of the earliest examples of land art is seen with the Nazca Lines in Peru (between 500BC and 500AD). These ancient artworks were made by digging troughs into the ground to expose lighter stones and pebbles below.
This stylised drawing of a hummingbird has a relatively simple design but, at over 90 metres long, it has a dramatic impact because of its scale.
The reason this image was created is unknown but its scale suggests its importance, as a significant amount of effort and skill was needed to create it. This is made all the more impressive when you consider that there was no way for the creators to see the finished artwork which can only be seen from the air.
Small scale
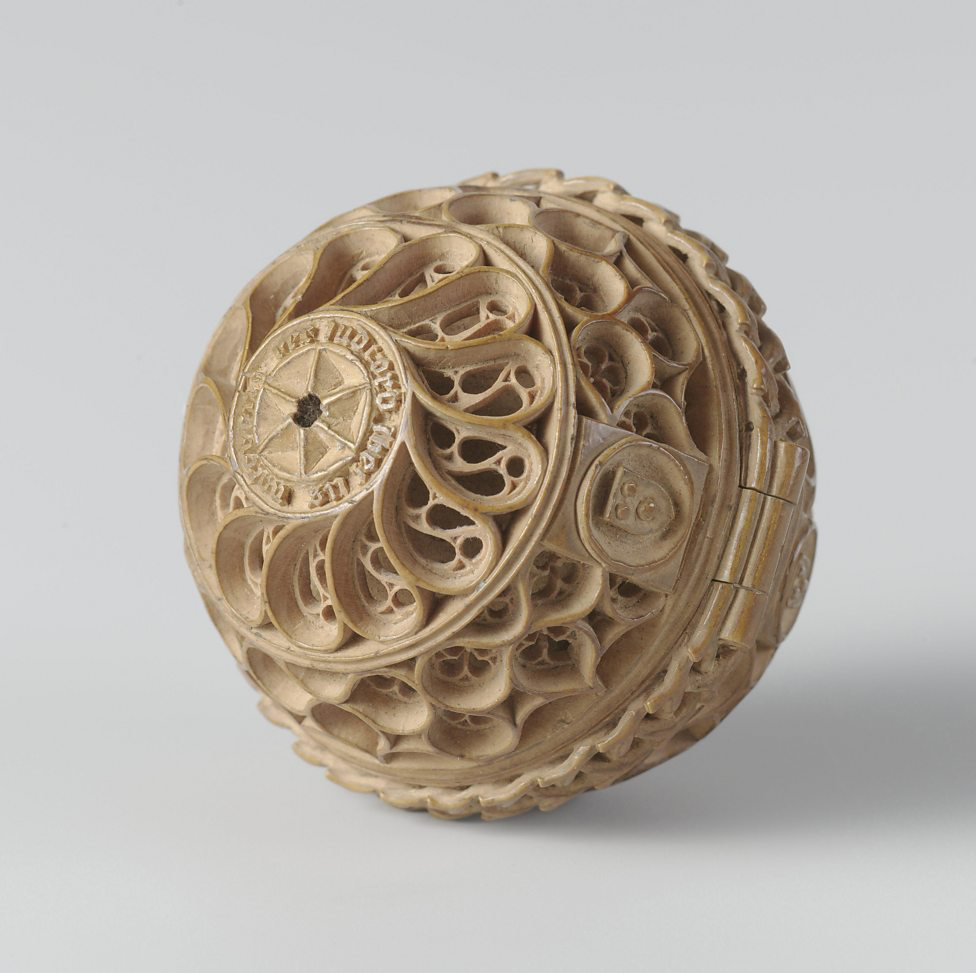
When artists create work on a miniature scale, impact is often created through the level of detail and skill involved.
This prayer nut was created by Adam Theodrici between 1500 – 1525. It measures less than 5cm across and would have been hung from a chain of rosary beads.
The intricate carving has been created with a great level of skilled craftsmanship. This work would have been time consuming and expensive.
This object would have clearly signalled the wealth of its owner.
One note
Although this project was developed during the height of the 2020 protests and the subsequent removal of Confederate monuments across the country, your work does not need to be anything nearly as confrontational. It could be something more humorous or it could indeed take on more challenging topics. While it is ok to make work that might be offensive, I expect you to have done the research to support your work. It is not enough to be offensive for the sake of being offensive. All works must be accompanied by a project statement.
Materials
- Chipboard / Cardboard
- White Elmer’s Glue
- Cheap Chip Brushes
- Xacto Knife
- Utility Knife
- Masking Tape
- Hot glue gun and glue sticks
- Metal ruler
Process
Part 1 – Sketchbook Research
Answer the following questions in your sketchbook or on Google Slides before you move any further in the project. There is no right or wrong here – I want to see what you already know. Students will share their research and responses with the class in the form of group discussions.
1. What do you know about monuments and their role in a community?
2. What would you need to know to create a successful public monument?
3. Of the monuments you are familiar with, whose story is being told, and from what viewpoint?
4. Should we be more scrupulous when viewing monuments that major corporations or donors fund? Why or why not?
5. While Confederate monuments have recently been a source of controversy, what other monuments are you aware of that might present similar issues?
Part 2 – Sketchbook Research
1. Take notes in your sketchbook on the readings and videos from the Research / Examples section below.
2. Create 5 pages in your Google Sketchbook Presentation, one for each of the sections below. Use this part of your presentation to research ideas for your monument. You’re not trying to copy what is already out there but trying to find sources of inspiration. In your sketchbook presentation include a slide for each of the following –
– 5 images of historical monuments
– 5 images of social monuments
– 5 images of appropriate textures for your monument
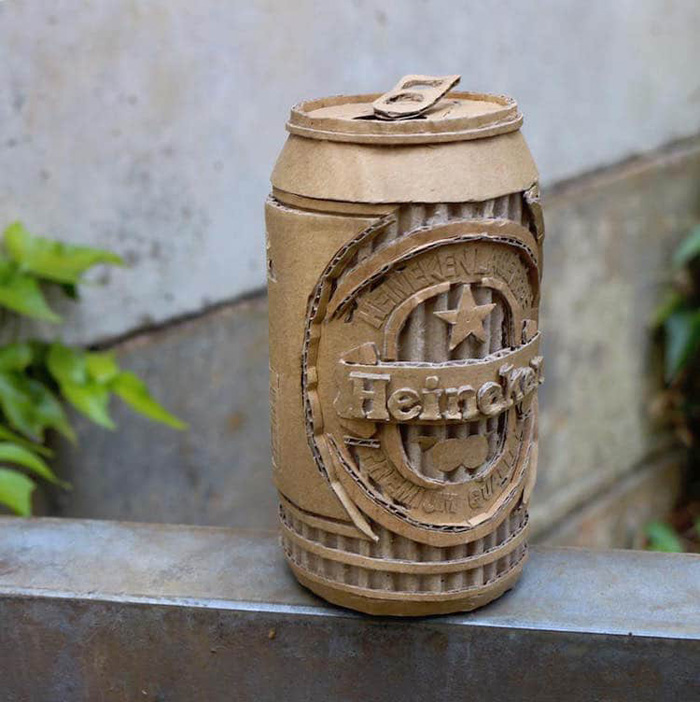
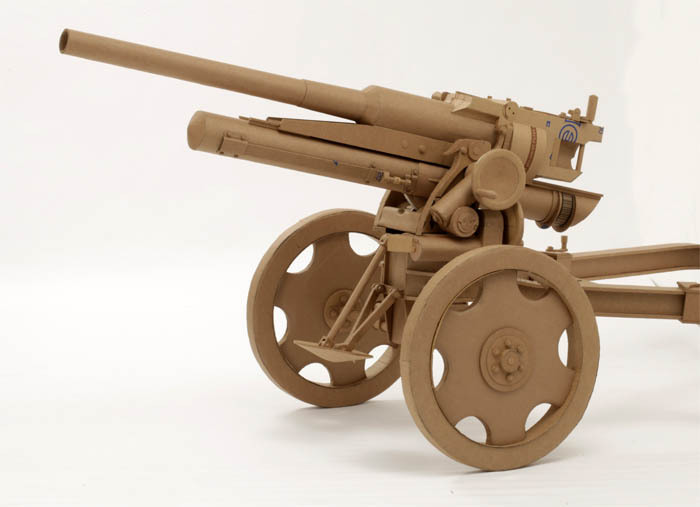
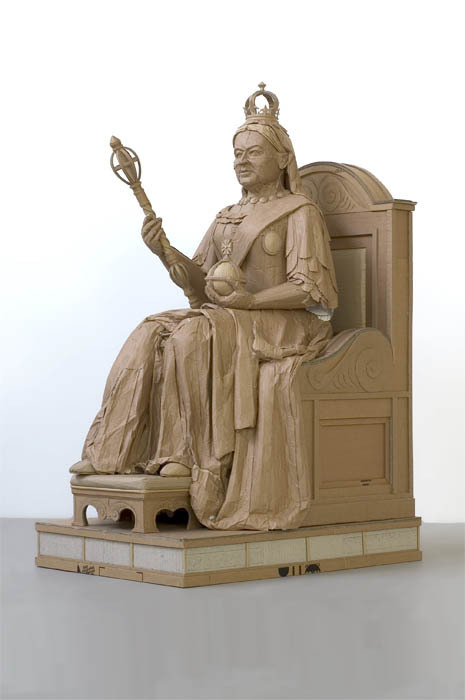
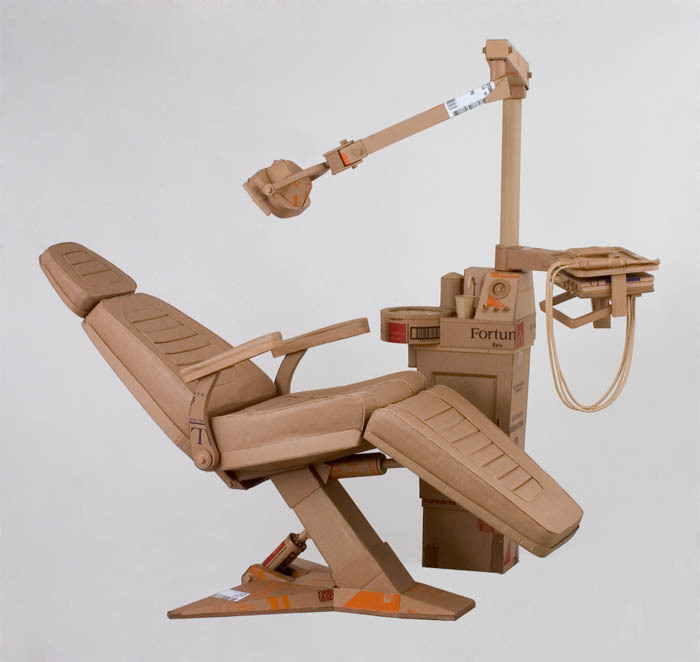
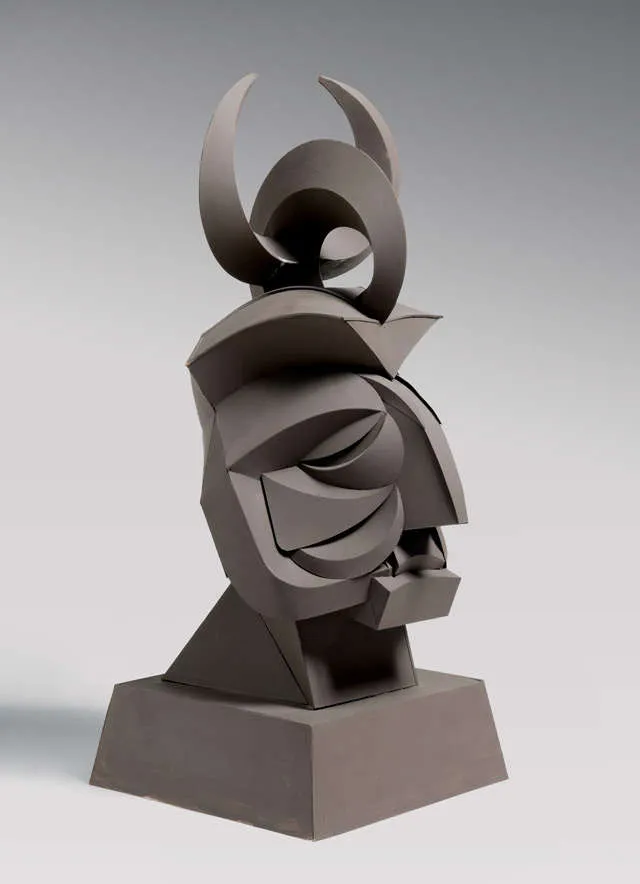
– 5 images of cardboard works of art
– 5 images of events, people, places, historical events, causes, social events, etc that you have some belief about.
3. Research different methods used in cardboard construction using the links and videos on this page. Take notes in your sketchbook.
4. Using the research you completed, work out 5 different ideas through sketches. Try to think about your work from all sides and in terms of scale.
Part 3 – Project Statement
1. Within your Google Slides Presentation create a draft of your project statement (250 – 500 words). A project statement is both a physical and conceptual description of your work. How would you describe the work over the phone? What is the work about? What research are you interested in? What do you hope the work expresses to the viewer?
Part 4 – Anti Monument Project
1. Using your sketches from the sketchbook research above and the feedback of your instructor, sketch out your monument to scale with the aid of the professor. The minimum size for the project is 18 inches. Make sure to think of any problems you might face while you are building your sculpture such as its design, structural integrity issues, balance, height, width, how it sits in space, etc.
2. After getting your sketch approved by the professor, start constructing your monument. You should start with the large shapes first with the cardboard and “rough” out the main components. Focus on excellent craftsmanship as you work. Edges of the cardboard should not be frayed and glue should not show. These won’t be painted – excellent craftsmanship is essential.
Part 5 – Project Statement Revision
1. Project Statement (250 – 500 words) – Respond to your peers and instructor’s feedback about your first project statement and make adjustments. These statements will accompany your work so double-check for clarity, spelling, and grammar.
Part 6 – Anti Monument Project Continued
1. Continue building basic forms for your monument, adding details where needed. As you are working make sure to examine your sculpture from all sides. Create areas of interest and surprises for the viewer. If the viewer comes close to your sculpture, will there be something for them to look at? Will they understand what your monument is about?
2. Make sure to take in-progress photos of your work and add them to your Google Slides Presentation.
5. With the help of the professor, select a location to exhibit your final piece.
6. For the critique make sure to bring a printed copy of your Project Statement (250 – 500 words) – When you display your work on campus the Project Statement must be displayed next to your work.
Part 7 – Documentation
1. Photograph your finished sculpture and upload your images to your Google Slide Presentation. For more information on photographing three-dimensional works of art, check out the notes here (Documenting Your Work – located under Resources at the top).
Part 8 – Self-Reflection
Answer the following self-reflection questions –
1. Why did you select this topic to make a monument about?
2. As you researched and worked through the building of your monument did anything change the way you previously thought about your topic?
3. Do you plan to engage in conversations or activism with regard to your specific topic?
4. Will a viewer understand your work and what you’re trying to say? Why or why not? What could be adjusted to make your idea more evident?
5. How does scale affect the way your work is interpreted? How would it change if it was smaller or larger?
6. How is the craftsmanship? Is your monument well made with few rough areas (no glue or unfinished parts)? Do textured areas work or are there some areas that are too simplistic?
Research / Examples
Collective memory refers to the shared pool of memories, knowledge, and information of a social group that is significantly associated with the group’s identity. The English phrase “collective memory” and the equivalent French phrase “la mémoire collective” appeared in the second half of the nineteenth century. The philosopher and sociologist Maurice Halbwachs analyzed and advanced the concept of collective memory in the book “Les cadres sociaux de la mémoire” (1925). Collective memory can be constructed, shared, and passed on by large and small social groups. Examples of these groups can include nations, generations, and communities, among others. Collective memory has been a topic of interest and research across a number of disciplines, including psychology, sociology, history, philosophy, and anthropology. (Source)
Anti-monumentalism (or Counter-monumentalism) is a philosophy in art that denies the presence of any imposing, authoritative social force in public spaces. It developed as an opposition to monumentalism whereby authorities (usually the state or dictator) establish monuments in public spaces to symbolize themselves or their ideology and influence the historical narrative of the place. According to artist Rafael Lozano-Hemmer, anti-monument “refers to an action, a performance, which clearly rejects the notion of a monument developed from an elitist point of view as an emblem of power.” Krzysztof Wodiczko‘s Bunker Hill Monument Projections, Do-Ho Suh‘s Public Figures or Jochen Gerz‘s 2146 Stones – Monument against Racism can be considered examples of anti-monumentalism. (Source)
Readings
Harvard Design Magazine – Memory and Counter Memory (PDF)
The Anti Monumental (PDF)
The Interventionists (PDF)
Memory – Vanished, Absent and Confined (PDF)
Collective Memory (Wikipedia)
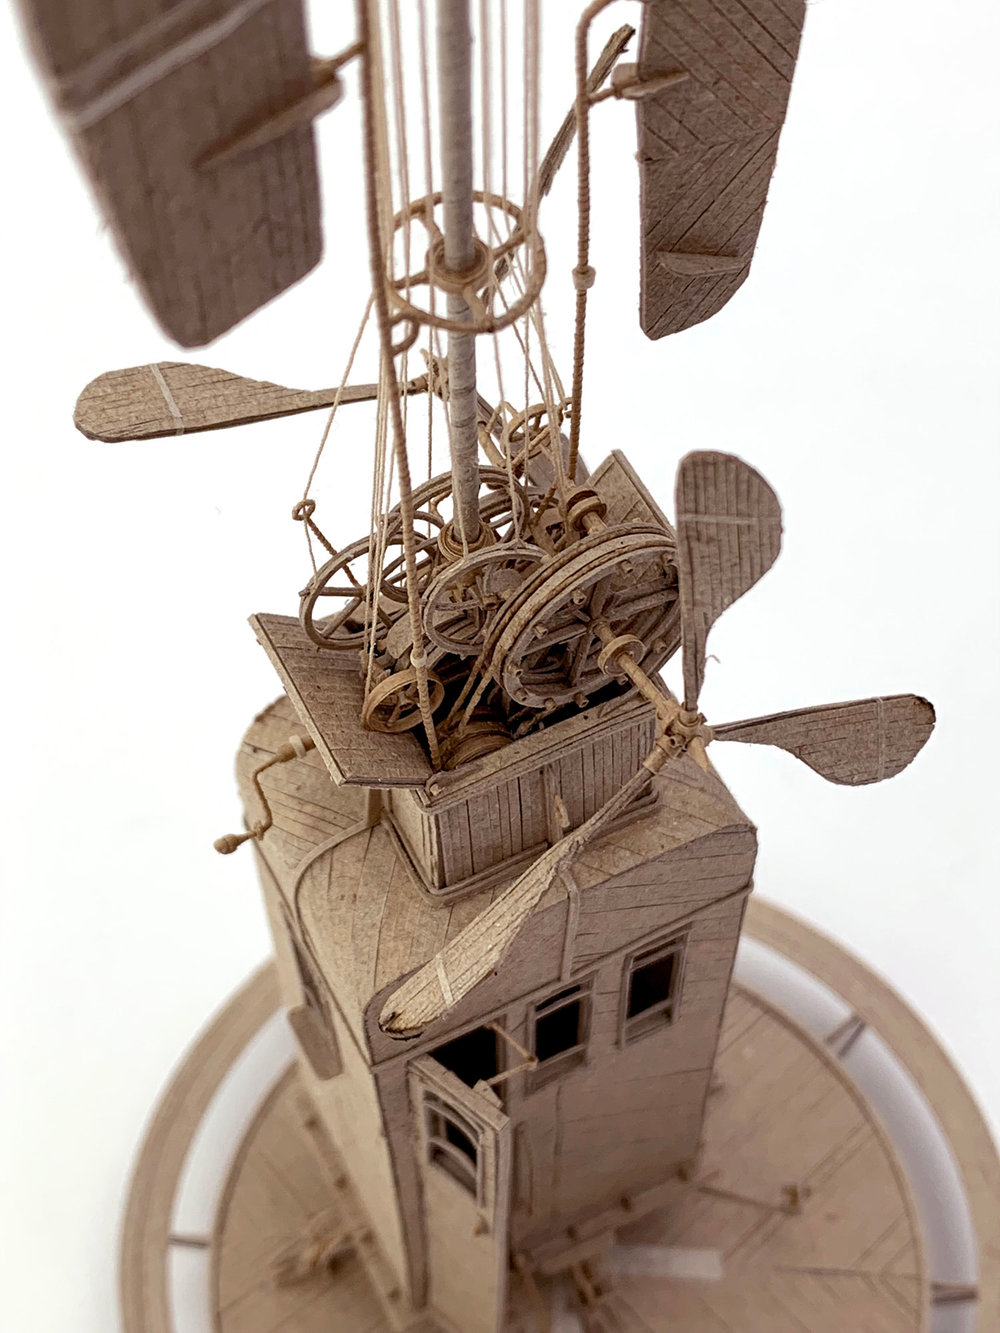
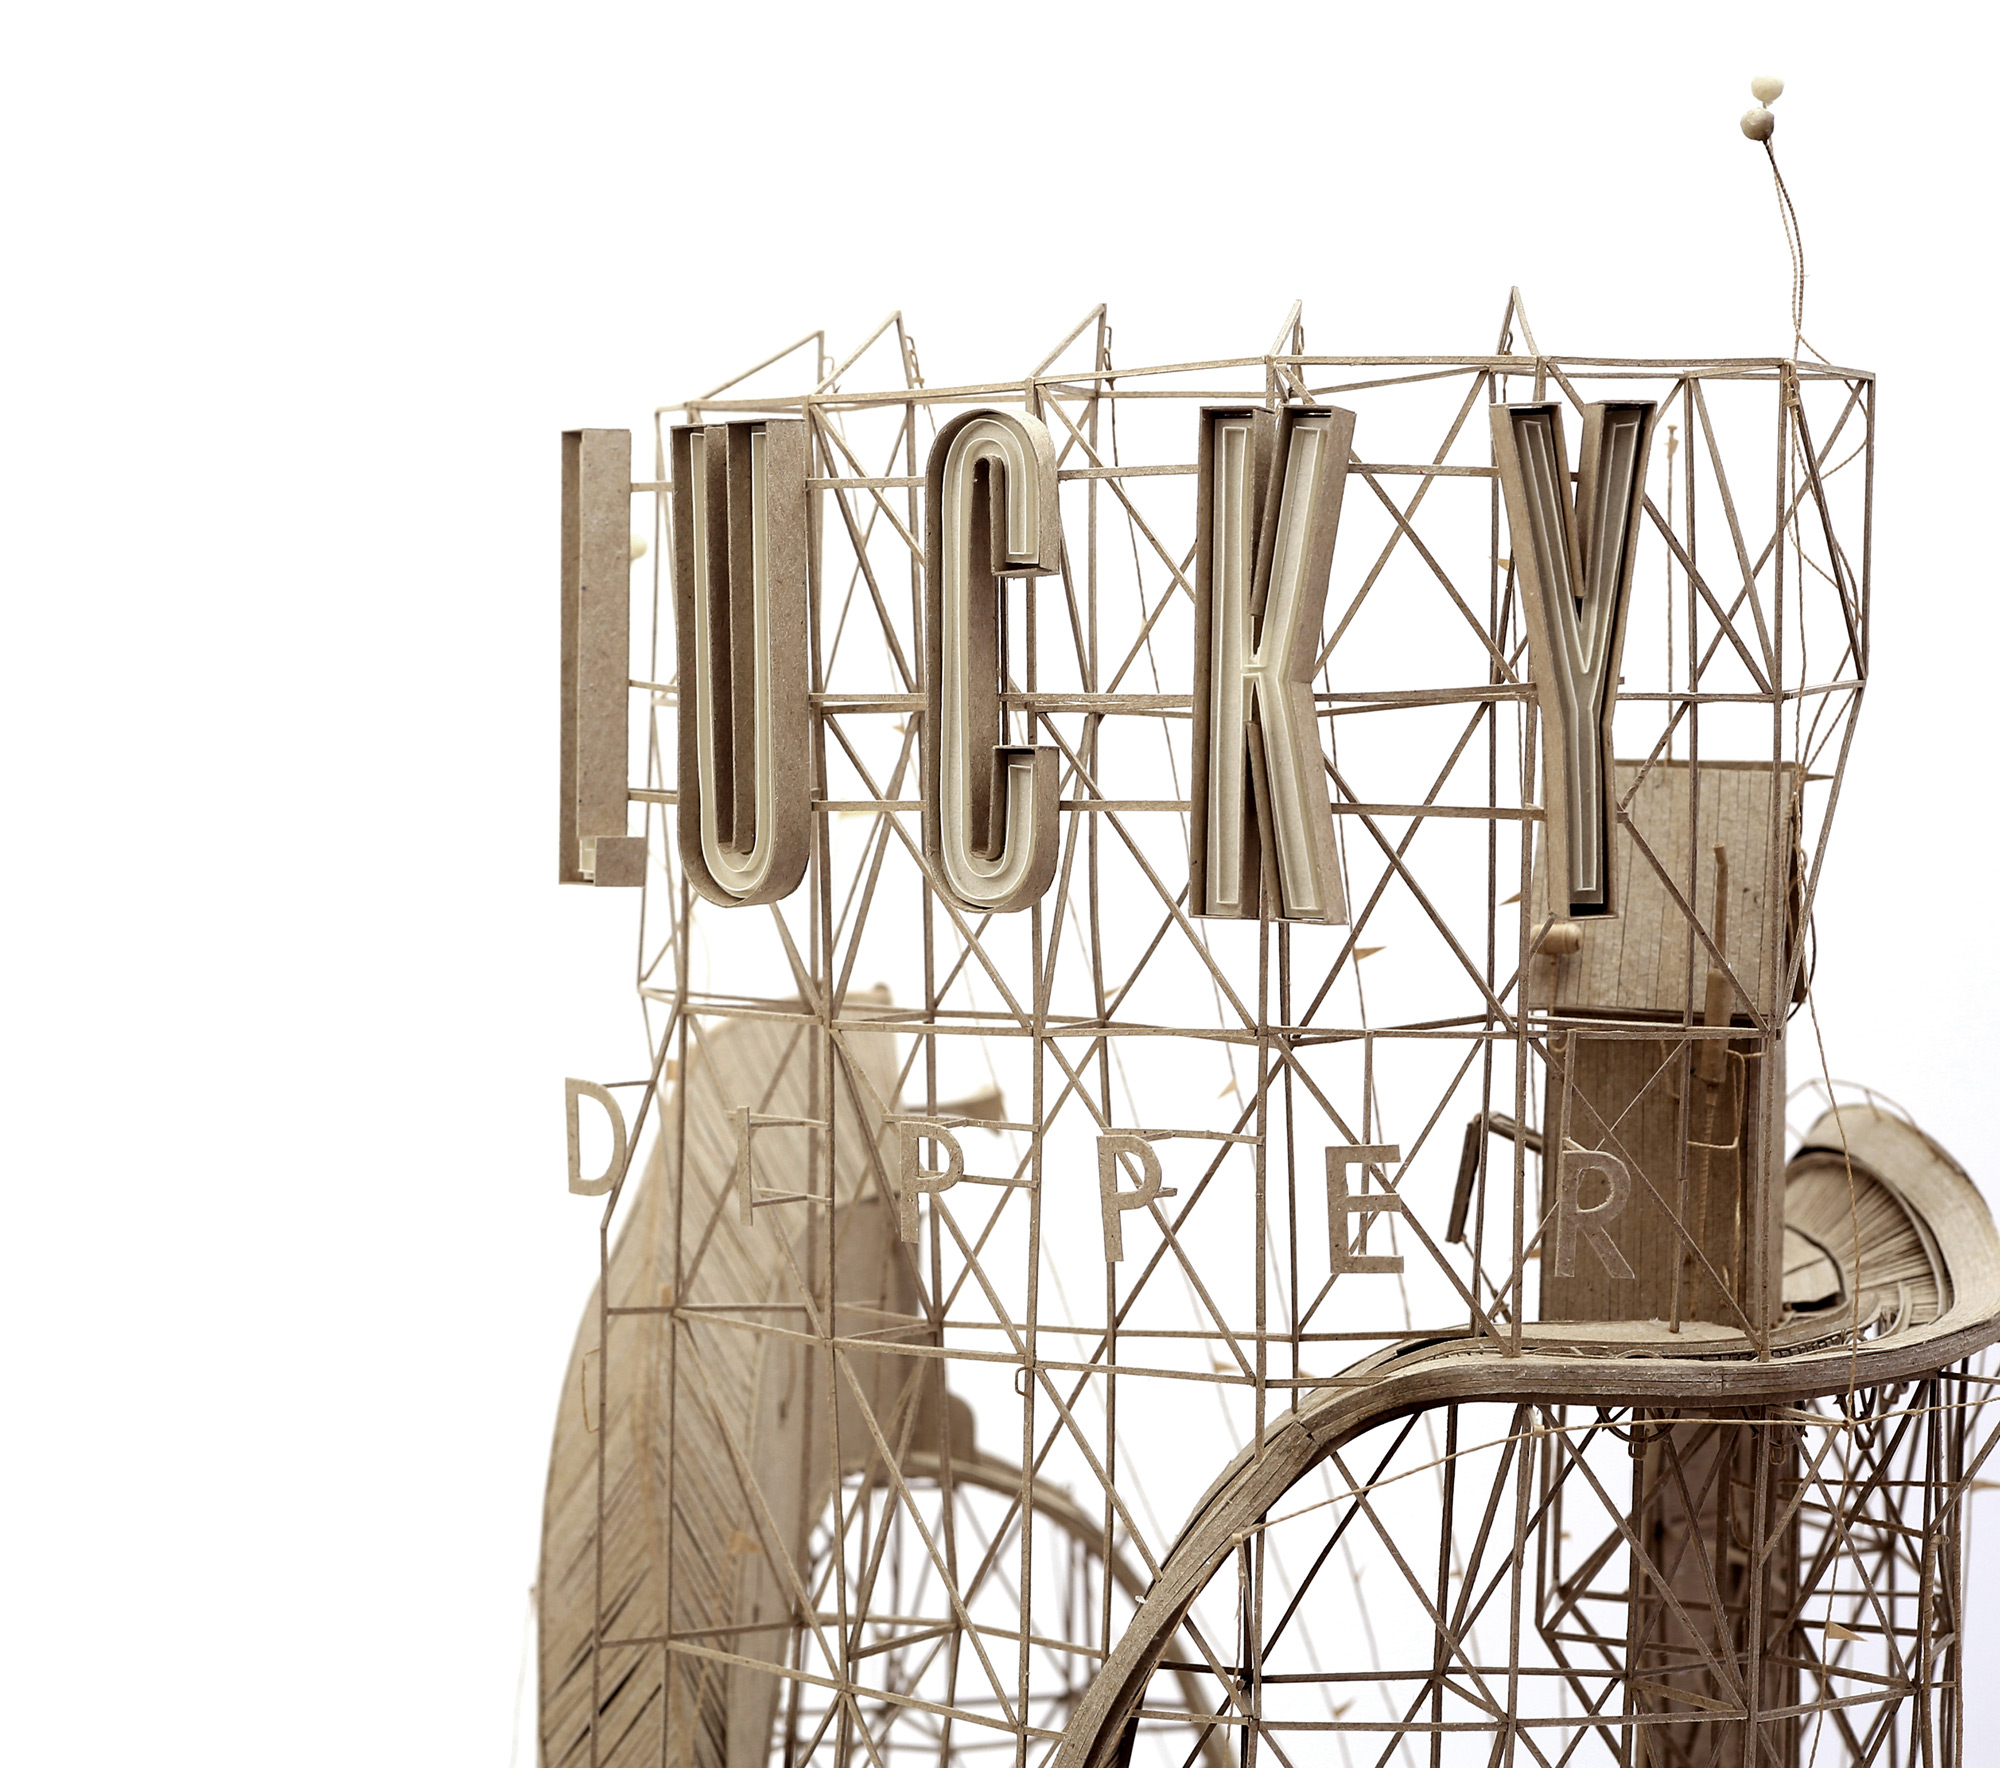
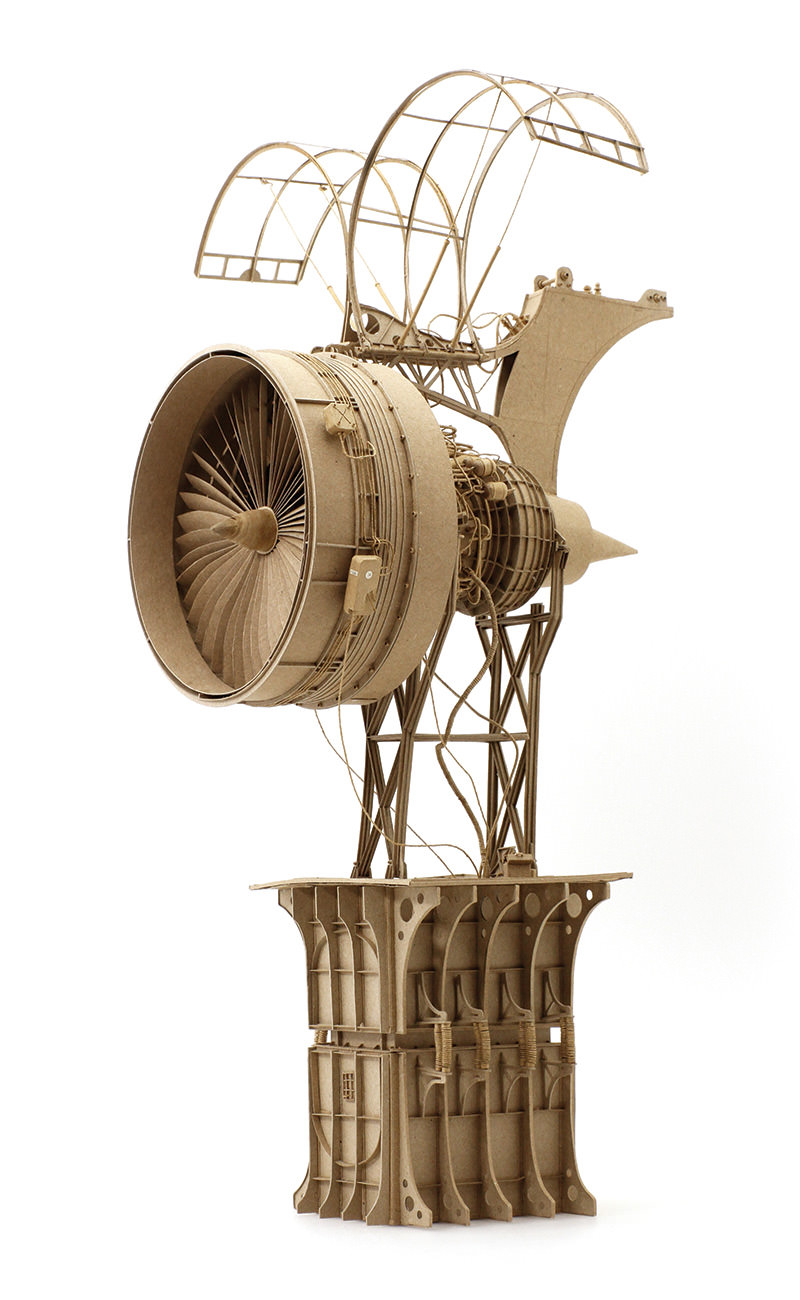
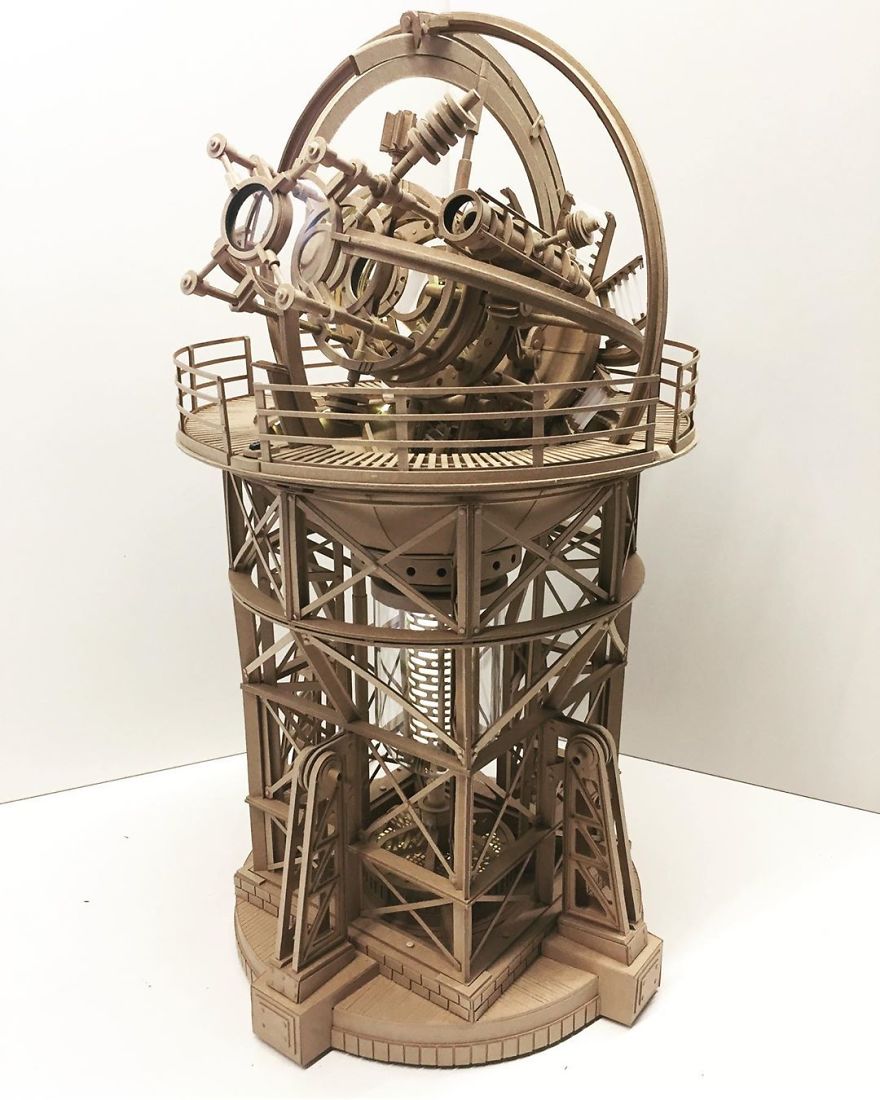
Artists and How To’s
Chris Natrop
Greg Olijnyk
Daniel Agdag
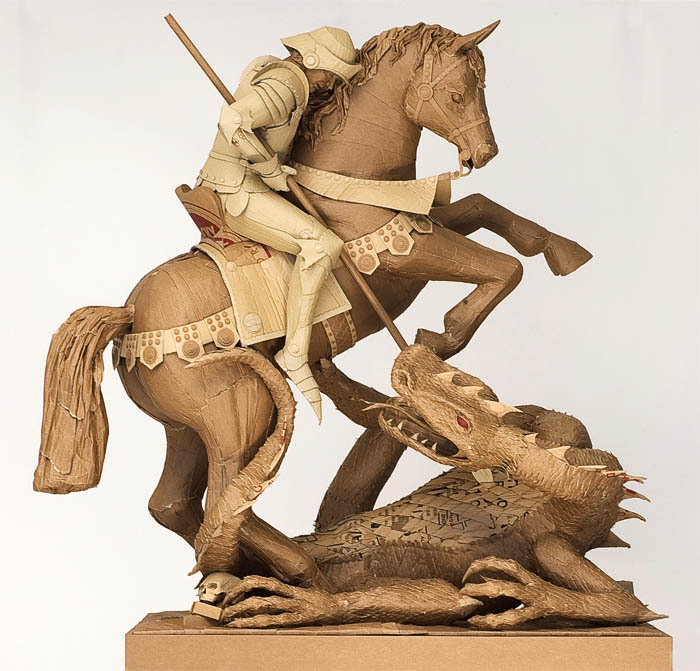
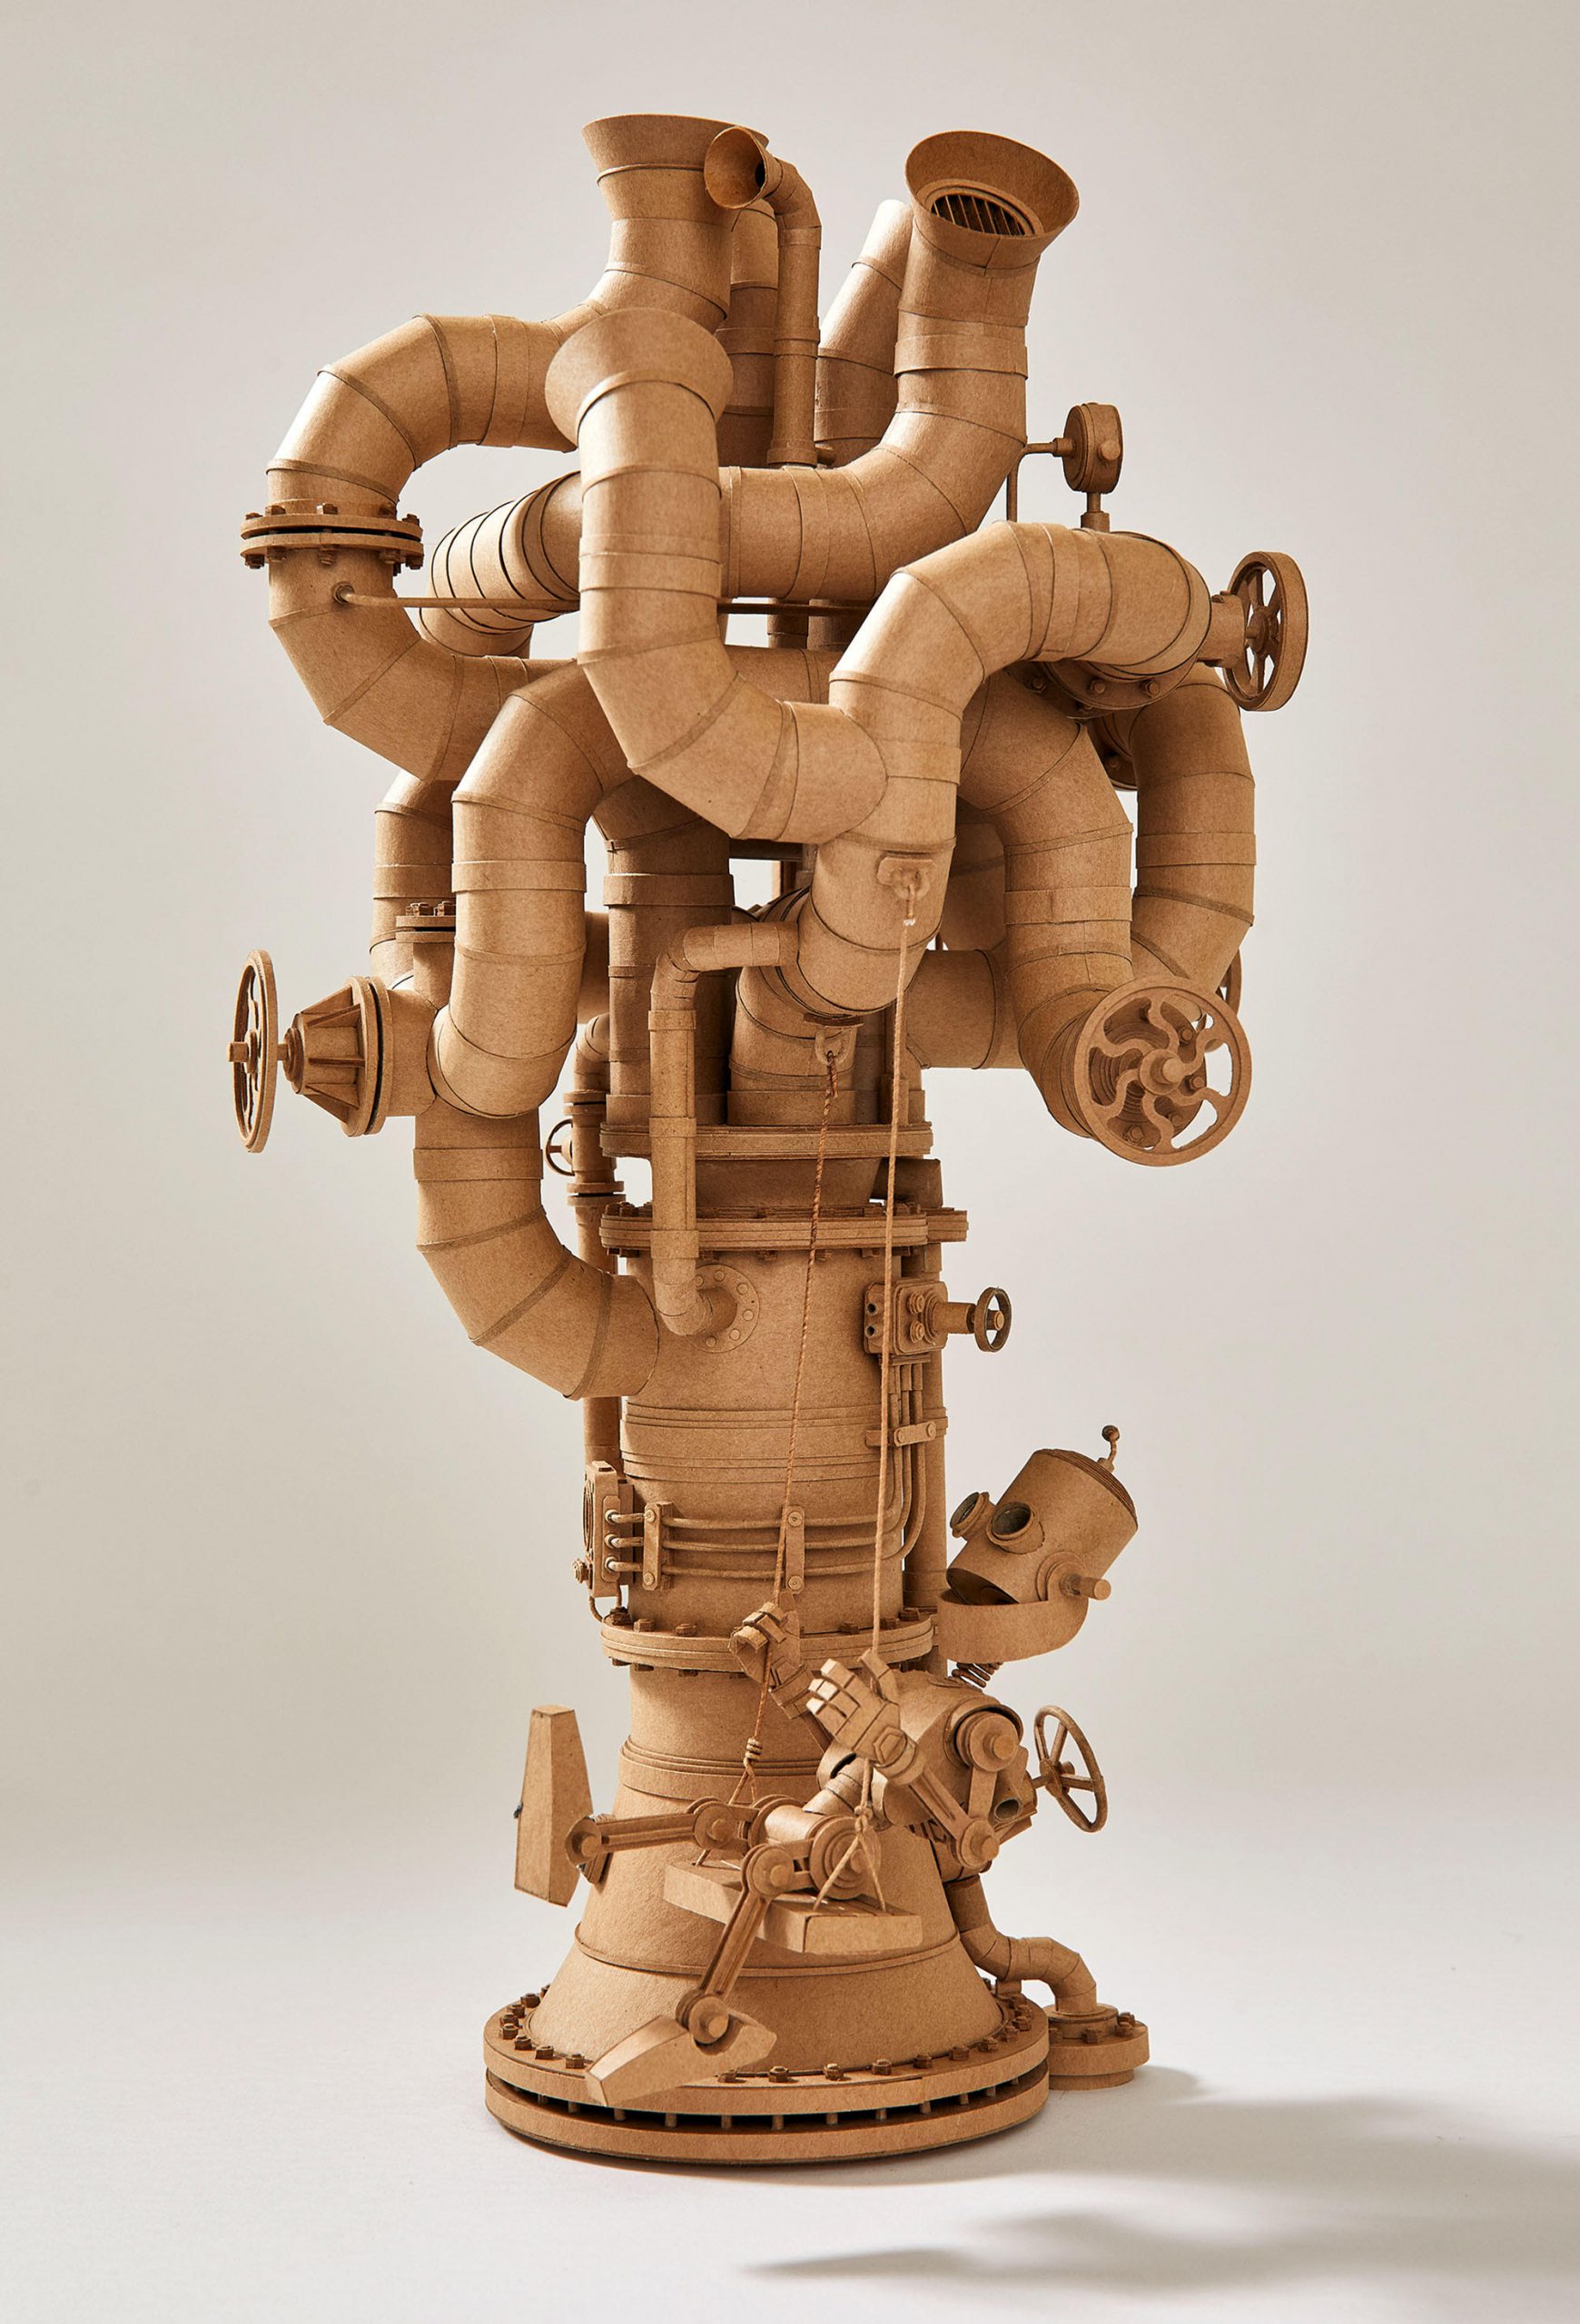
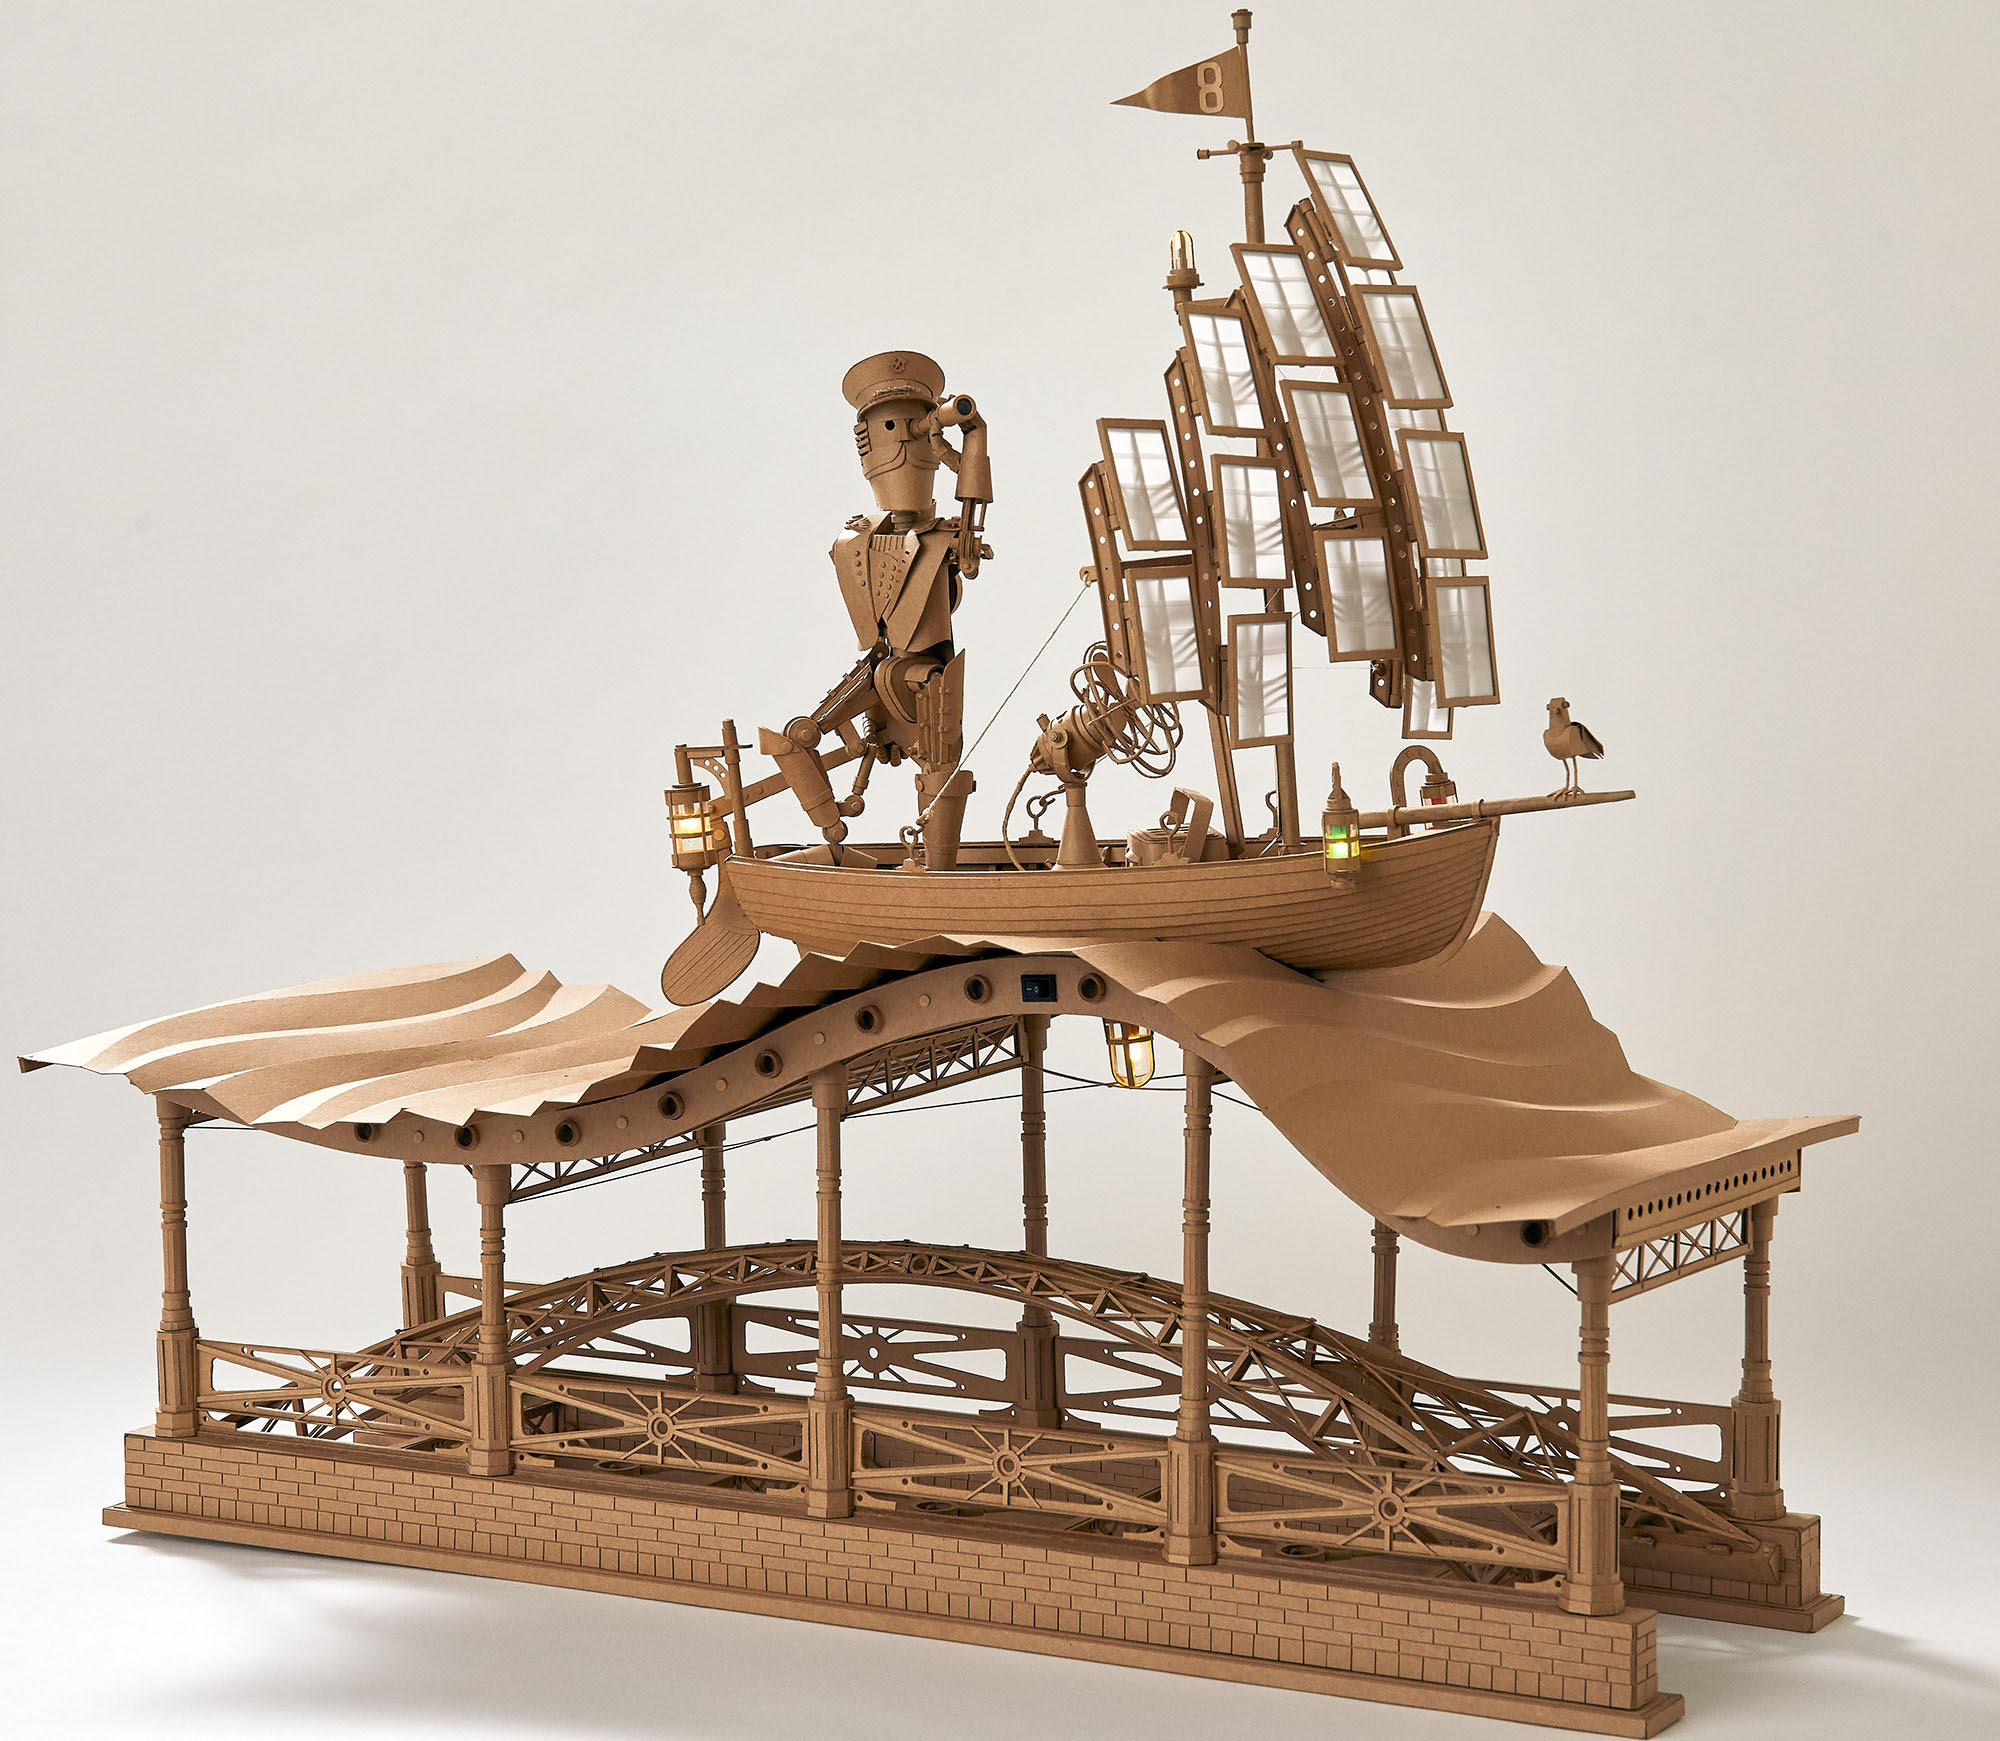
Chris Gilmour
Thomas Demand
Cardboarders.com (the artwork on this page can be adult in nature)
Student Work
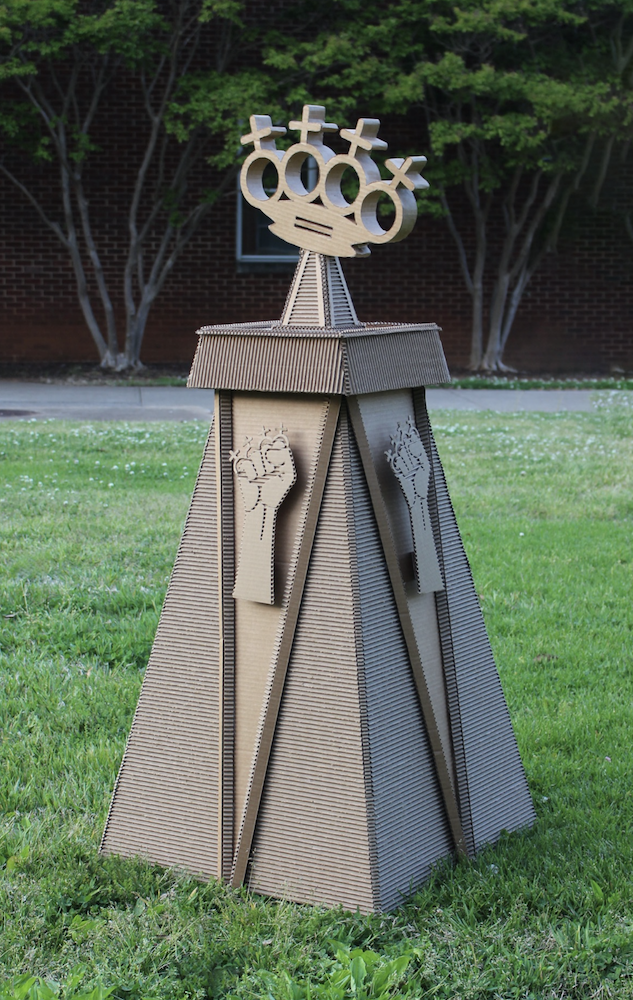

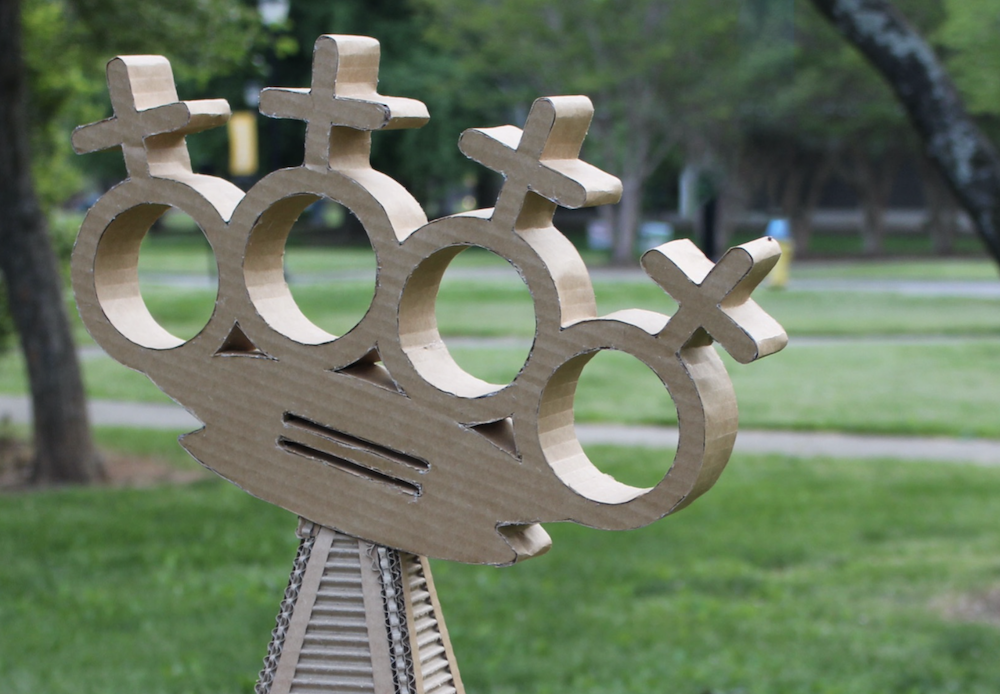
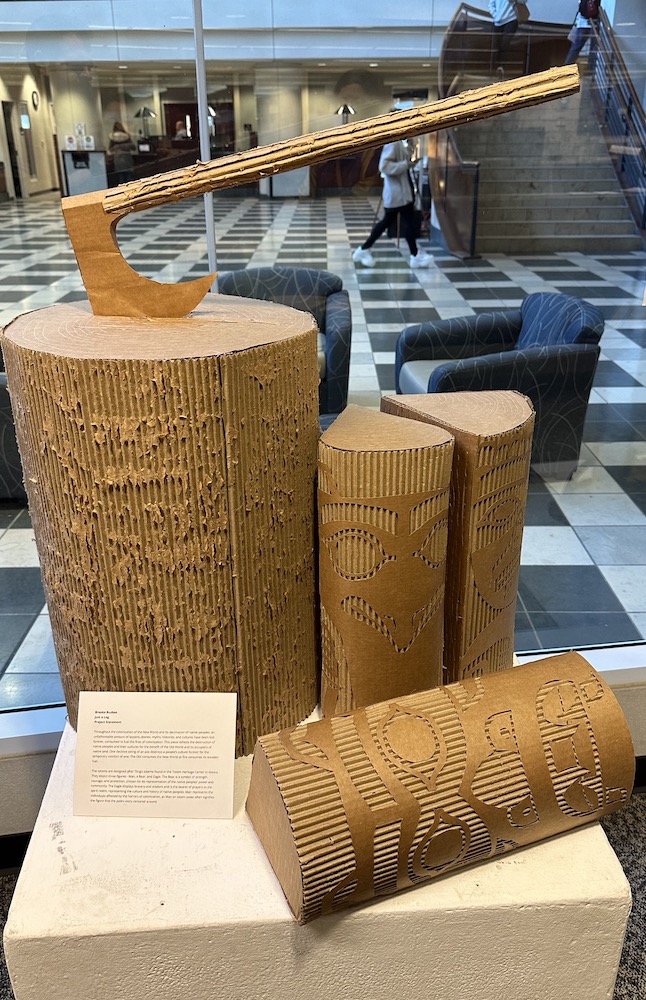

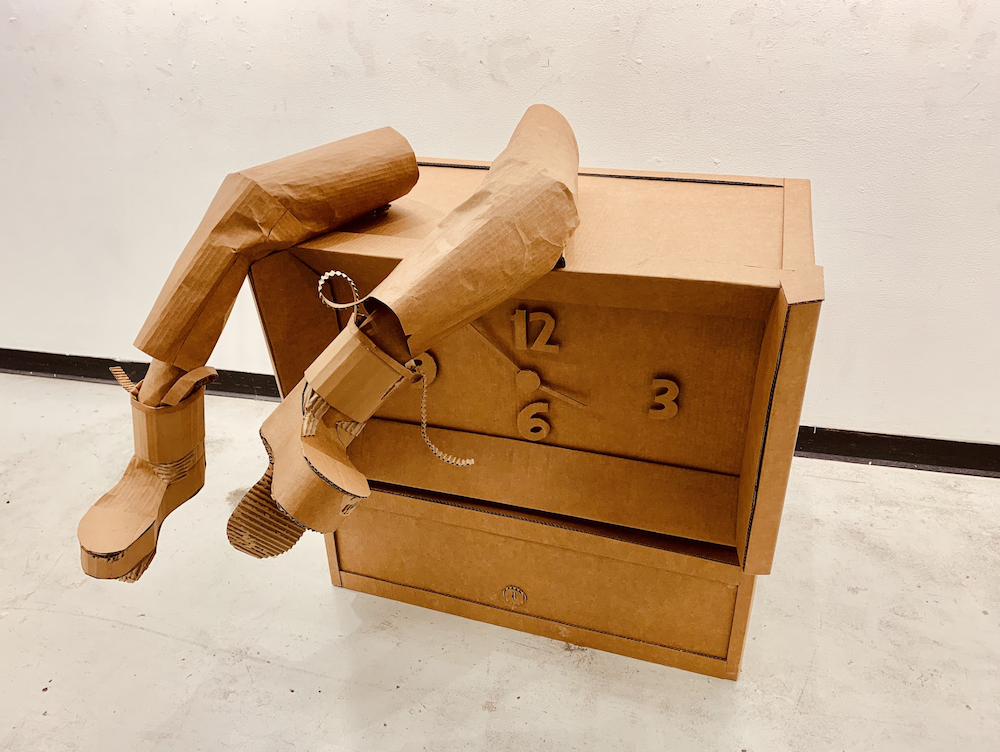


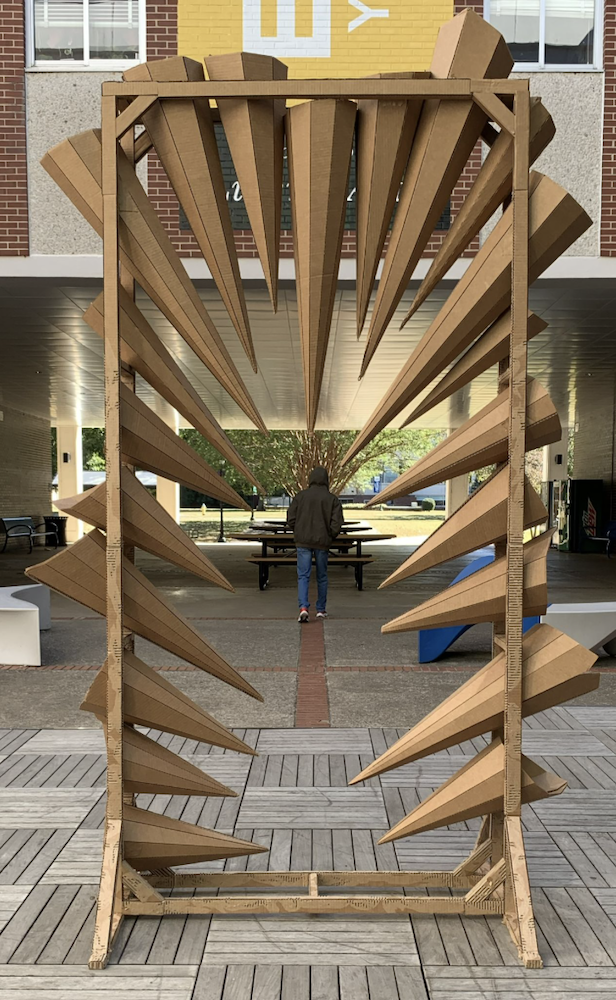
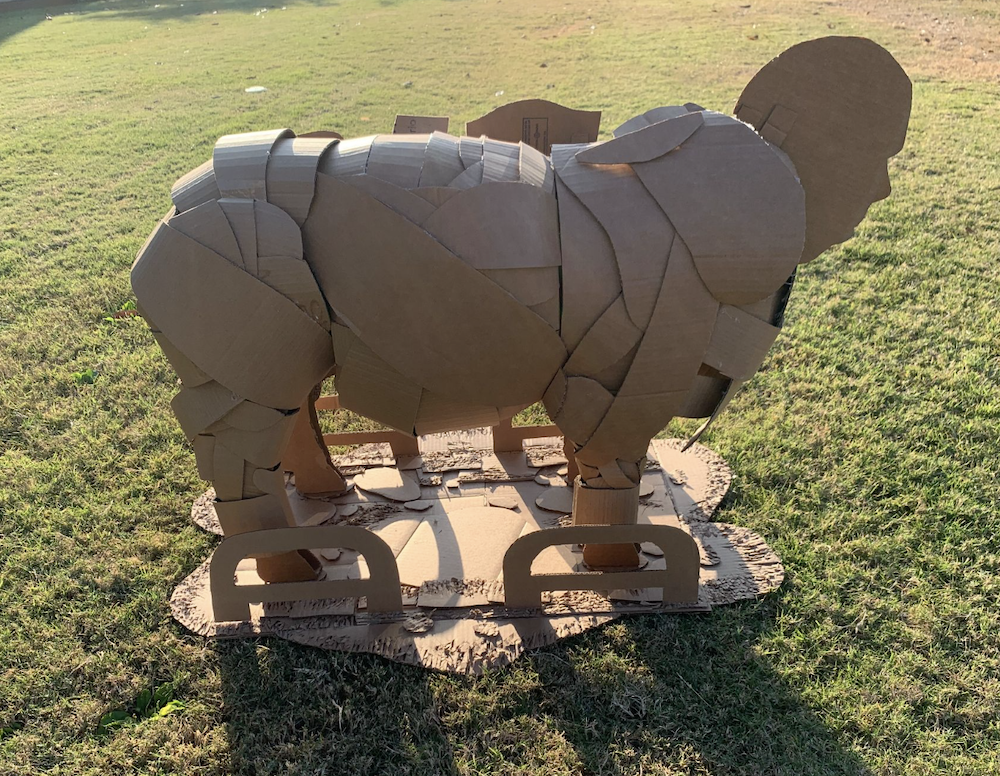
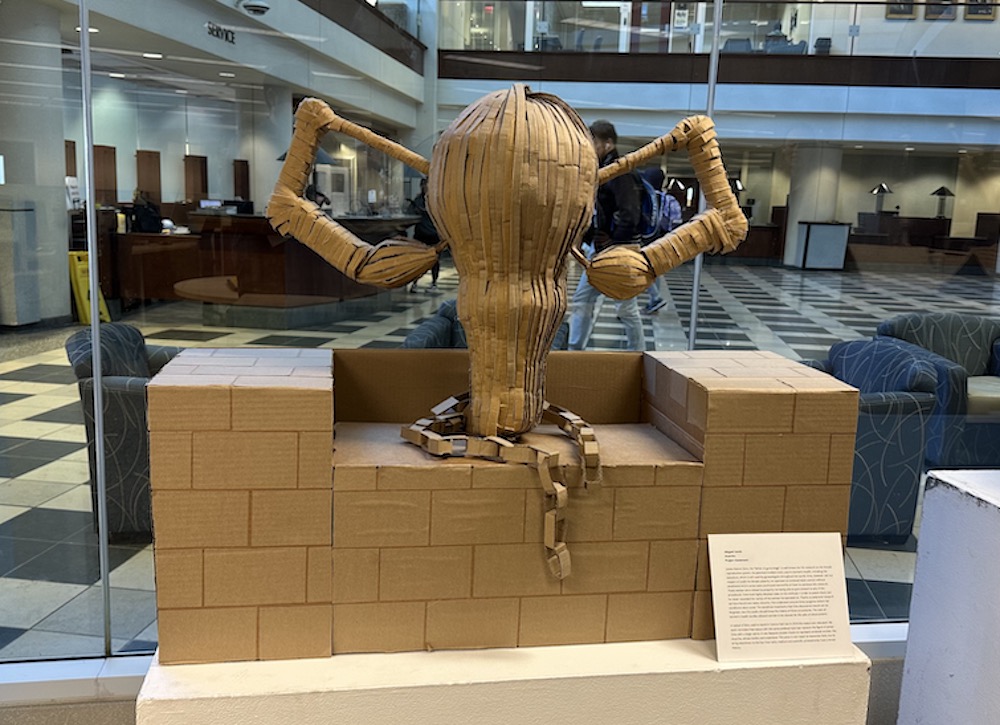
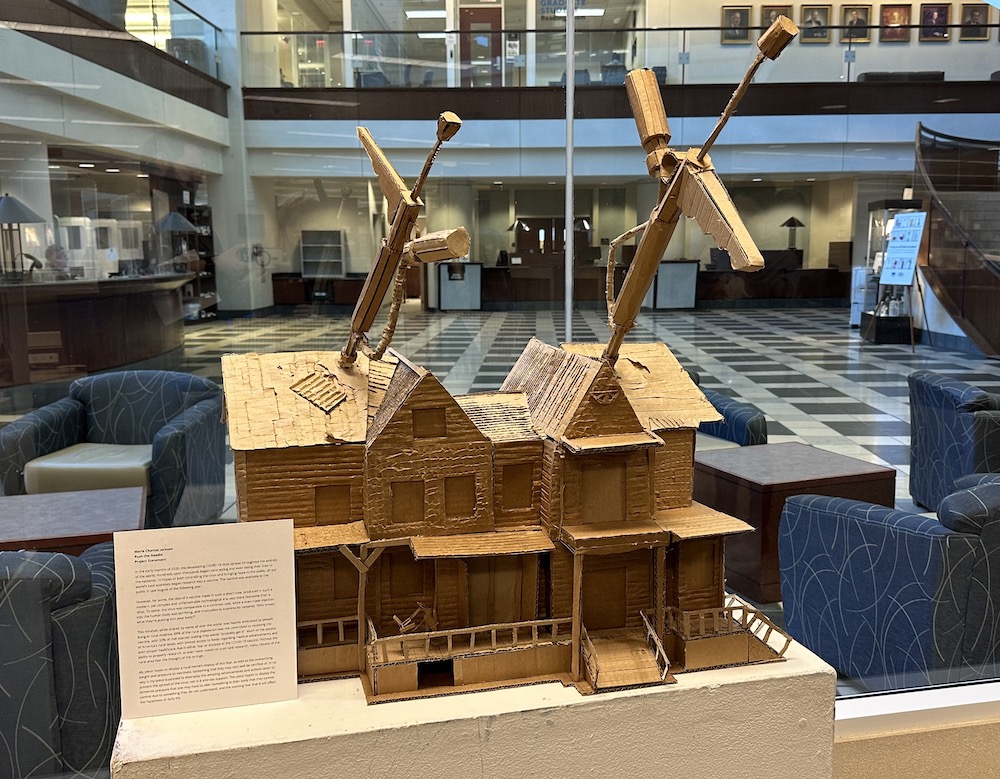
Examples