Learning Objectives
- Students will be able to demonstrate various technical building skills as well as fine craftsmanship.
- Students will demonstrate an understanding of the sculptural process; going from idea to sketchbook, to acquiring materials, to building, to refinement, to finished product.
- Students will be to define line, shape, form, pattern, depth, and space.
Project Overview / Considerations
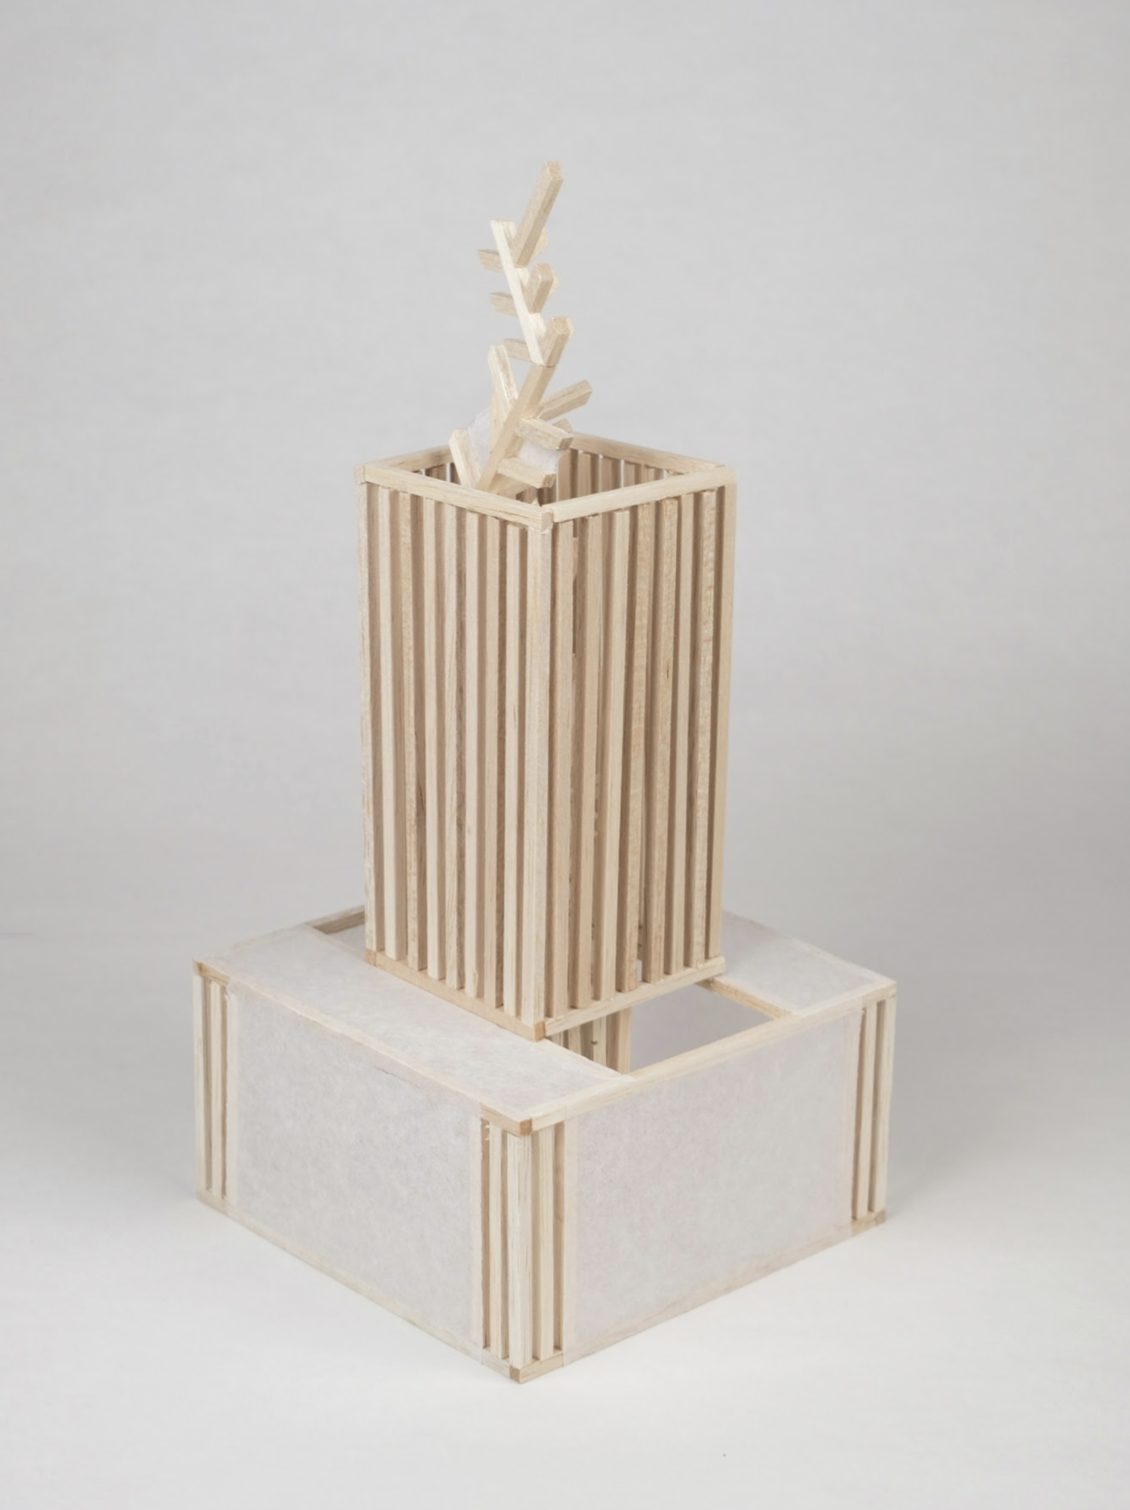
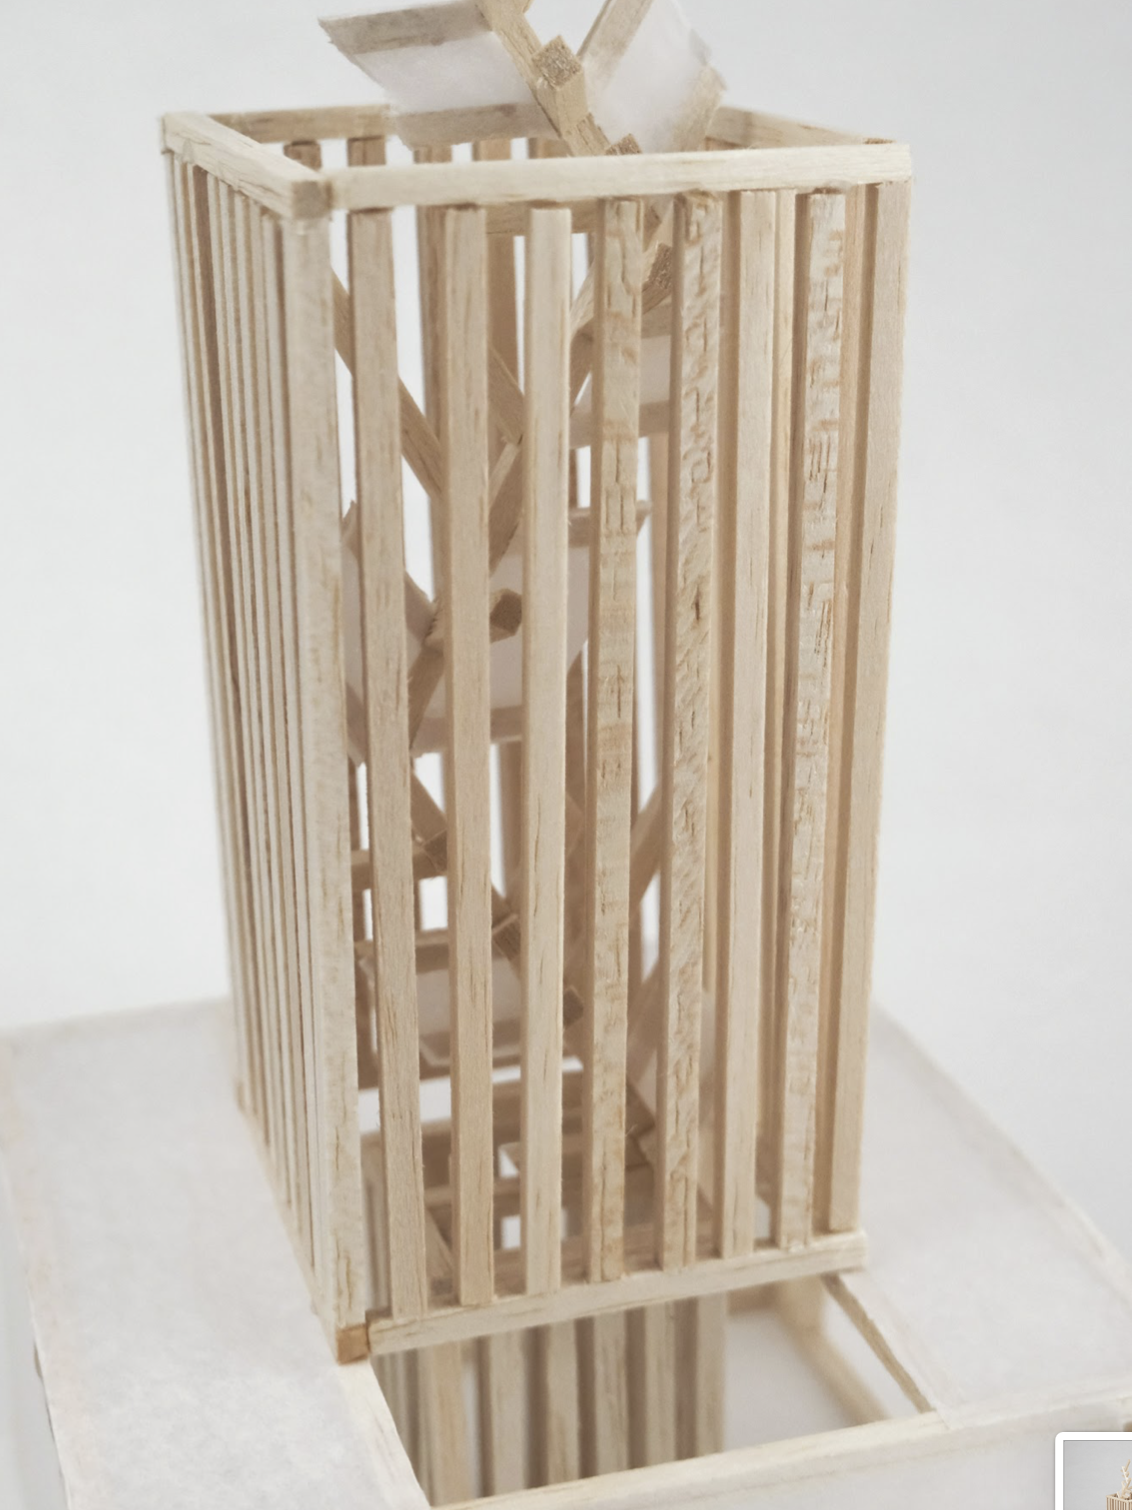
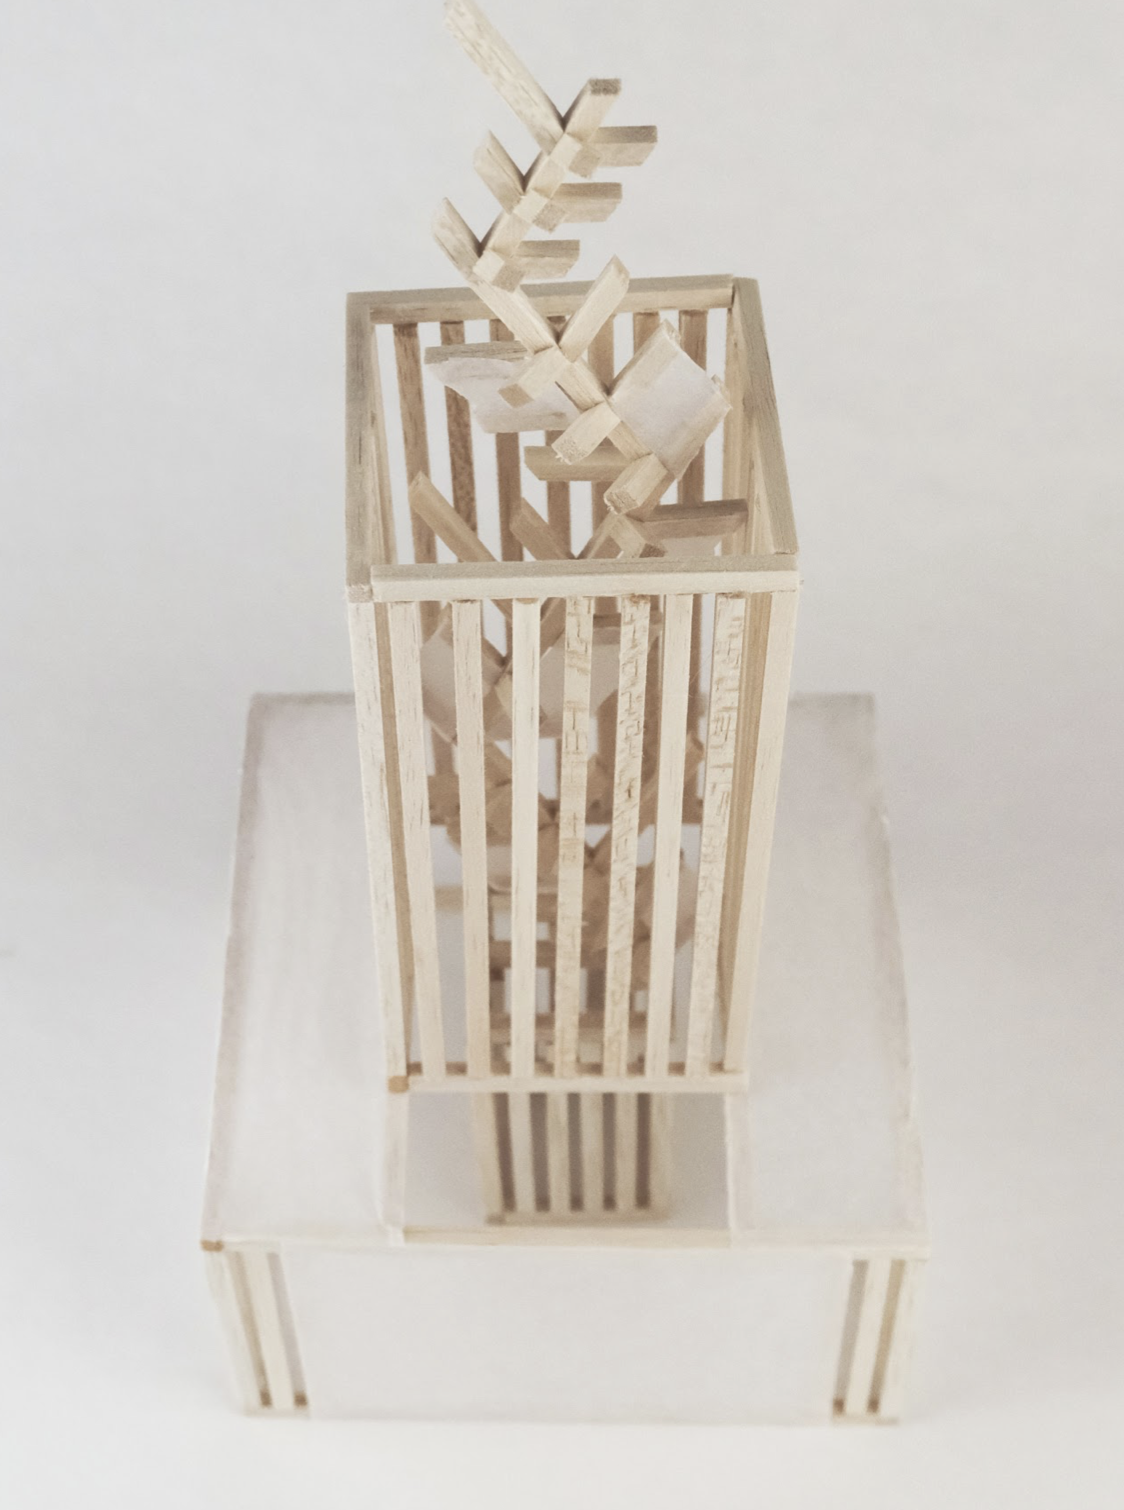
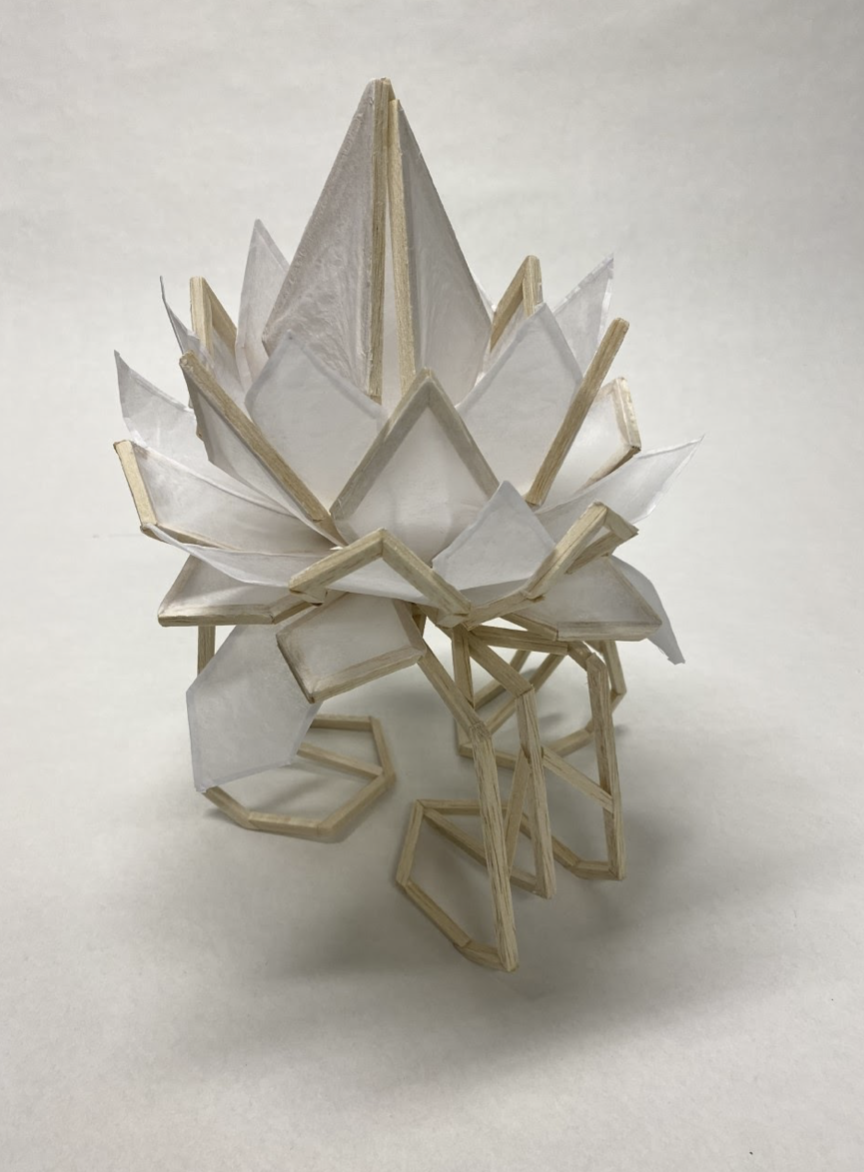
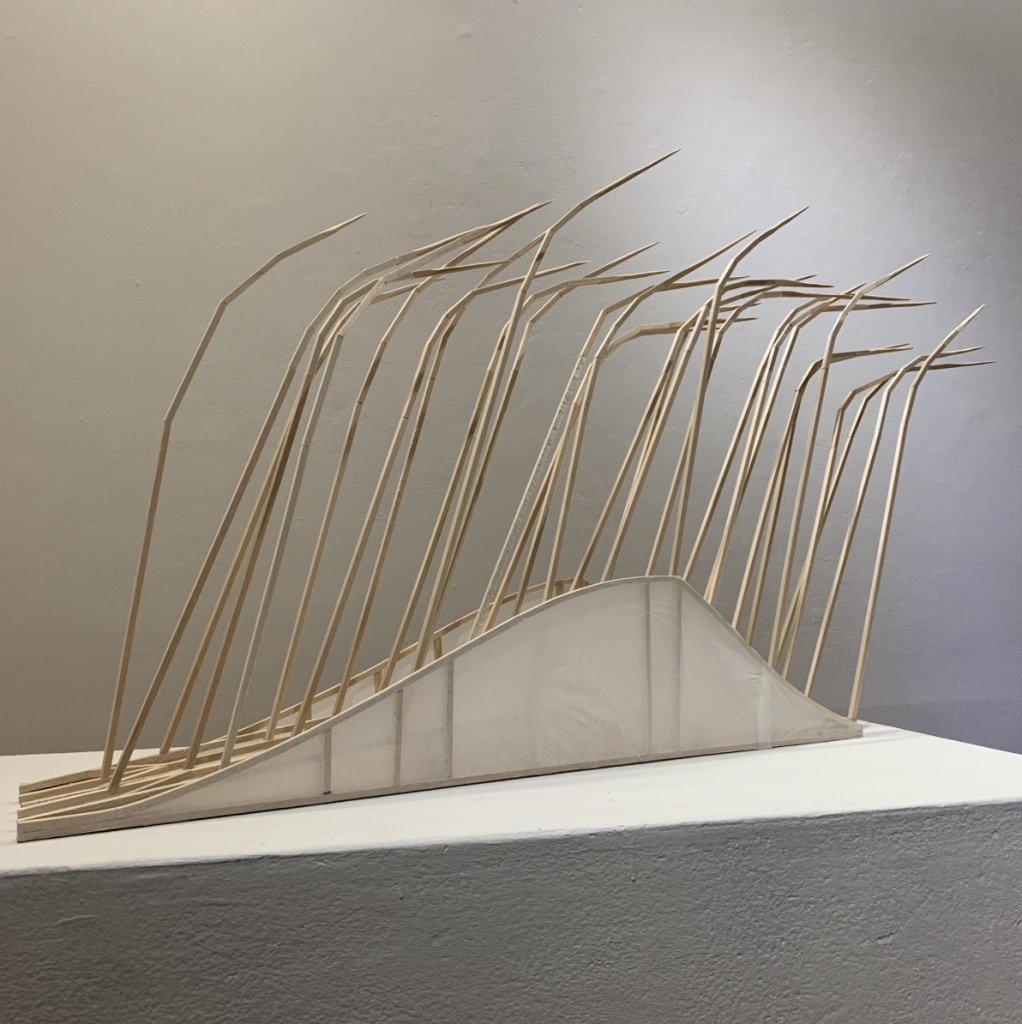
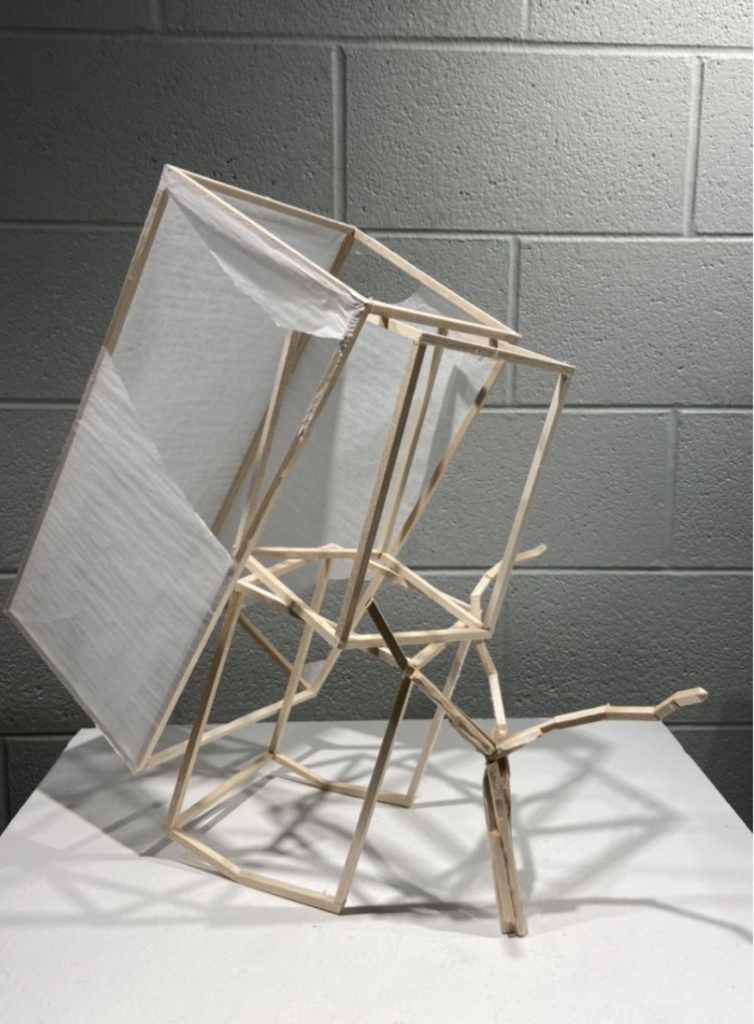
For this assignment, we will be creating a greenhouse full of different plants and their respective pots. Using balsa wood and tissue to paper we will create a sculpture that is between 10″ to 16″ tall and 6″ to 10″ wide (about the size of a large shoebox). The goal of this assignment is to create a work that uses line (the balsa wood) and shape (tissue paper) to create areas of contrast and areas of harmony.
To keep the emphasis on form and structure, do not incorporate color or the use of other materials in this project. How will you make curved forms out of straight sticks? How do you make an area that might not be very interesting engaging?
When creating works of art, artists use a few “rules” known as the Elements and Principles of Design. These rules are flexible – having an understanding of these guiding principles will help you make better decisions about your work. When something doesn’t feel right or looks off, you can usually figure out what’s wrong by going back to these rules. It is helpful to go back and review your notes from the previous assignment (or 2D Design) to make sure you’re headed in the right direction as you develop your ideas.
For this assignment, we will be focusing on the Elements of Line, Shape, Form Space, and Value and the Principles of Balance, Scale, Contrast, and Repetition. Make sure that you familiarize yourself with these Elements and Principles by reading over them here.
Materials
- Super Glue, CA Glue, or hot glue (provided)
- Fine mist spray bottle (provided)
- Isopropyl Alcohol (provided)
- Utility knife and extra blades (good to have your own)
- Sketchbook and pencils
- At least 5 pieces of 1/4″ square 36″ long balsa wood (provided)
- Tissue Paper
- White glue or rubber cement
- Paintbrush
Process
Name these slides Project – Skeleton and Skin in your Google Slides Presentation.
Part 1 – Sketchbook Research
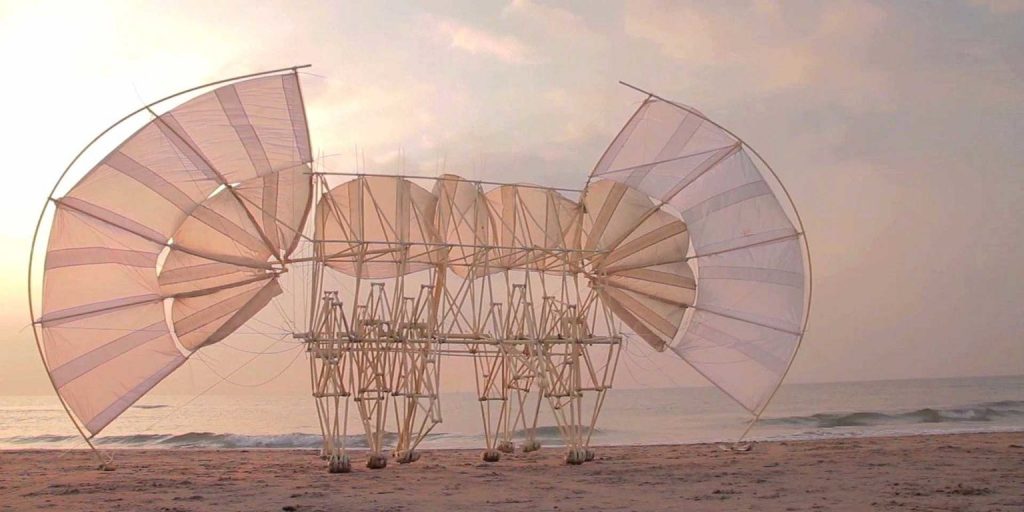
1. Take a look at Theo Jansen’s Strandbeest and Do Ho Suh’s Homes. What makes their work engaging? Why do you think they chose the materials that they did to create their work?
2. Jot down ideas for breathing, moving, and walking – how could you illustrate these ideas without actual movement? Although you will be making a plant-like sculpture, how do you make something feel alive when it isn’t? What does a full breath look like? How do we know the wind is blowing if we are looking at a still image of trees?
Part 2 – Studio Research
1. For this first part of the project I want you to get familiar with the materials – their strengths and weaknesses. Using small portions of a plant as inspiration, create one leaf or stem from that plant. These small works should be no larger than 8 inches and must use at least 30 individually cut pieces of balsa wood.
2. Use tissue paper to cover portions of your small test piece. Pay special attention to clean connections and tight tissue paper. No balling it up and gluing it in. The tissue paper needs to form a skin between connecting balsa wood pieces. Experiment with different techniques.
Part 3 – Sketchbook Research
1. Find source images of different plants and pots that you find interesting – or bring one of your own plants in. Look for interesting movement and shapes and contrasting forms. Include these source images in your Google Slides.
2. Use the reference images and ideas from the previous step to create at least 5 different sketches of a potted plant. Think about how the plant and pot could contrast each other – if the plant has lots of curves could the pot be more geometric? These do not need to be perfect sketches – they’re just sketches. As you’re drawing think about how you are using space and line to create areas of interest. Don’t forget that you will be covering parts of your balsa wood sculpture with tissue paper so consider those areas as you’re drawing.
Part 4 – Skeleton and Skin Project
1. Once your sketches from the sketchbook portion have been approved, use one of the larger sheets of paper in the studio to sketch out your sculpture to scale – the size it will be made. Draw it from multiple angles and look for any areas that may give you problems.
2. Using 1/4” x 1/4” x 36” balsa wood strips and with the help of your instructor, start constructing your sculpture. Pay close attention to how your balsa wood strips meet each other. Sanding them before gluing them together makes a strong connection. As you see your sculpture start to come to life look for areas that are particularly interesting or areas that may be a little boring. Do you need to tweak them in order to make them more engaging? What’s the overall movement of the work?
3. Once you have completed the balsa wood portion of your sculpture, start covering your chosen areas with tissue paper. The easiest and cleanest way to do this is to cut the tissue paper a little larger than the area that you’re covering, apply white glue to the back side of the wood, and then fold the tissue paper around the wood to the glue side. This way the glued edge is hidden. You could also cut it larger than the area you’re covering, apply glue to the front of the balsa wood and glue the tissue paper down. Once the glue has dried you can then trim off the excess with an X-Acto knife. The video below gives a good overview of the process but we won’t be using the Easy Dope material.
4. Double-check your sculpture for any areas that need cleaning up or refinement.
Part 5 – Documentation
1. Photograph your finished sculpture and upload your images to your Google Slide Presentation. For more information on photographing three-dimensional works of art, check out the notes here (Documenting Your Work – located under Resources at the top).
Part 6 – Self-Reflection
Answer the following self-reflection questions –
1. How does your work explore both internal and external surfaces?
2. How does your work create a feeling of movement? Try to explain your answer using the elements and principles of design.
3. How would scale change our experience with your work? What would happen if it was much smaller or larger?
Research / Examples
Handout – Elements and Principles of Design
Presentation – Elements and Principles of Design
Theo Jansen – Strandbeest
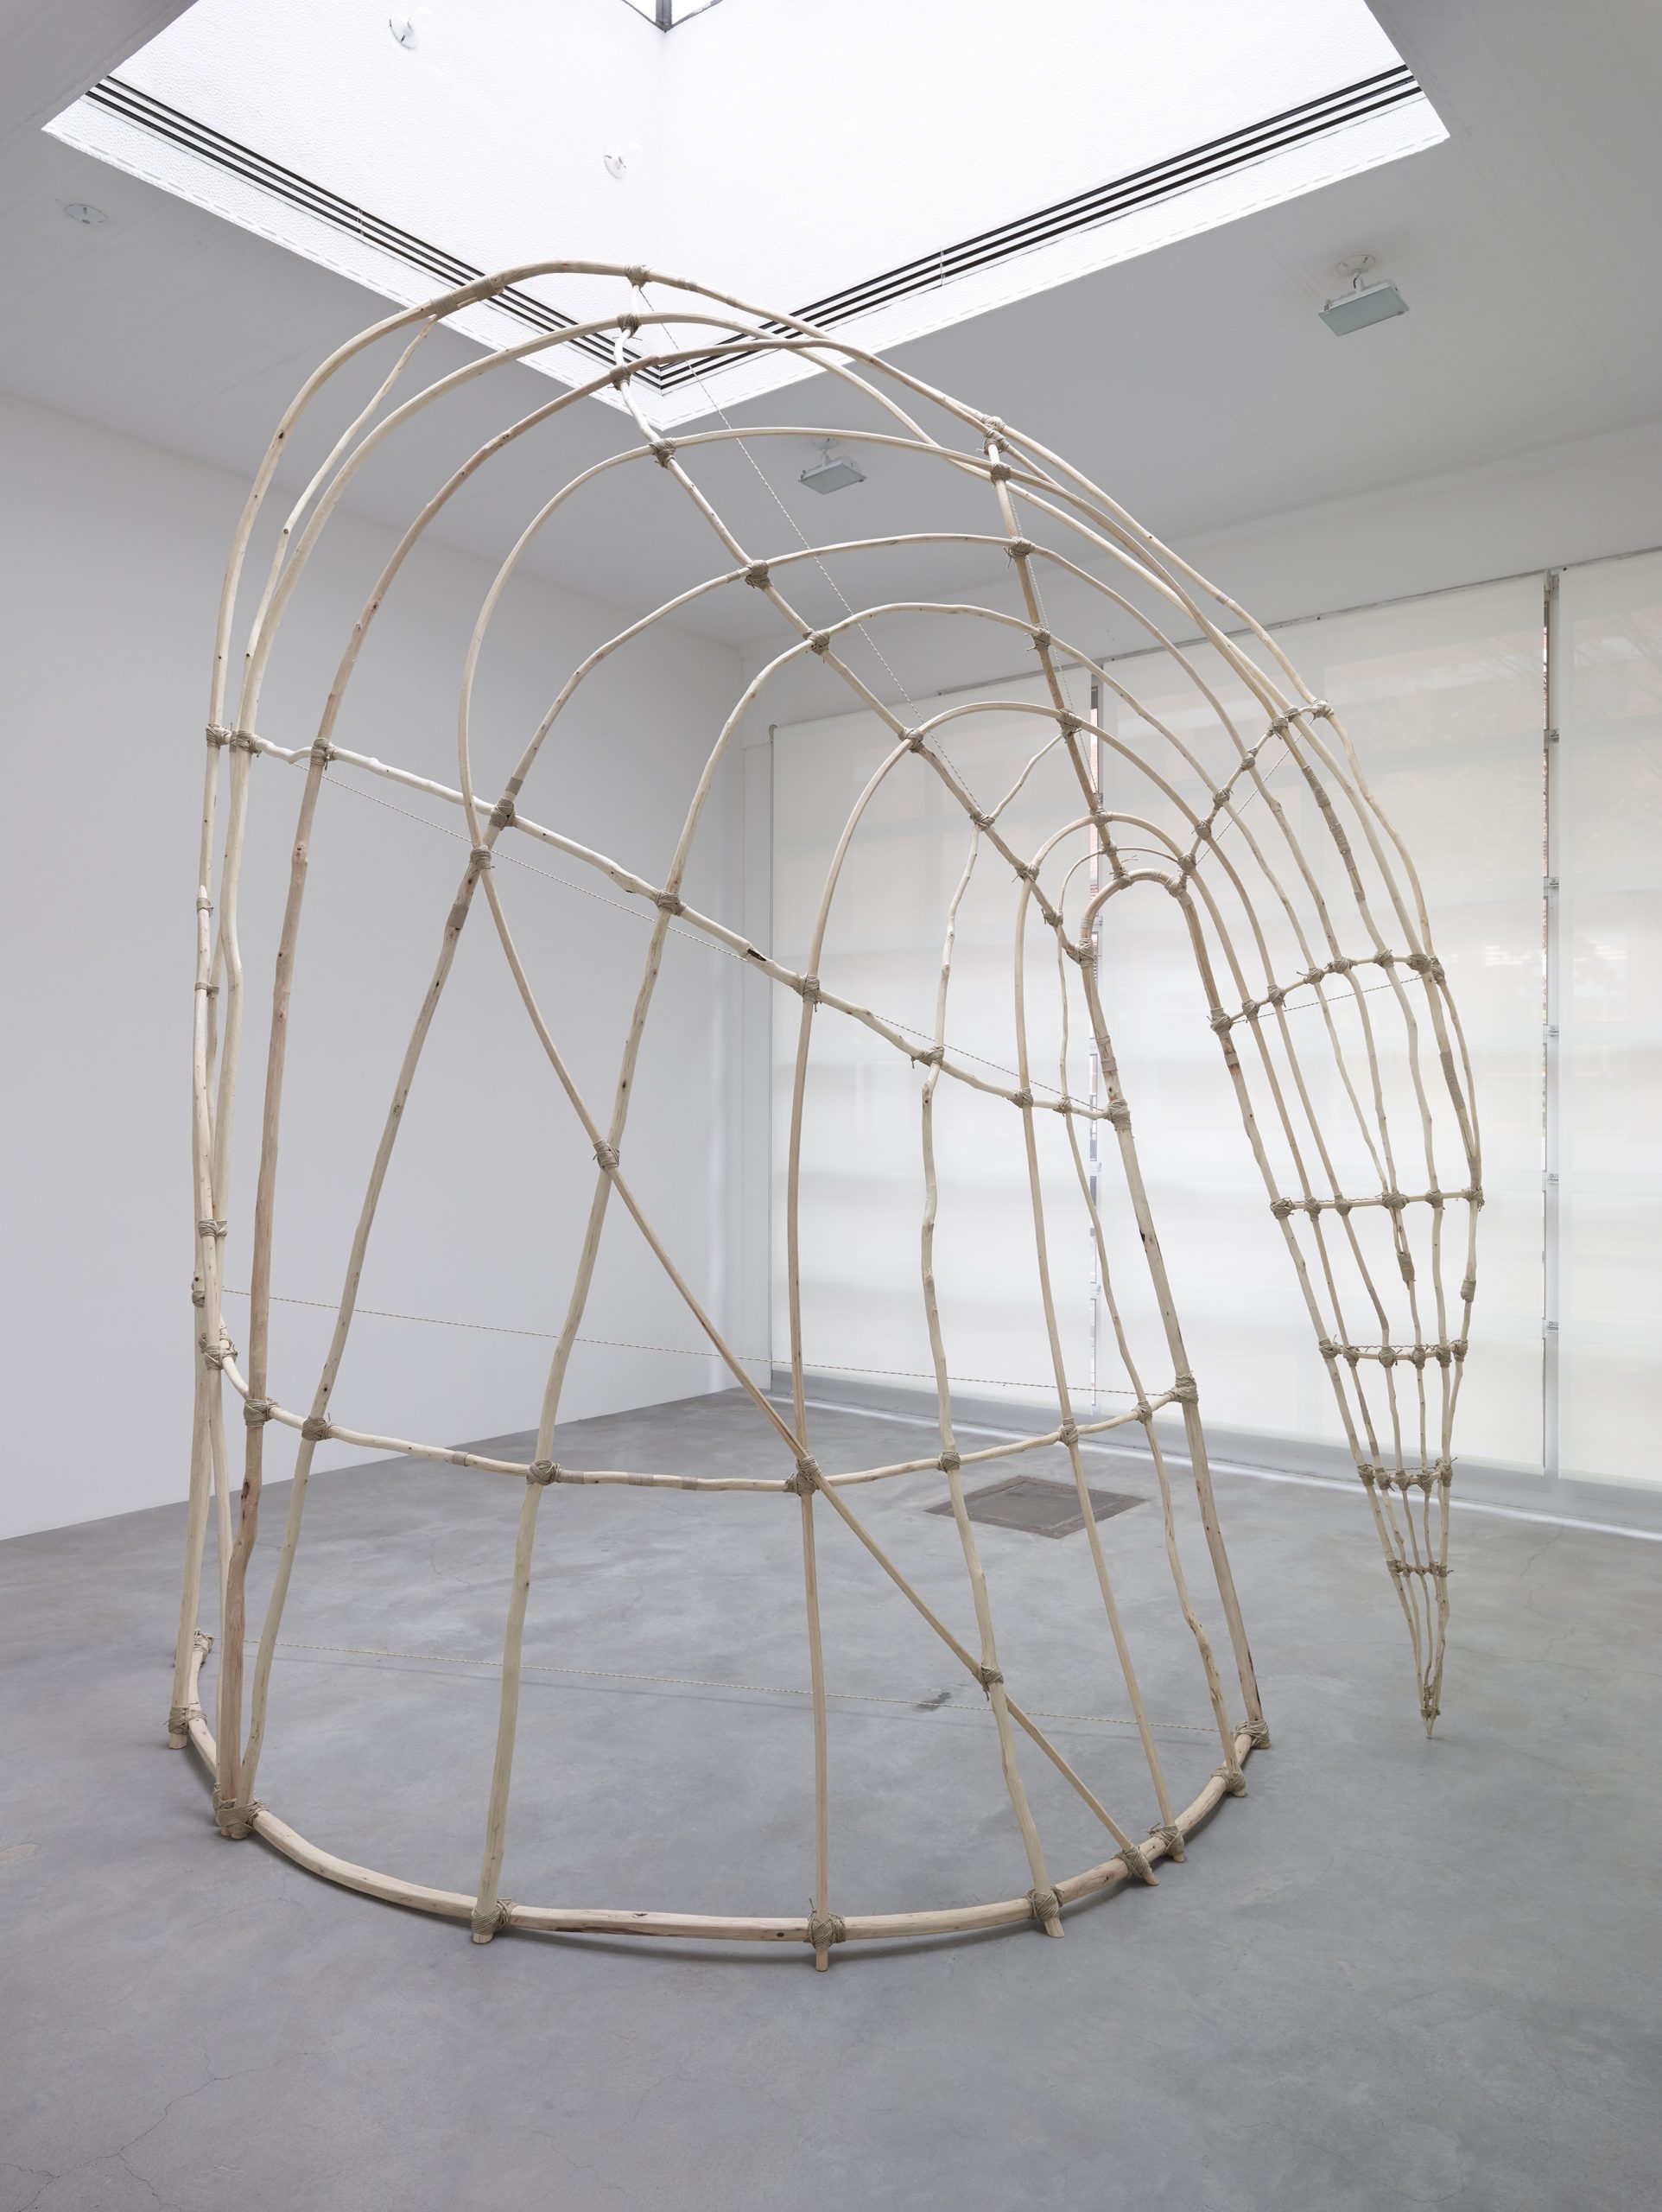
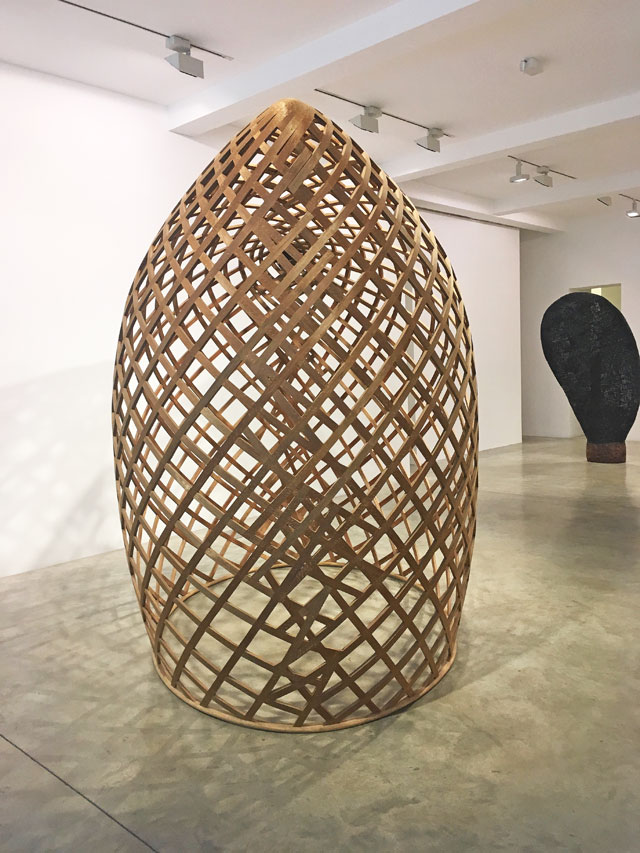
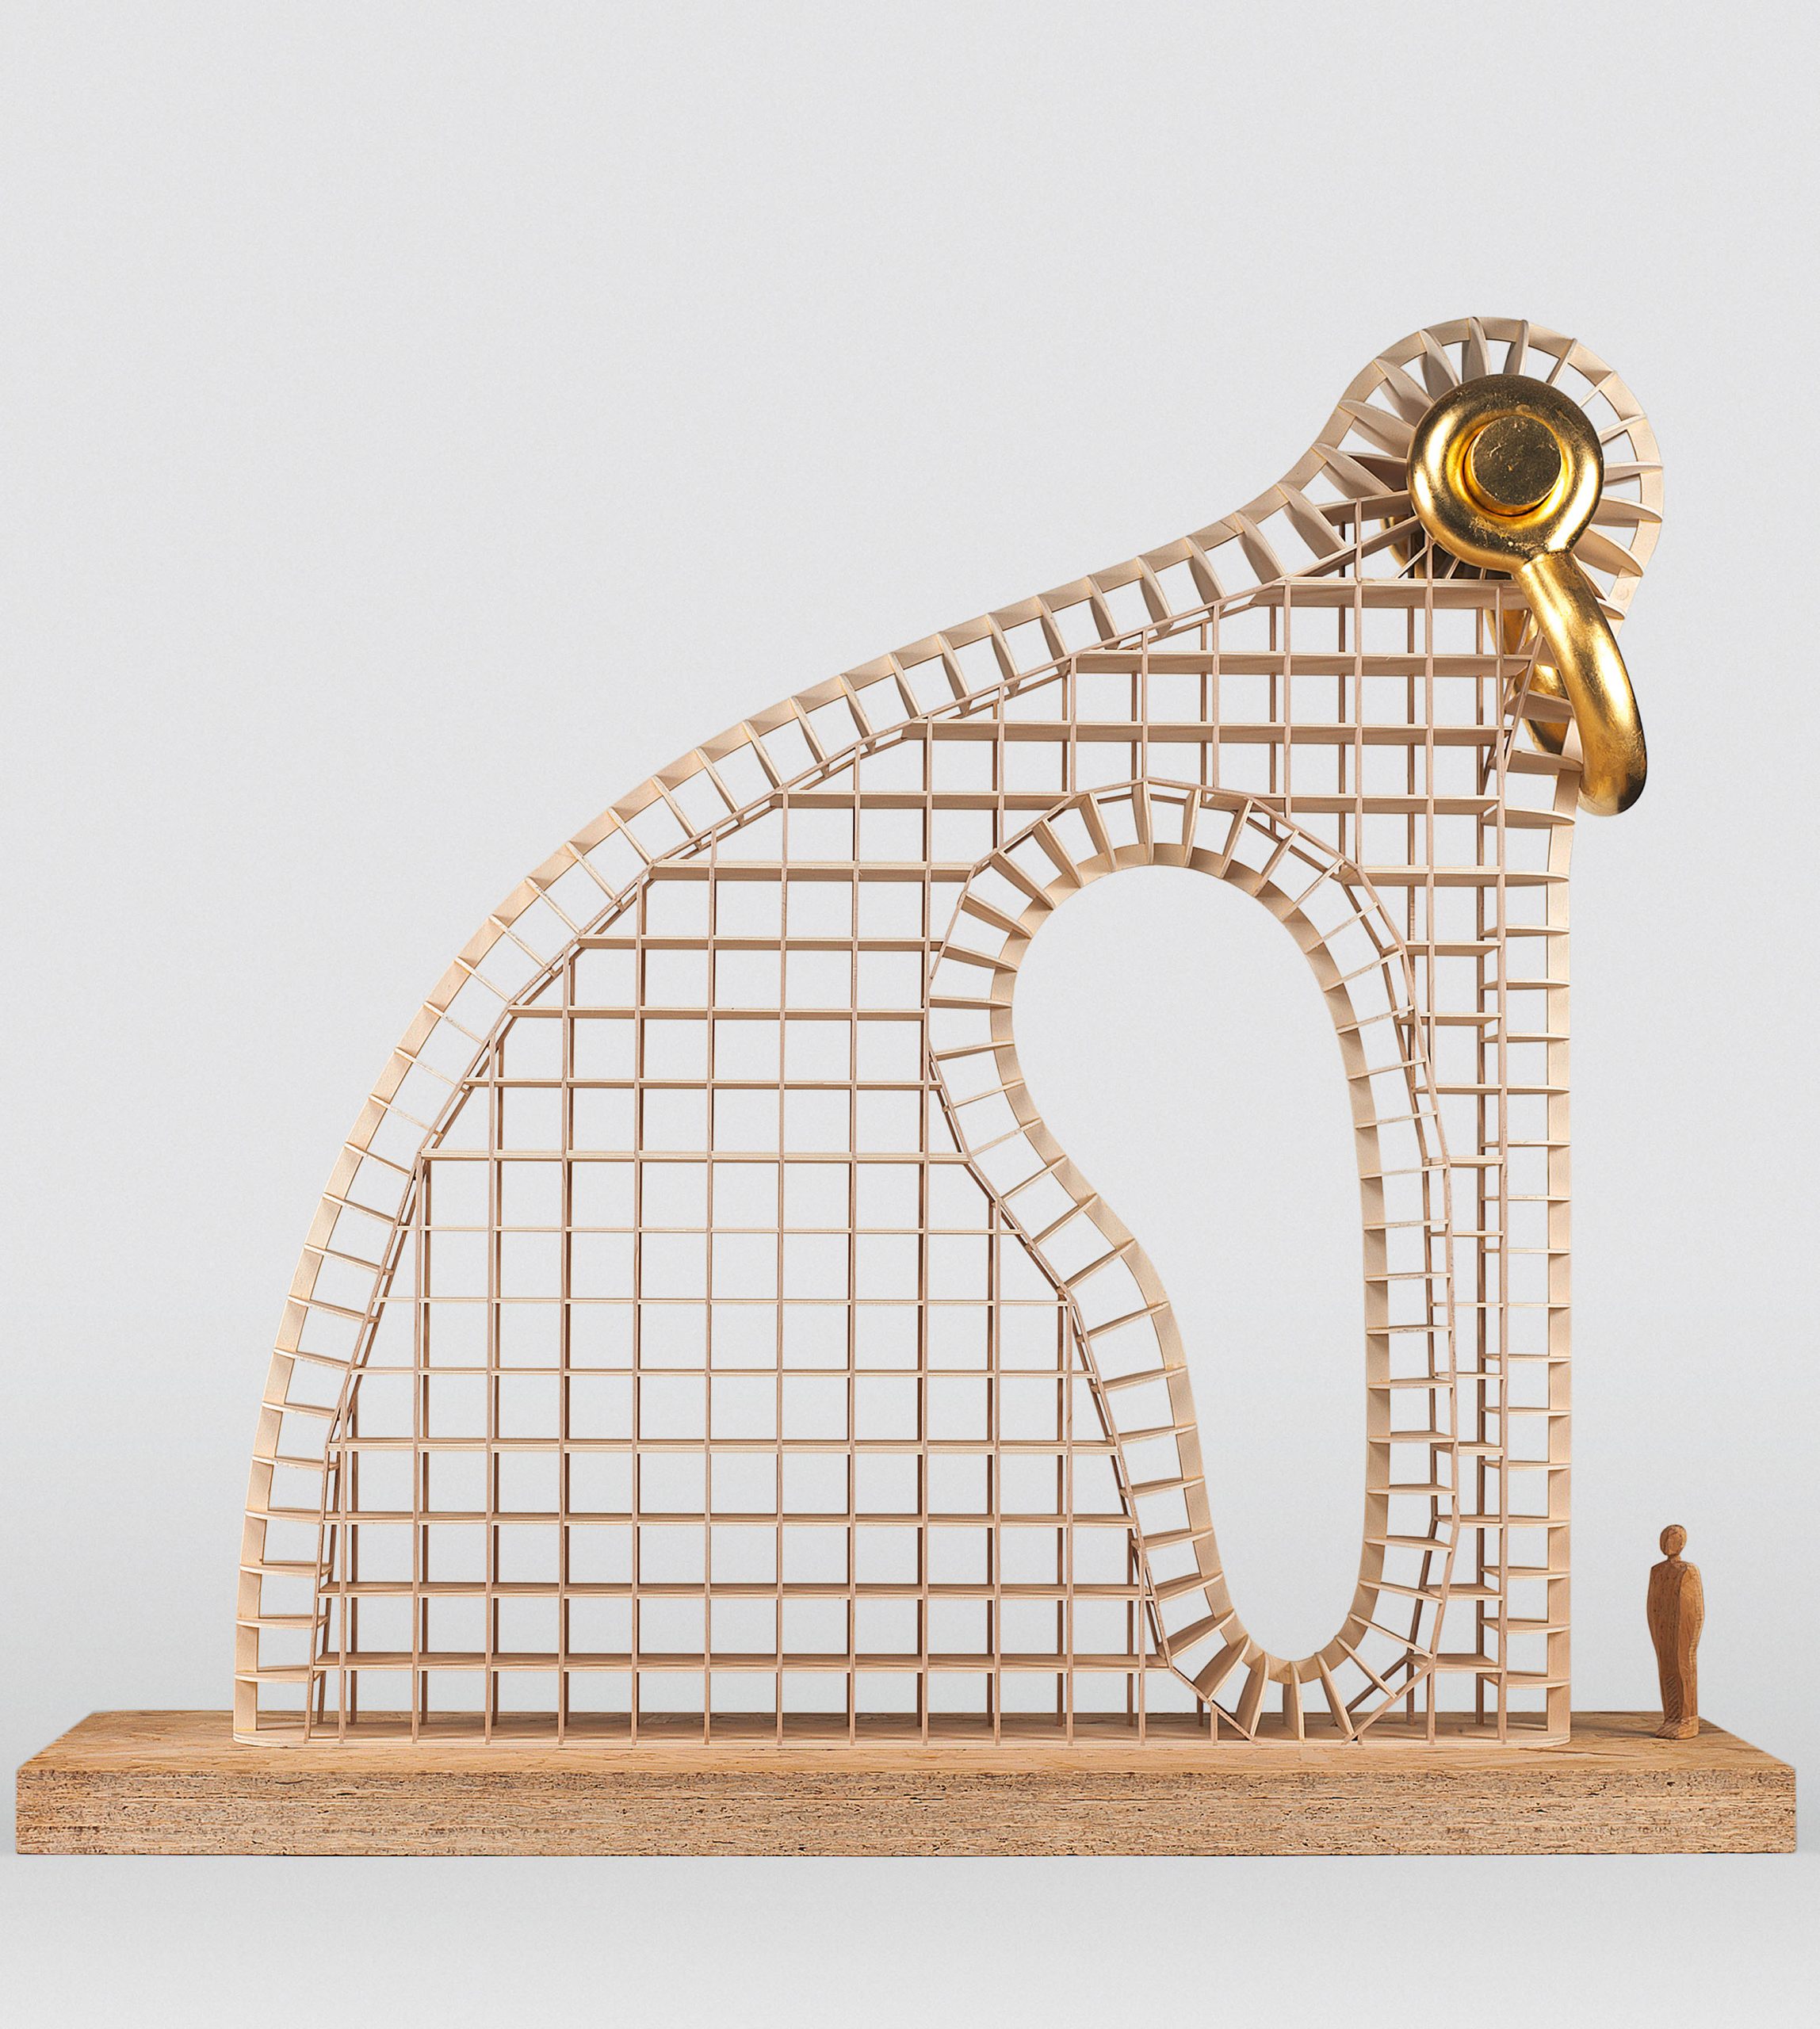
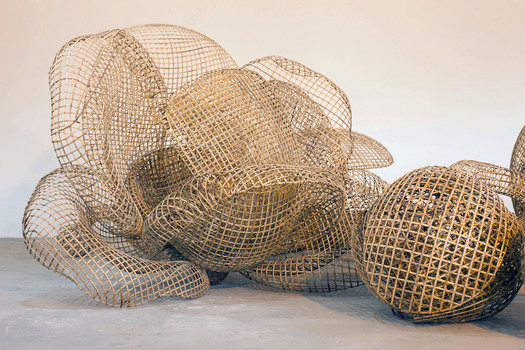
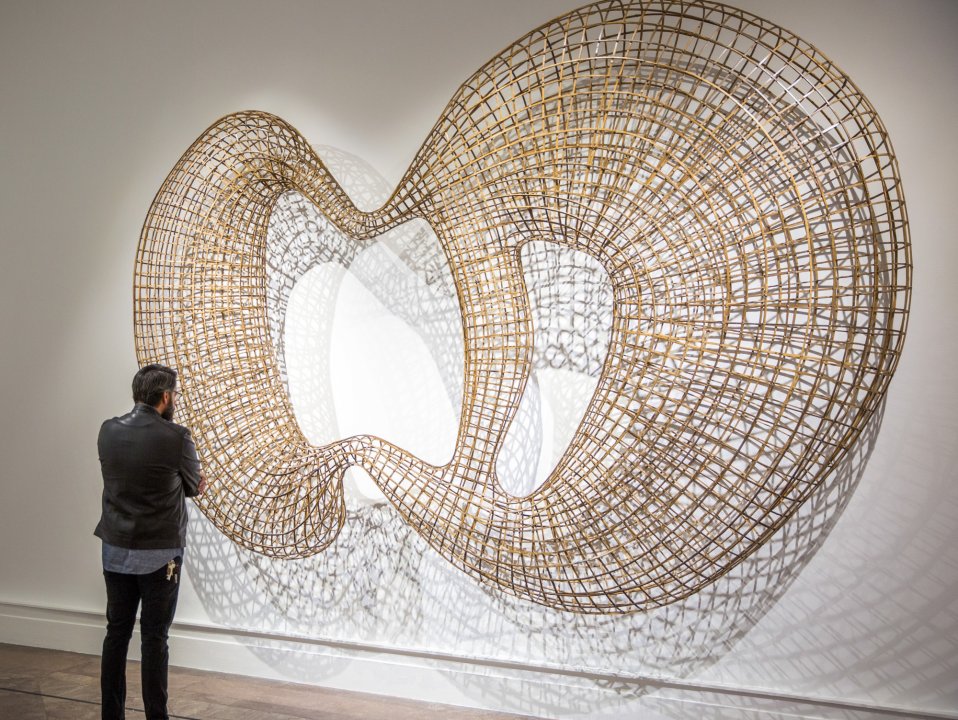
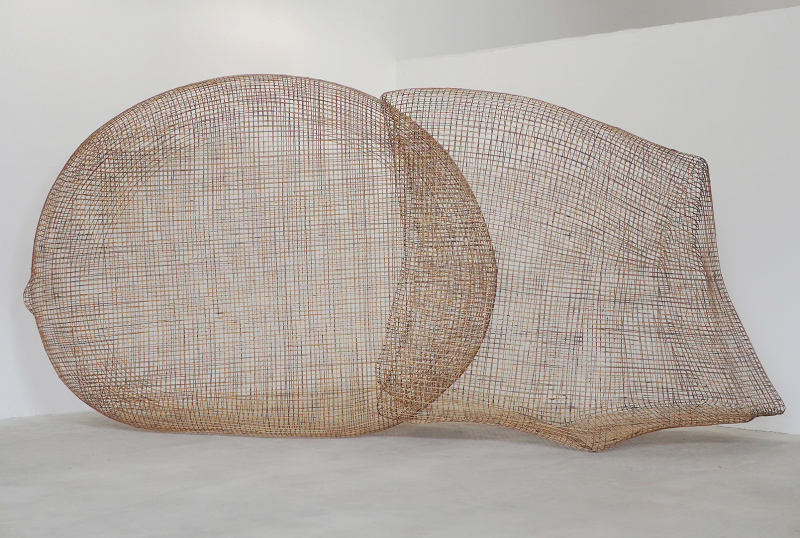
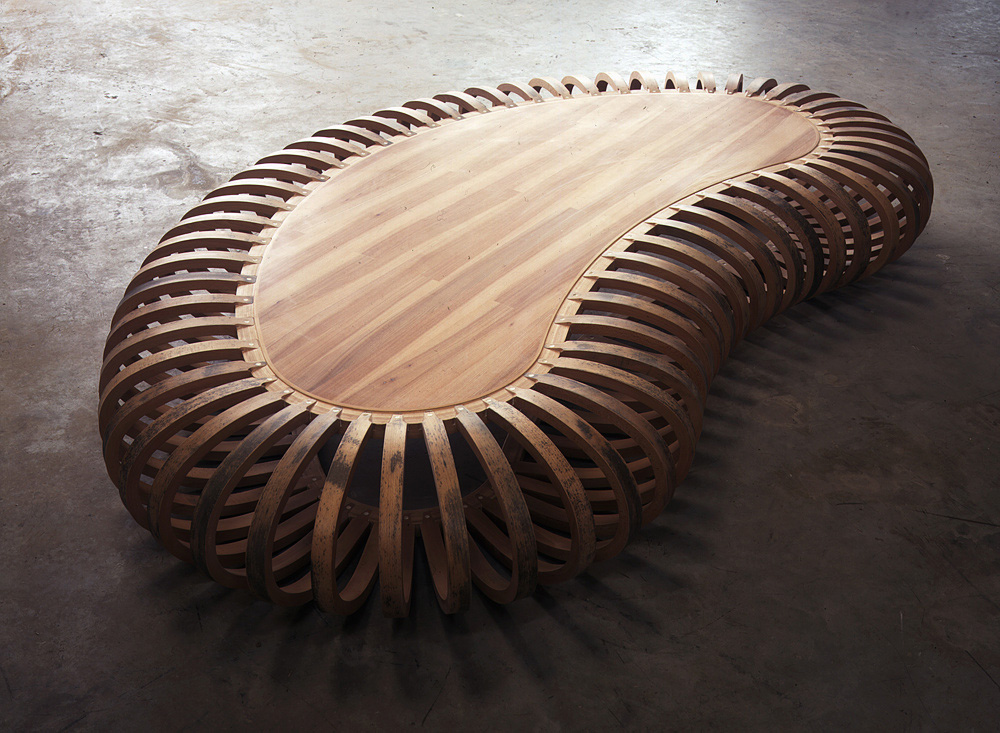
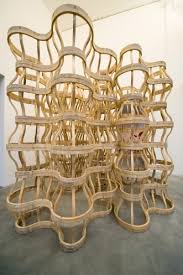
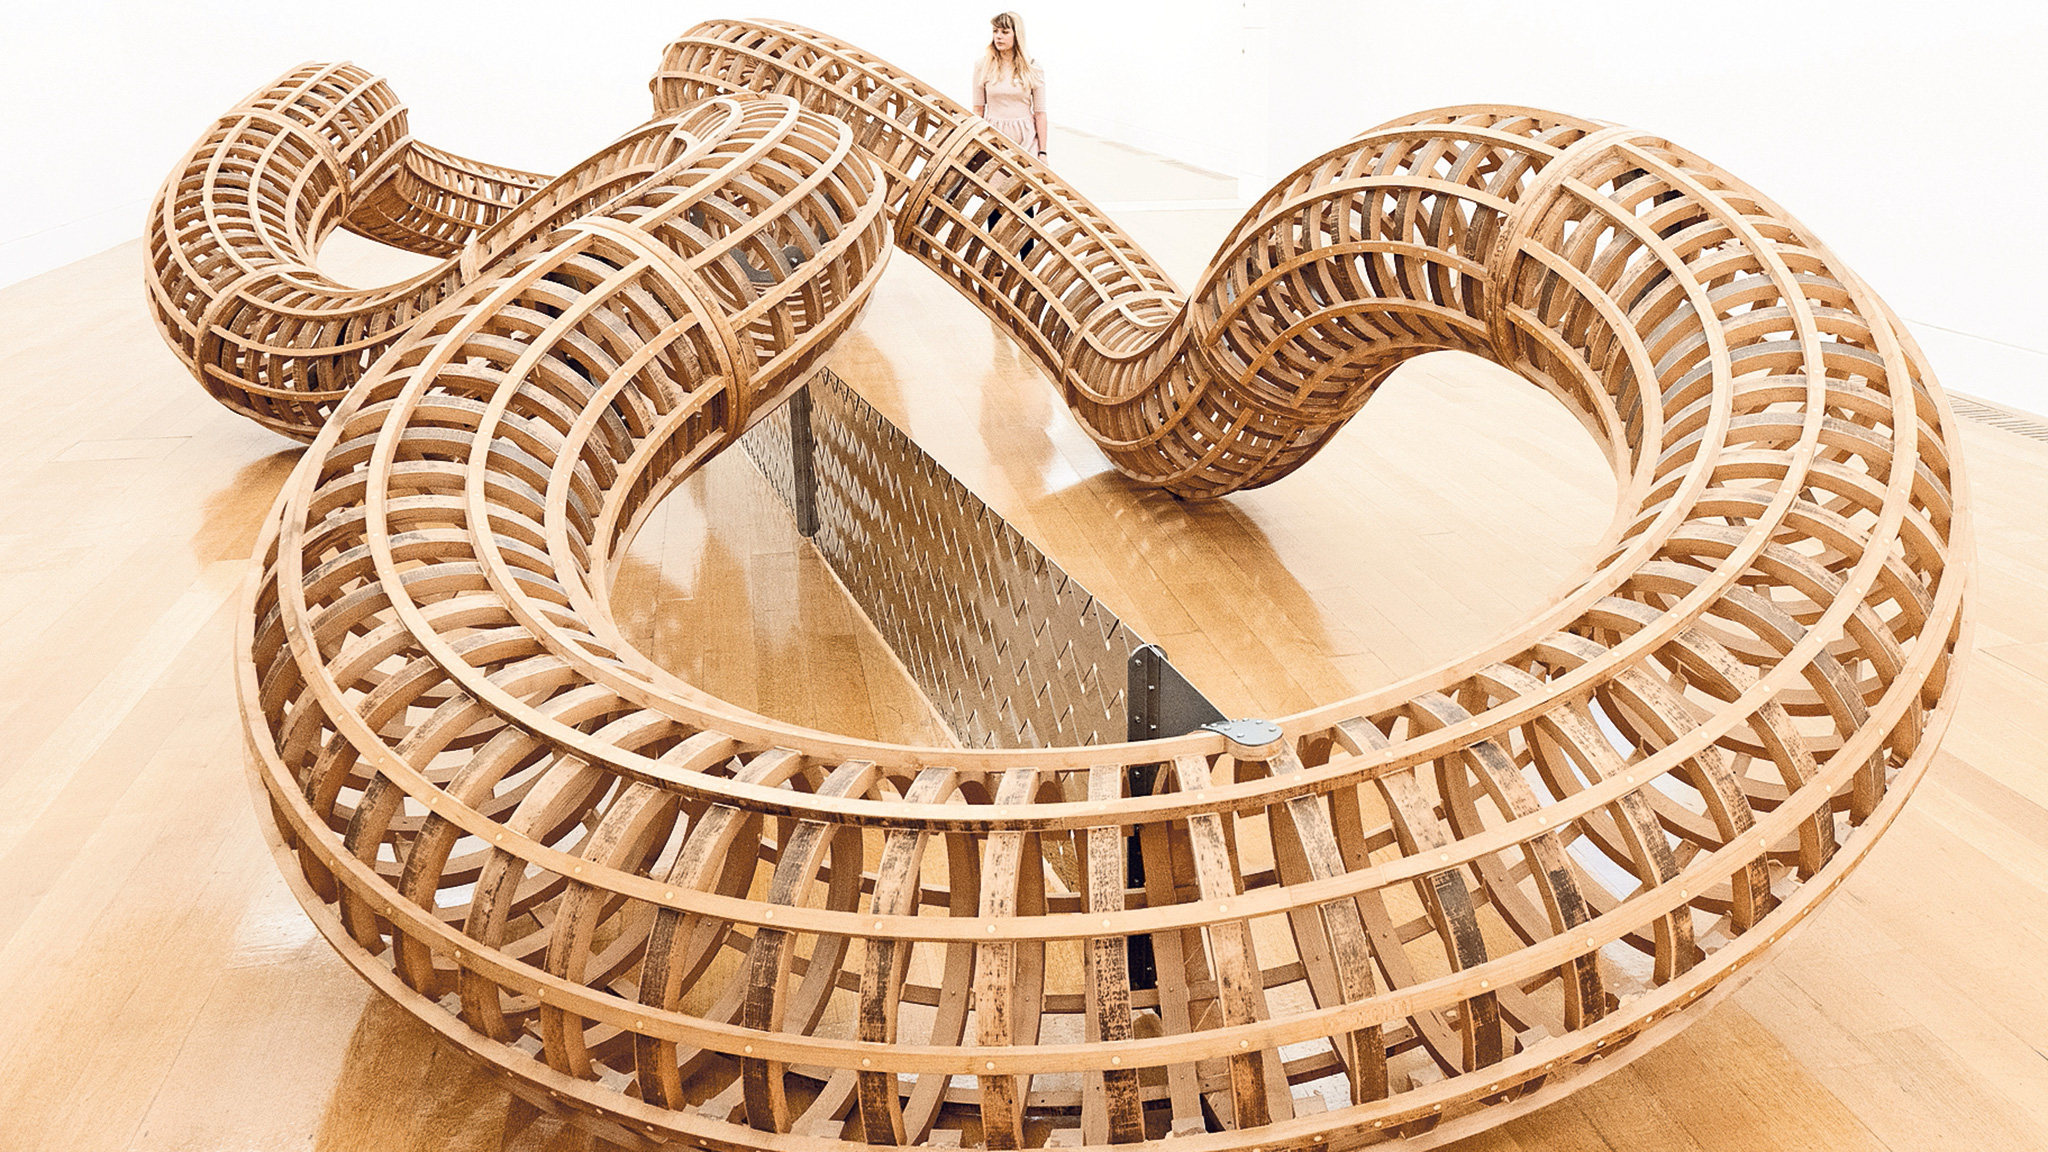
Richard Deacon
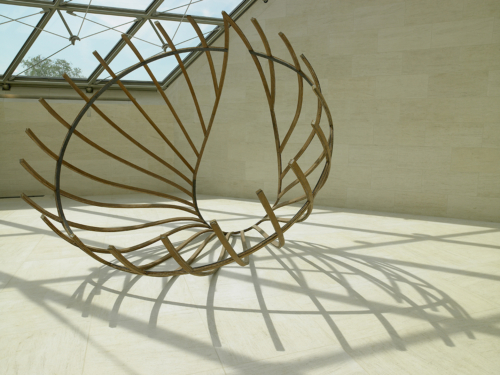
Martin Puryear
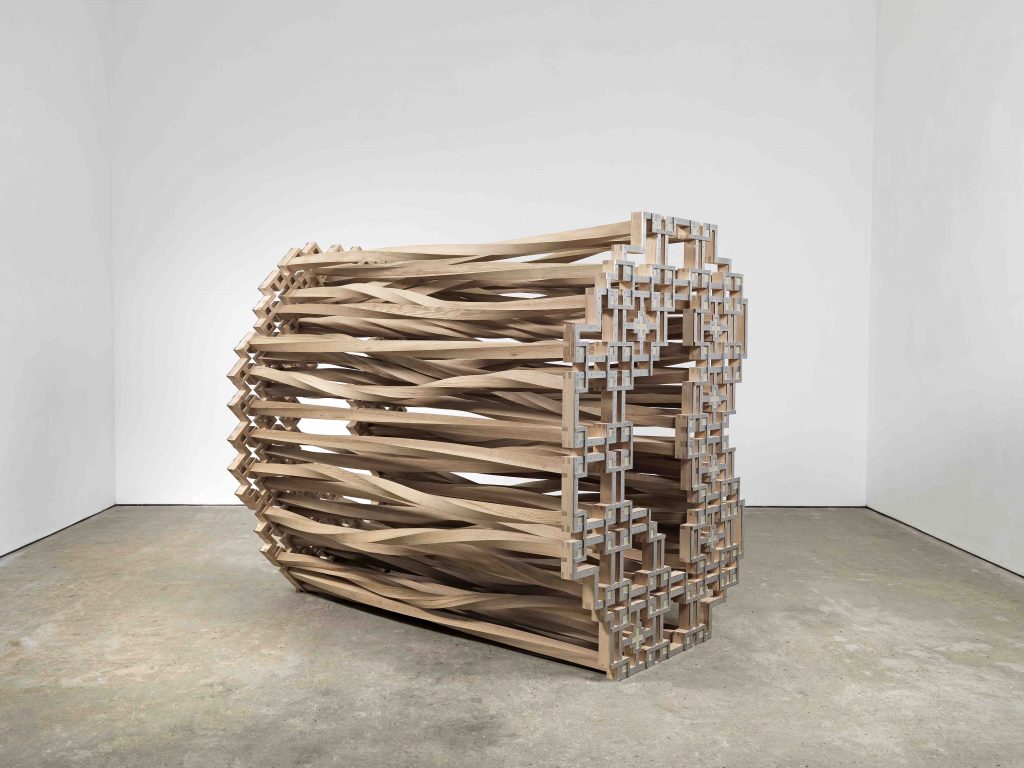
Sopheap Pich
Student Work
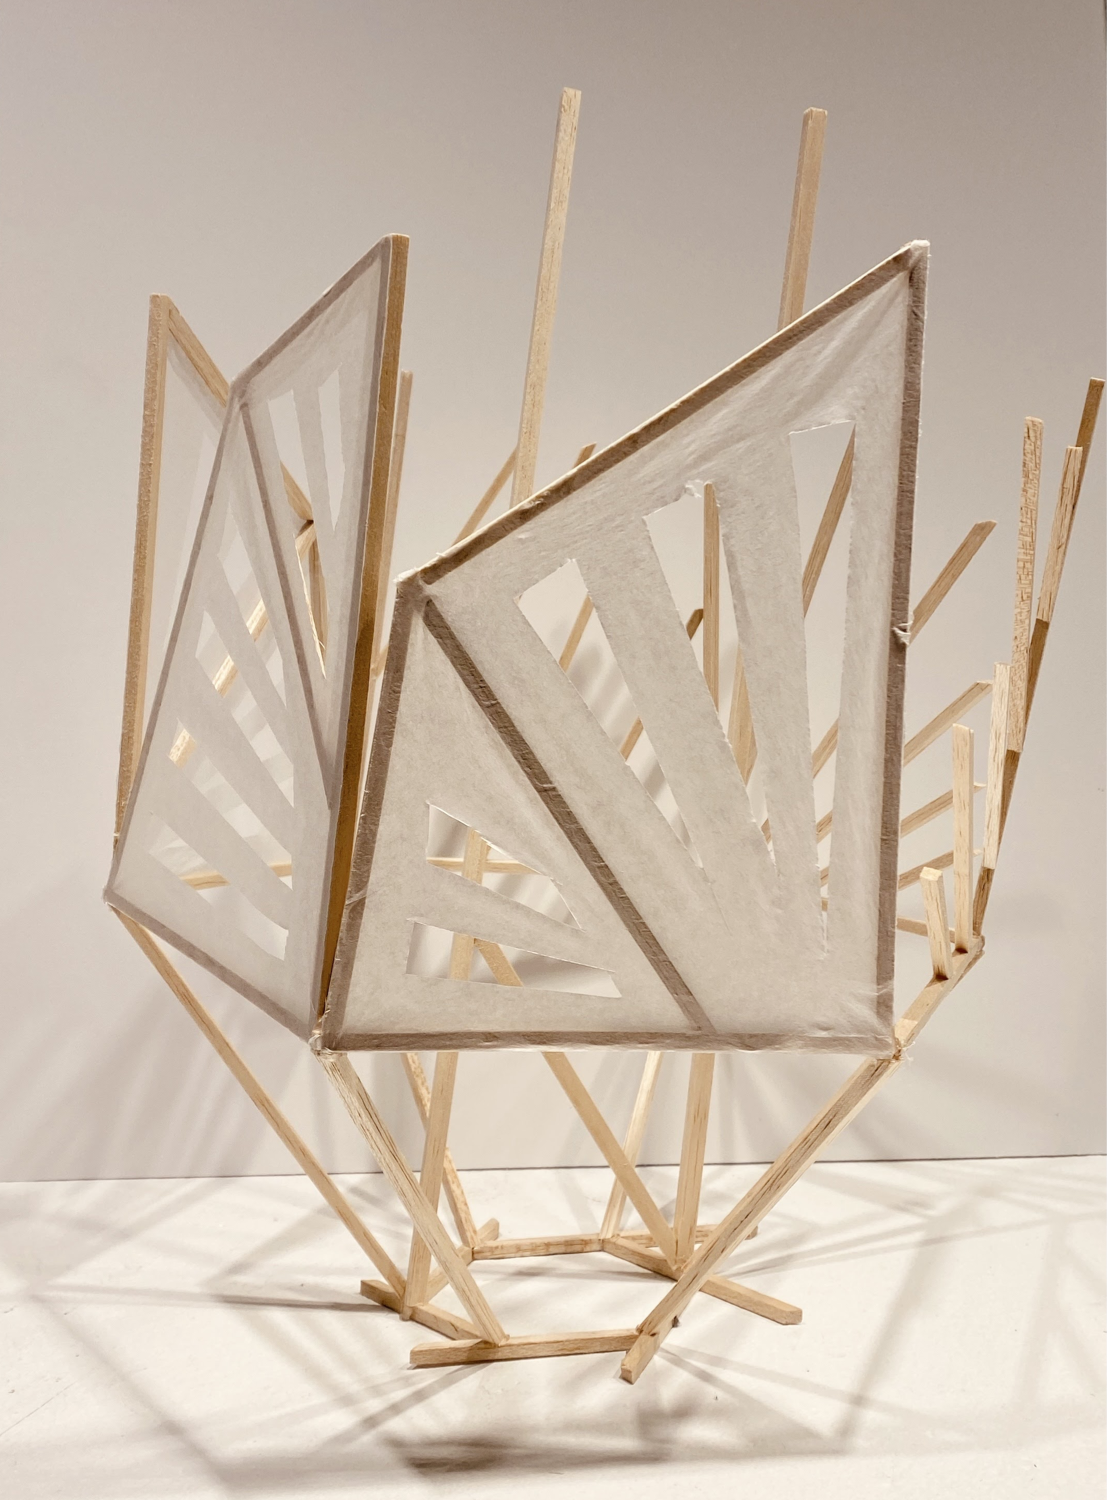
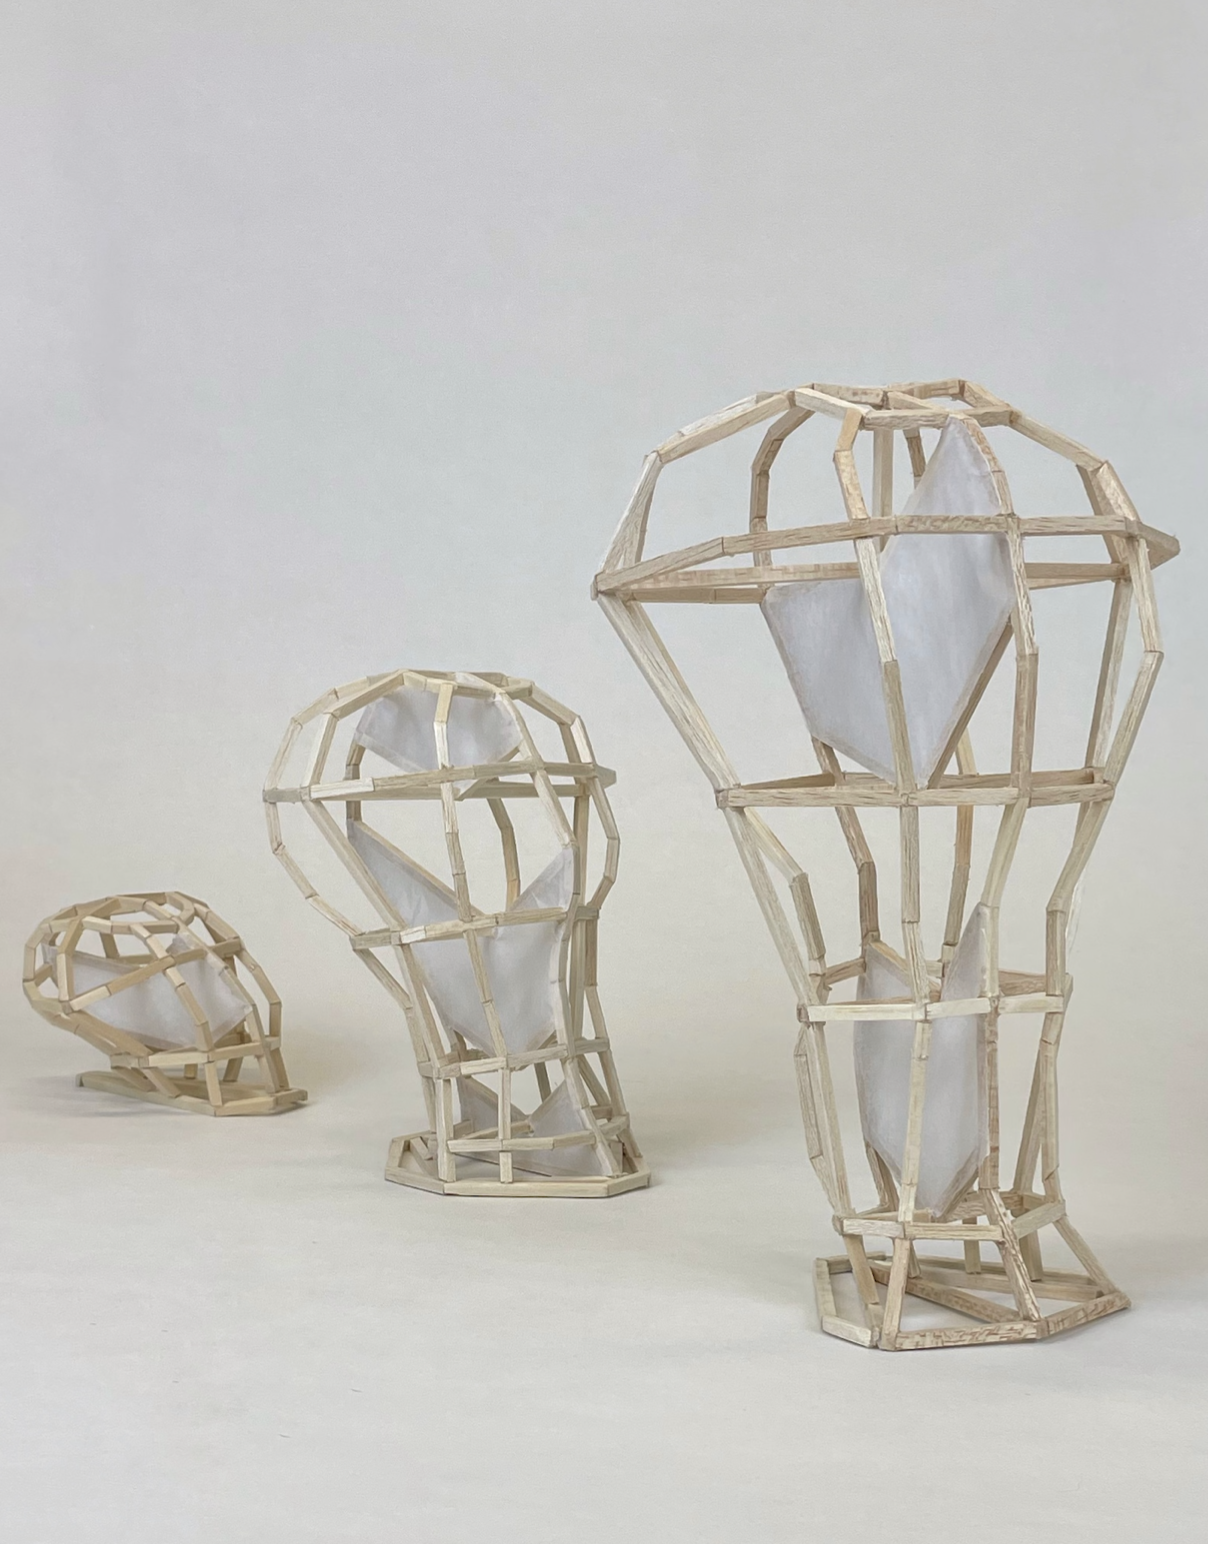
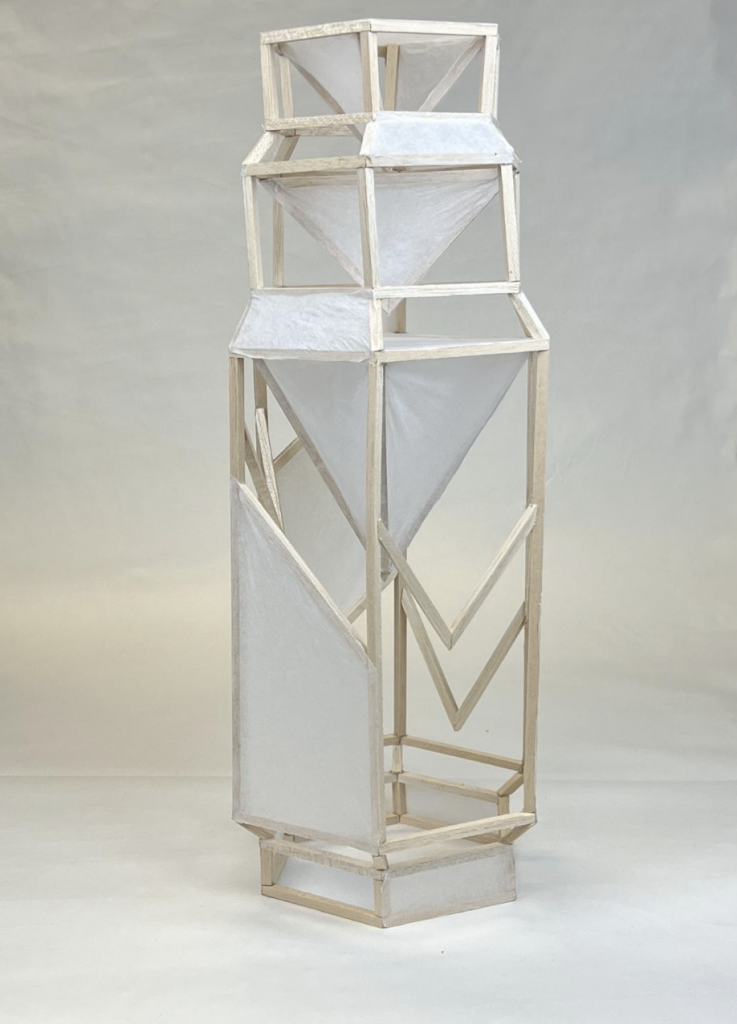
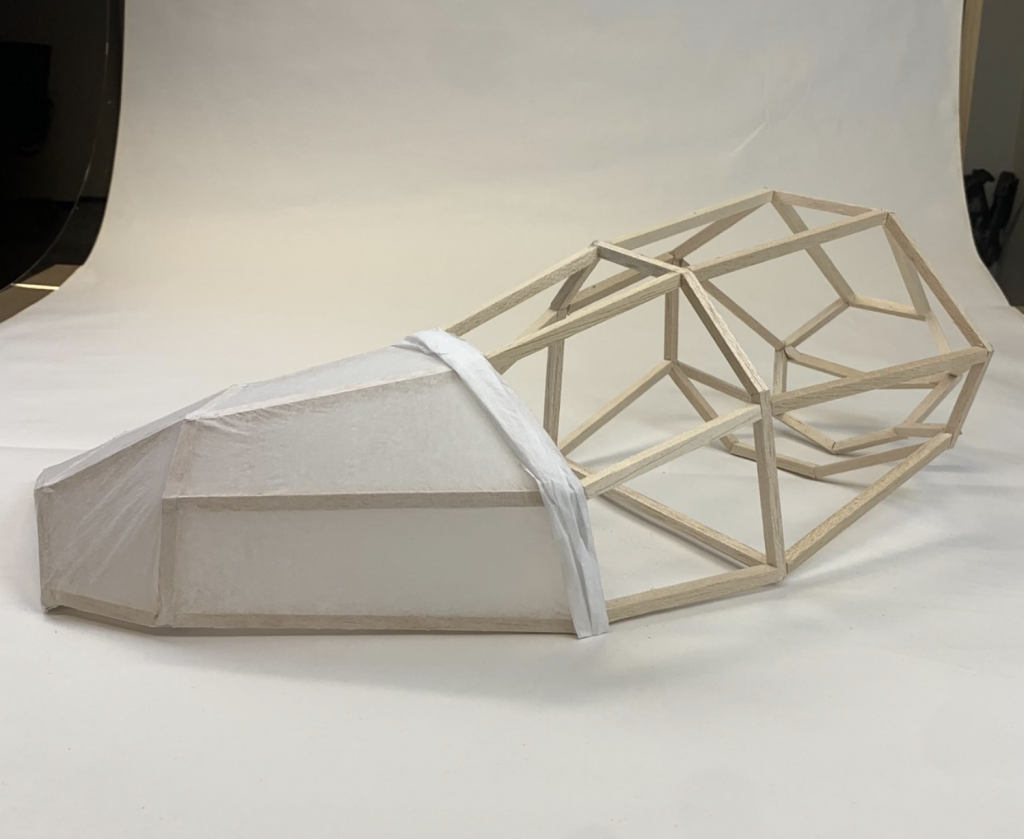
Examples