Learning Objectives
- Students will be able to accurately capture objects using contour drawings.
- Students will be able to differentiate between positive and negative space.
- Students will be able to create engaging compositions through the arrangement of shapes and lines.
- Students will demonstrate ands understanding of correct color mixing, basic knowledge of color theory, and correct painting techniques.
Project Description
There are multiple parts to this project so it might be helpful to read through each step before you get started. You will end up with 2 abstract paintings that are based on negative space drawings. You will be introduced to advanced color combinations by avoiding simplistic ones such as red, yellow, blue and over saturated or pure colors. You will also be encouraged to focus on excellent painting skills and craftsmanship.
Project Considerations
A few tips – Take your time. Practice. Acrylic can be fussy because it dries really fast. You want your final paintings to almost feel like they are digital or were printed. This is not how artists typically use acrylic but it will help you better understand how to control it.
Take a trip to Target for color inspiration or visit some of these sites – Snappa, Canva, Dwell, Vogue, IKEA, or Interior Design.
Materials
- 2 sheets of 9″ by 12″ Bristol Board
- Set of Acrylic Paints (Need at least Red, Yellow, Blue and White)
- Small Acrylic Paint Brushes
- Copy Paper or other loose paper
- Pencil and pen
- Tracing Paper
Directions
Name these slides Project – Powerline Paintings in your Google Slides Presentation.
Project – Powerline Paintings – Part 1
- On your first piece of 9″ x 12″ Bristol board divide the paper into 3 equal sections using 3 horizontal lines. In the top section create 3, 7 step monochromatic color scales. Monochromatic means one color, so you will choose one color and gradually make it lighter until you reach white and darker until you reach black. Example
- Find a round object (tennis ball, bouncy ball) and a rectangular object (shoe box, cereal box). In the middle section draw the sphere and in the last section the box. Choose a warm color and paint the sphere – pay close attention to the highlights, shadows and cast shadows. For the box, use a cool color. Make sure that you pay close attention to how the values work on the ball and the box. Examples are below.
- Using the Adobe Color website, create at least 8 different color schemes. You may screenshot these and add them to your Google Slides Presentation. Label them according to which color scheme they belong too. Try to avoid analogous color schemes. Reference You can use these color schemes in your painting if you want so get creative. Try to avoid overly saturated / intense colors and simple color combinations (no red, yellow, blue).
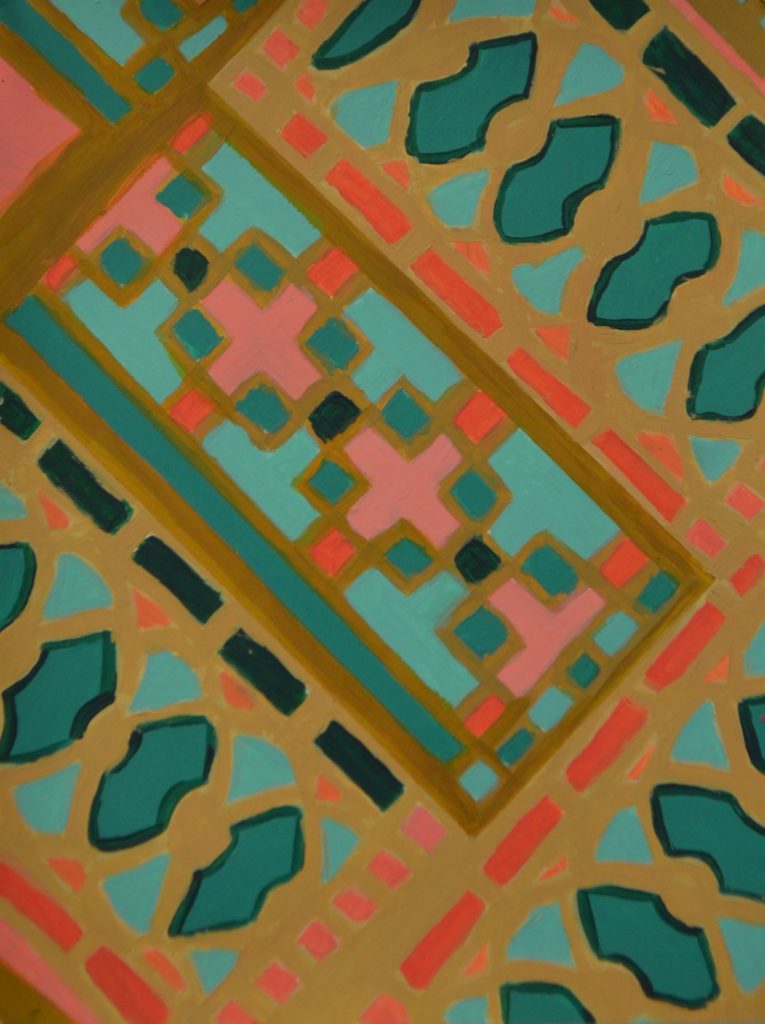
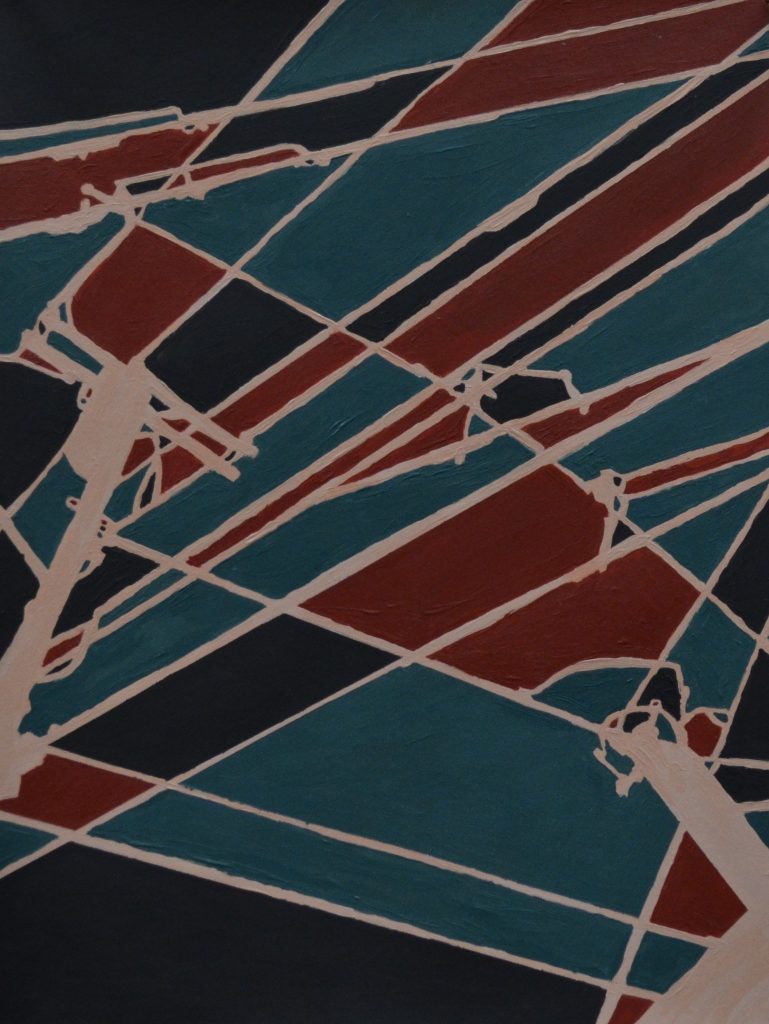
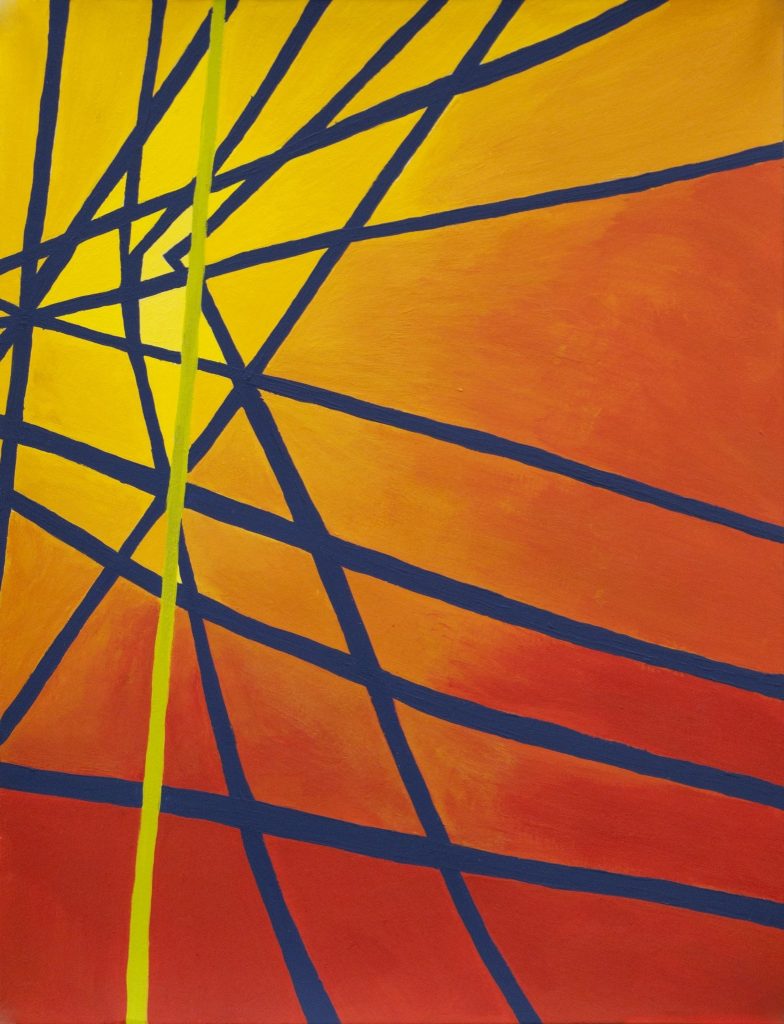
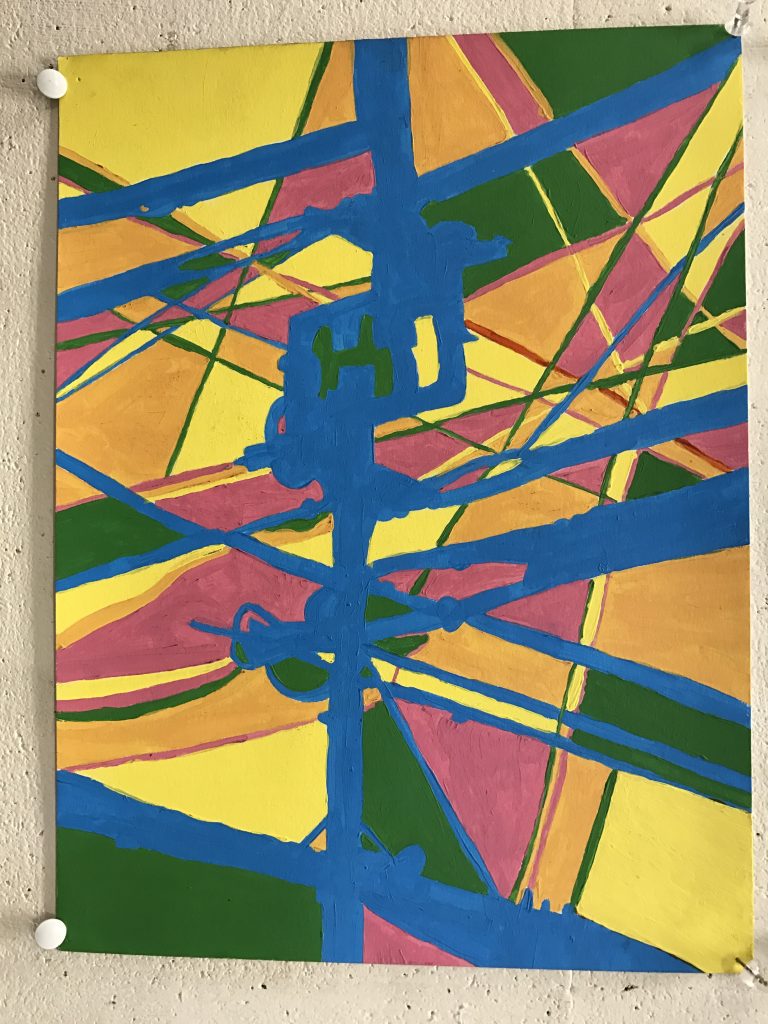
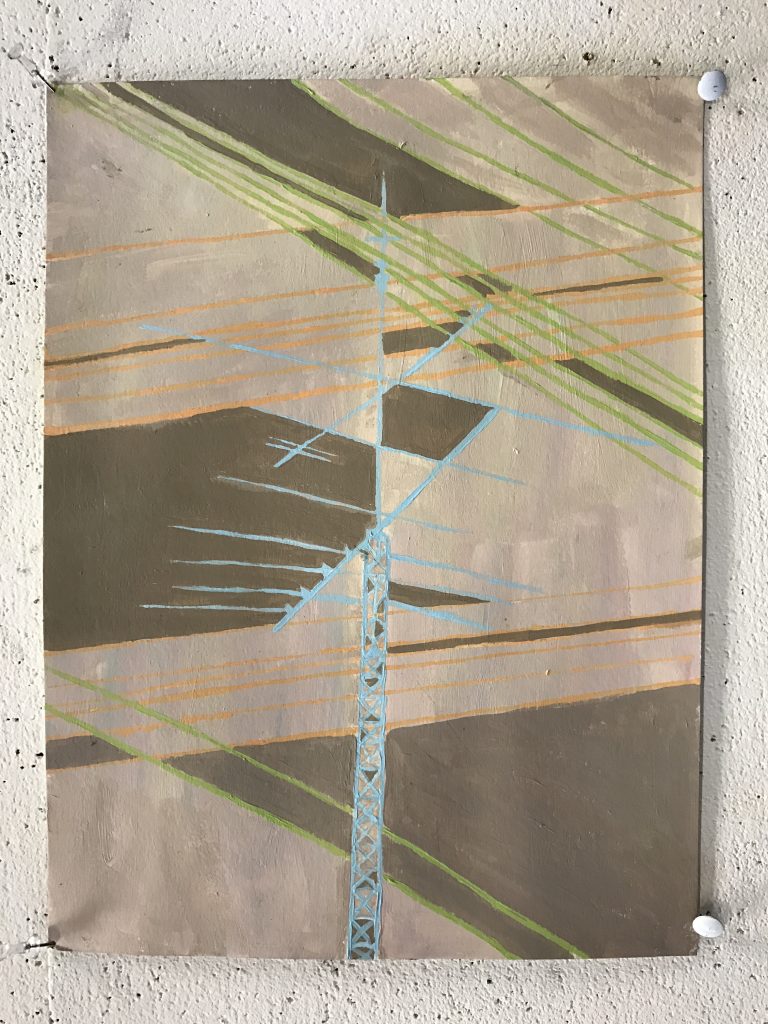
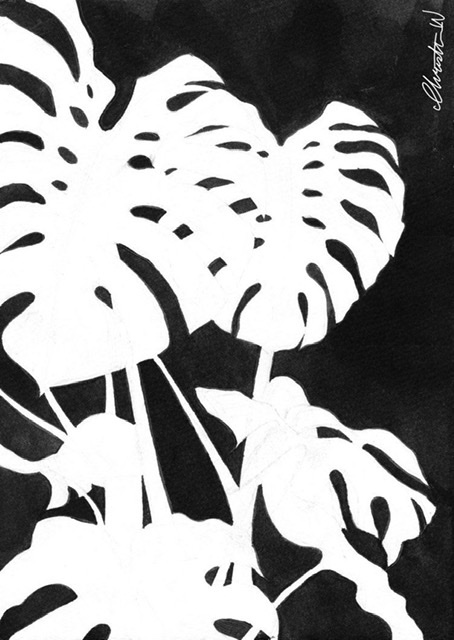
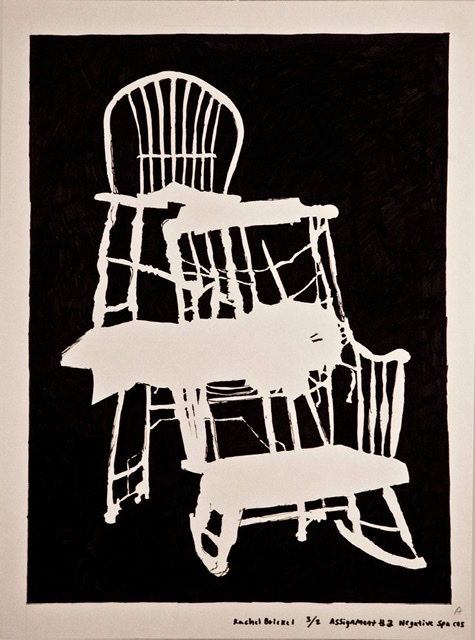
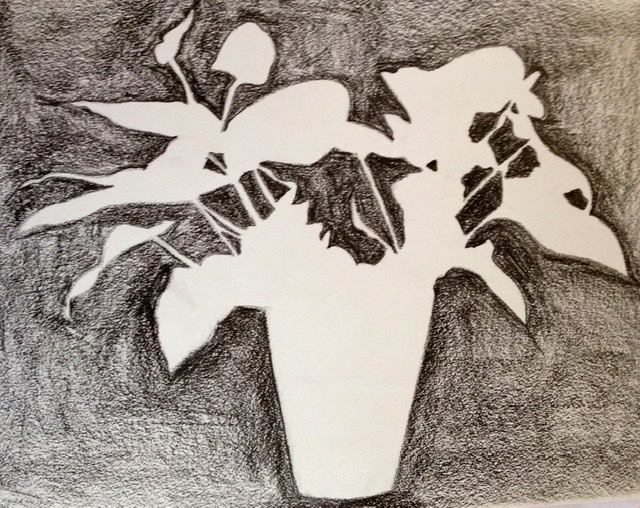
- On your tracing paper draw 10 contour / negative space drawings of architecture (power lines, gaps between buildings, stop light wires) or other linear objects (vines, plants, trees). Each drawing should be on a separate sheet of tracing paper. These are simple line drawings so don’t spend more than 10 minutes or so on each of them. Try to capture as many details as possible and remember that you are drawing the negative space, the air around the object, not the actual building or plant itself. Focus on the positive (the object itself) and the negative (the sky or air) to create your drawings. The examples below are Contour or Negative space drawings. You’re drawing the negative space as an outline – you don’t need to fill it in. As you work on these pretend that you’re drawing the space around the object and not the object itself. You could park your car in a parking lot that faces an intersection and draw the power cables and lights that are around that intersection or spend time outdoors focusing on plants and vines. Check out my demo video at the bottom of this page for examples.
- Once you have your 10 different tracing paper drawings, start looking for interesting combinations by overlapping them. If you can’t see through the paper, you can tape your drawings to a window backlit by the sun to help. You might overlap a drawing of vines with a drawing of powerlines to create a nice contrast between organic and geometric shapes. You may use certain elements more than once if that works for your composition.
- Take a sheet of tracing paper and draw a 5″ by 8″ rectangle. Lay the sheet of tracing paper over the collection of drawings and move it around until the best part of your composition fits your rectangle. Slowly trace the lines onto the tracing paper. You don’t need to include everything – these drawings are meant to help you create a composition, not force you into one. Push your lines all the way to the edge of your 5″ by 8″ rectangle.
- Use a 2B or higher (3B, 4B, 6B…) to completely cover the back of your tracing paper. Once you are done, lay a sheet of bristol board underneath, making sure that your rectangle is centered, and, using a ball point pen, slowly trace your lines. Be careful not to let the paper move and don’t push down too hard. Once you are done the tracing paper drawing should have transferred to the Bristol board.
- Repeat steps 5 through 7 to create 1 more composition on Bristol board. You will have 2 compositions on 2 different pieces of Bristol board when you are done with this part.
- Make sure to upload an image of the final work, and image of the work with a ruler and image of yourself holding the work.
Examples of Painting a Cube and Sphere


Examples of Contour / Negative Space Drawings:


Part 2
- Once you have your compositions created on the Bristol board and you have received feedback on them, you will start painting one with acrylic paint. The professor will help you choose which one to start with. You will need to work out color compositions in your sketchbook before you start painting. Think analogous, complement, split complement, triadic, etc. You can use the Adobe Color website to help you come up with color schemes,. Don’t just use color straight from the tube. Mix them. Blend them with white or complements to get a variety of colors. Once you have your colors worked out you will paint your compositions paying attention to every detail. No white should be seen and the paint should be applied as evenly and as flat as possible. Start with your lightest colors first because it will be easier to paint over mistakes with darker colors.
Part 3
- After you have submitted and received feedback on your first painting, complete the paintings for the remaining composition. Make sure to use a different color scheme.
Research / Examples