Learning Objectives
- Students will be able to identify basic visual and verbal vocabulary.
- Students will be able to demonstrate the unique power of different types of line.
- Students will be able to illustrate how line affects composition.
Project Description
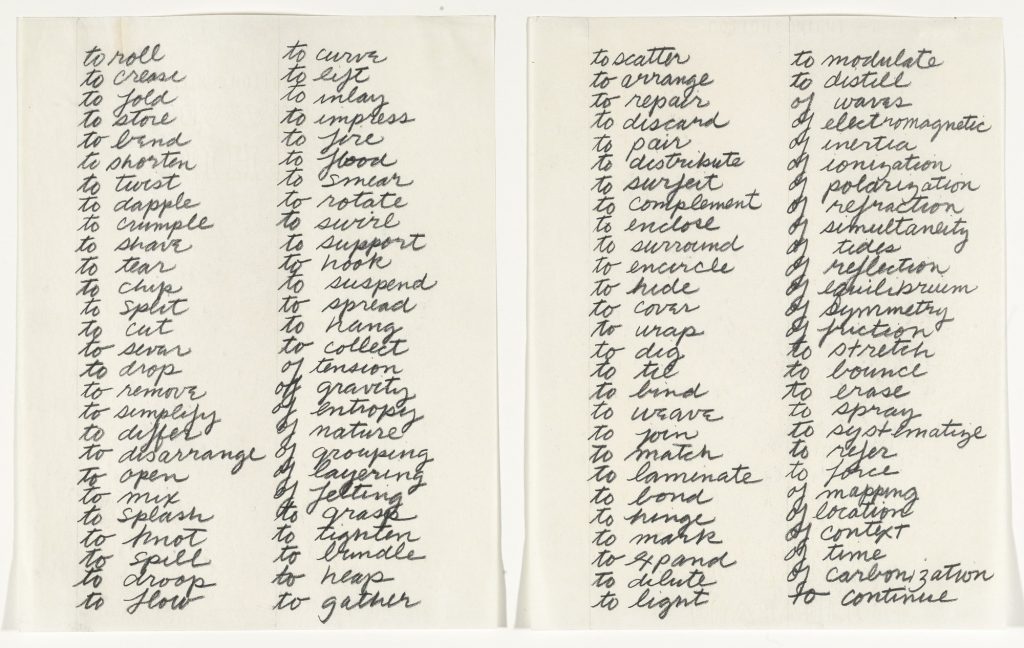
For this assignment you will be using 4 words to explore compositions. Each word that you choose from Richard Serra’s Verb List below should be illustrated in an abstract way – no representational imagery.
Project Considerations
Line is one of the simplest and most versatile elements of design. Line may be defined as a point in motion, a series of adjacent points, a connection between points, or as an implied connection between points. Lines can connect, dissect or define shapes and spaces within design.
It is a good idea to explore a bit first. When you have generated a page of studies, consider:
- what are the advantages of each different type of line?
- how does a change in format affect line dynamics?
- what happens when lines are repeated?
- what happens when lines intersect?
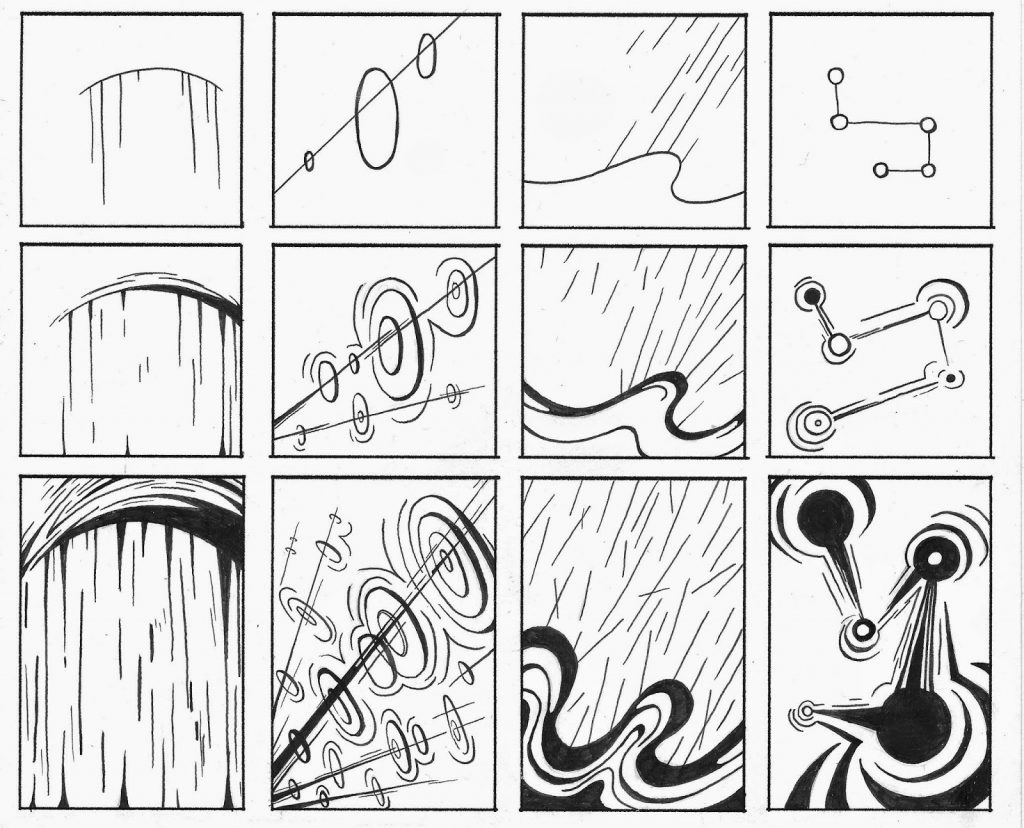
Try working with very different kinds of line. As you work your way down each column, try to increase the power of the original line.
Materials
- Bristol board
- Ruler
- Fine Tip Sharpie Marker
- Pencils
- Template
Directions
Name these slides Project – Line and Shape Inventory in your Google Slides Presentation.
Project – Line and Shape Inventory – Part 1
- Take notes in your sketchbook on Line and Shape from the Elements and Principles research link to the right. Make sure to watch the two videos.
- Take a look at the template for an understanding of the layout for this assignment.
- Read through Richard Serra’s Verb List below. Choose 4 of the verbs to illustrate in the template. Click the image to view it full scale.
- Using the template as a guide, use your ruler and a pencil to mark out the measurements on your piece of Bristol board. I would start from the top left and always measure from the top and left. You will have a little extra on the right and bottom sides.
- Above each of the boxes write one of the verbs you chose from the list above. You should have a word above column 1, your second word above column 2 and so on. Each word should be different.
- In the first box in the top left, illustrate that word without representational imagery. For example – If you chose the phrase “to support” you will need to figure out a way to show a line or shape supporting a line or shape. Don’t draw any realistic / representational imagery. You are trying to illustrate the idea the word represents. You may sketch out your ideas with pencil but the final drawing should be done in Sharpie marker. Use both the ultra fine and fine tips to vary line width.
- Once you have the top left box complete, move to the box below it. Take the best parts of the first box and make it better. This second box should not be just added lines or shapes. It should be a reimagining of that first box. What worked? What didn’t? Enhance the good and get rid of the bad.
- Continue making, editing or changing your drawing in the third rectangle and then finally in the circle.
Project – Line and Shape Inventory – Part 2
- After you have completed and received feedback on Part 1, complete columns 2, 3 and 4. Each column should use one of the words you chose in Part 1.
- Make sure to upload an image of the final work, and image of the work with a ruler and image of yourself holding the work.
Examples