Learning Objectives
- Students will be able to demonstrate appropriate colored pencil techniques through incredible craftsmanship.
- Students will be able to design engaging compositions using limited subject matter.
- Students will demonstrate appropriate color schemes when creating their drawings.
Project Description
This project will introduce you to color through the creation of a color wheel, color combinations, a plain colored object, a vibrantly colored object and two completed 5″ x 8″ colored pencil drawings. We will focus on building a variety of colors through blending to avoid what is known as “tube” color (colors that are straight from the paint tube or colored pencil that have not been blended with other colors). We will focus on realism so close attention will need to be paid to the objects that are being drawn.
Project Considerations
Colored pencils can be built up using thin layers to gradually create nice gradations, texture and shadows or applied more heavily for rich, intense colors. If the layer of wax from the colored pencil gets too thick, too quick it may be difficult to lighten it or erase it. Work slowly. Craftsmanship is of utmost importance. No pencil marks should show unless they are an integral part of the composition. There should be no white space left in your 5″ x 8″ drawing. One last note. Take care of your work. Fingerprints, smudges and creases will all affect your craftsmanship score.
Materials
- 3 sheets of Bristol or Illustration Board
- Prismacolor brand color pencils
- Pencil for sketching compositions
- Color photographs AND / OR real objects of each of the following:
- A Number
- A String
- A Strawberry
- A Target
- Three objects of your choosing (nothing with text and no electronics)
Directions
Name these slides Project – Colored Pencil Designs in your Google Slides Presentation.
Project – Colored Pencil Designs – Part 1
- Take Notes in Sketchbook from the color theory section found here.
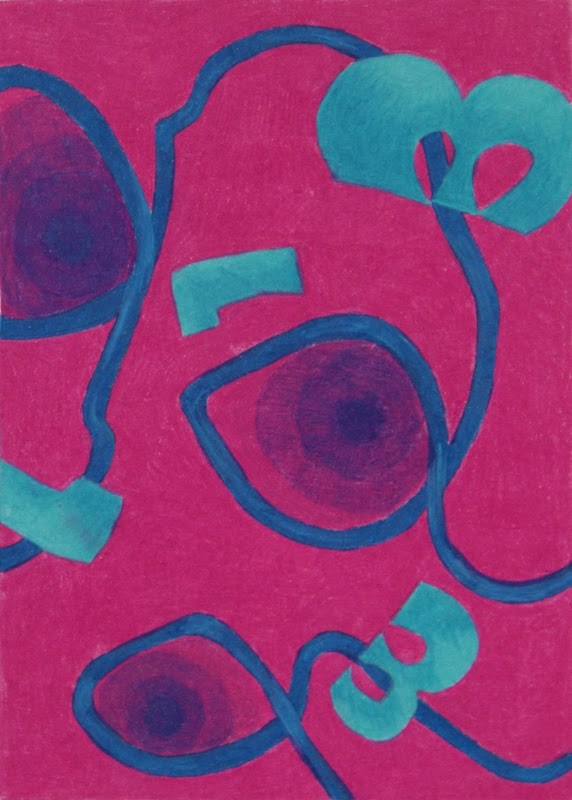
For steps 2 through 5 you will use one sheet of Bristol board divided into 4 equal parts. For the major project you will use two sheets of Bristol board, one for each drawing.
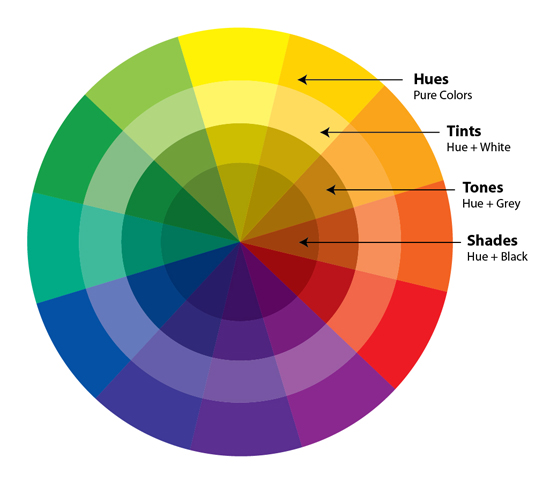
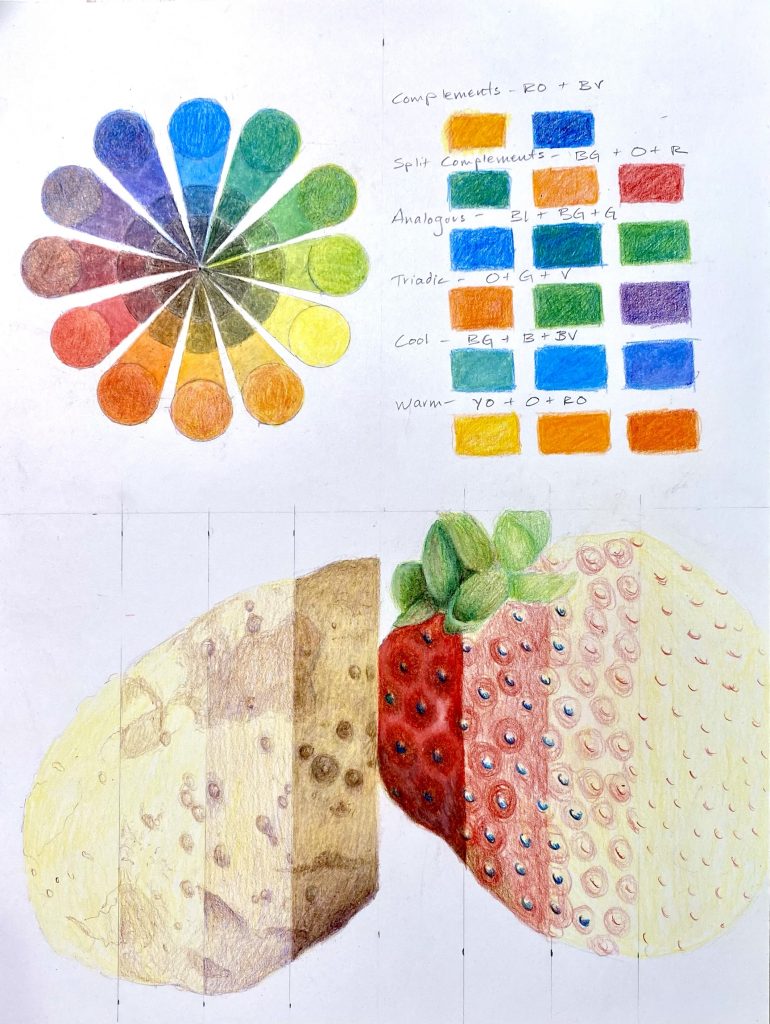
- Create a color wheel using your colored pencils. You will need to include primary, secondary and tertiary colors. The color wheel should include the hue, a tint, a shade, and a tone. Use the image below as a reference.
- Create an example of each of the following color groupings – complementary, split complementary, analogous, triadic, cool and warm colors. Try to avoid red / green, blue / orange combinations.
- Find a stick, rock or potato and bring it in. A lot of times the things that we think are just brown, beige or grey actually have a lot of color. I want you to bring that color out in this illustration. Don’t over emphasize colors that aren’t there but do pay close attention to the ones that are. Even grey sometimes has a hint of blue or red in it.
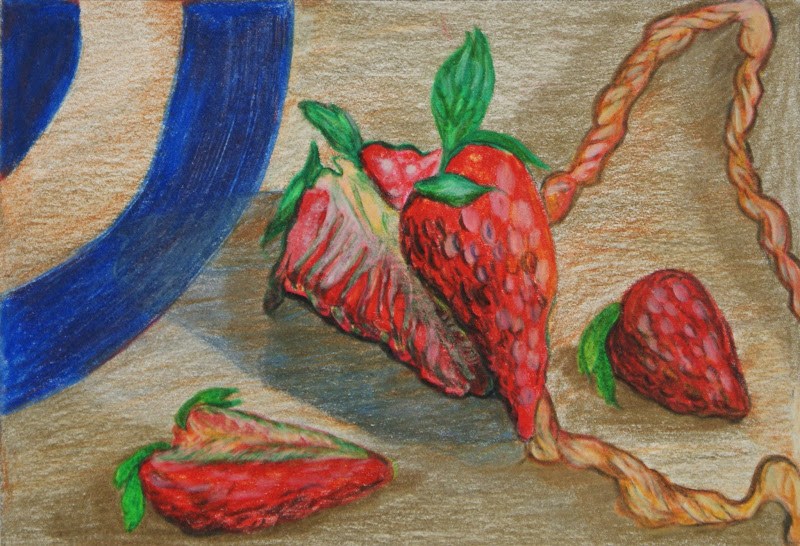
- Using a colorful fruit or vegetable and Prismacolor, create a realistic drawing. Focus not only on proportions and shape but also on color. Is there a local color you can start with (like the red in a strawberry) and then build off of that? Even the red in a strawberry has hits of yellow and green. Try to build your layers slowly until you get the color color and texture.
- In your sketchbook, work out at least 8 compositions using at least 3 of the objects from the materials list above (string, strawberry, etc). You must include at least 3 but do not need to use all of them. Your colored pencil drawings will be 5″ by 8″ which is the same size as the provided sketchbook. Each of your compositions should be different from each other but you do not have to use different objects for each.
Steps 2 through 5 should look something like the image below but please don’t copy the example exactly. Make it your own.
Project – Colored Pencil Designs – Part 2
- Using a sheet of 9″ by 12″ Bristol board and a pencil, draw a 5″ by 8″ rectangle in the center. Make sure it is centered – If done correctly you will have a 2 inch margin on all sides.
- Draw one of the compositions you created in your sketchbook to scale on your sheet of Bristol board. Use a very gentle hand when you’re drawing on your Bristol board. If you press too hard it will leave an indentation on the paper that will show up when you use colored pencils.
- Before you start using the colored pencils, work out color combinations in your sketchbook. Make sure you know the color scheme or theory your are going to work with before you start drawing. I will ask “What color scheme are you basing your drawing off of?” Be prepared to know.
- Start using your colored pencils. Remember to work slowly, in thin layers and to lend as you go. Make sure to have an image of your object or the real object in front of you so that you can accurately portray the colors and shadows of that object. There should be no white of the paper showing when you’re finished and the objects and colors should look as realistic and professional as possible.
Project – Colored Pencil Designs – Part 3
- After you have received feedback on your first colored pencil design submission (Part 2), repeat the steps in Part 2 for your second drawing. Make this one better than the first one.
- Make sure to upload an image of the final work, an image of the work with a ruler and image of yourself holding the work.
Research / Examples
Light and Color (Google Slides Presentation)
CJ Hendry on Instagram