
Learning Objectives
- Students will be able to demonstrate an understanding of pattern and color and their relationship to space and form.
- Students will be able to demonstrate an understanding of the process; going from brainstorming ideas, to sketchbooks, to playing with and learning about various software applications, to building their objects in a virtual environment.
- Students will be able to assess their final project through written descriptions using the elements and principles of design.
- Students will be able to express the value of creative practices in uncertain times through written or oral expression.
Project Overview / Considerations
For this assignment, we will be exploring how pattern and color can distort our understanding of space and form. We will create two works – one sculptural piece and one augmented reality work. Both of these will focus on the use of color and pattern.
For the Paper Sculpture part of this assignment, we will create color and pattern-focused paperwork that uses a combination of origami, weaving, paper strips, and other techniques to create a small sculptural work.
For the Augmented Reality Sculpture part of this assignment, we will create an augmented reality object that challenges our understanding of space and form through the use of pattern, color, and virtual space. We will use what we discovered in the first part (the paper sculpture) to inform what we do in the second part (the augmented reality piece).
As you’re working consider how the object will interact both in a real and a virtual environment. If your work is placed outside on the grass will the colors work better or worse? Should you try to control where the viewer places your object in their environment? Your final submission for the AR work should be your own work – premade basic shapes, not premade objects, are allowed but using someone else’s work to create your own is not.
- Neither of the two works of art you create for this assignment should be object-based – they should not look like something. The goal is to focus on color and pattern.
- Excessive textures and multiple individual shapes may not load at all or be extremely slow when converted to AR.
- Reduce your polygons and simplify your shapes to avoid excessive load times.
Terms
Augmented Reality (AR) – a technology that allows the superposition of digital elements into the real-world environment. In the AR experience, you can see a composite view of physical or real-world elements and digital elements.
Virtual Reality (VR) – a technology that allows the creation of a fully-immersive digital environment. In VR experiences, the physical or real-world environment is entirely blocked out.
Mixed Reality (MR) – a technology that allows not only the superposition of digital elements into the real-world environment but also their interaction. In the MR experience, the user can see and interact with both the digital elements and the physical ones.
Polygon Count – The number of polygons a model uses. The polycount of a model, or how many polygons a model has, is one of the best ways to measure the efficiency of a model. You can determine a model’s efficiency by comparing its visual quality to its polycount.
Shape – is a 2-dimensional line with no form or thickness. Shapes are flat and can be grouped into two categories, geometric and organic.
Form – is a 3-dimensional object having volume and thickness. Form can be real, as in a sculpture or implied, as in a drawing. To imply form you might use light and shading techniques to make a circle look like a sphere. Forms can be viewed from many different angles.
Pattern – is the use of similar elements again and again.
Color – is the reflected light that we are able to see with our eyes. It also refers to specific hues and has 3 properties, Hue, Chroma, and Value.
Materials
For the Paper Sculpture part of the assignment
- Stonehenge paper (provided)
- Support materials if needed (wood)
- paint, brushes, and palette (provided)
- gluesticks (provided)
- box cutters
For the Augmented Reality part of the assignment
Any three-dimensional modeling software that can export .glTF or usdz. While you may use any of the software listed below, Tinkercad is the one I will be able to help you with the most. Make sure that the software you’re working with can export in either the .glTF or .usdz format.
- Tinkercad (free and easy to use, browser-based – make sure to use the class signup link posted in D2L)
- Blender (free, steep learning curve)
- Maya (not free, steep learning curve)
- Adobe Aero (not free, similar to Photoshop)
- iPad apps such as Shapr3D, uMake (not free, some require a monthly subscription)
- Adobe also has a new app called Aero (iOS only) that can use Photoshop layers to build AR experiences. Video tutorial.
I will take care of getting your three-dimensional file into an augmented reality experience. If you would like to play around with AR these are two of the software applications I will be using.
Process
Name these slides Project – Augmented Color and Pattern in your Google Slides Presentation.
There are 2 sculptures you will be creating for this project. One is a colored paper based work while the other is an Augmented Reality based work.
Part 1 – In your sketchbook
1. Look through the examples and watch the videos on the paper-based artists linked below.
2. Sketch out several ideas for your own paper-based work. Make sure to focus on color and pattern.
Answer the following in your sketchbook or Google Slides. Feel free to brainstorm or do some research when you write your responses –
1. How can patterns be used to challenge our understanding of depth and space?
2. Historically, how have patterns been used to draw attention to objects, places, or events?
3. What objects, buildings and clothing have you seen that use color in a particularly interesting way?
Part 2 – In your sketchbook – Paper Sculpture
1. Look through the paper sculpture examples and videos linked below. Jot down anything you find inspiring in your sketchbook.
2. In your sketchbook or on a scrap sheet of paper use paint or colored pencils to create the following –
a. color wheel (label primary, secondary and tertiary colors)
b. 10-step one-color value scale
c. set of analogous colors
d. set of complementary colors
e. set of split complementary colors
f. the color brown using only the primary colors and white
3. In your sketchbook work out several sketches for the paper sculpture portion of this assignment. Think about color combinations, patterns, and ways your can fold, tear, cut or weave the paper to create engaging compositions. You may use photos of spaces and digital drawing techniques if you’d like for this portion of the assignment.

Color Wheel with Primaries, Secondaries and Tertiaries labeled 
10 step one color value scale 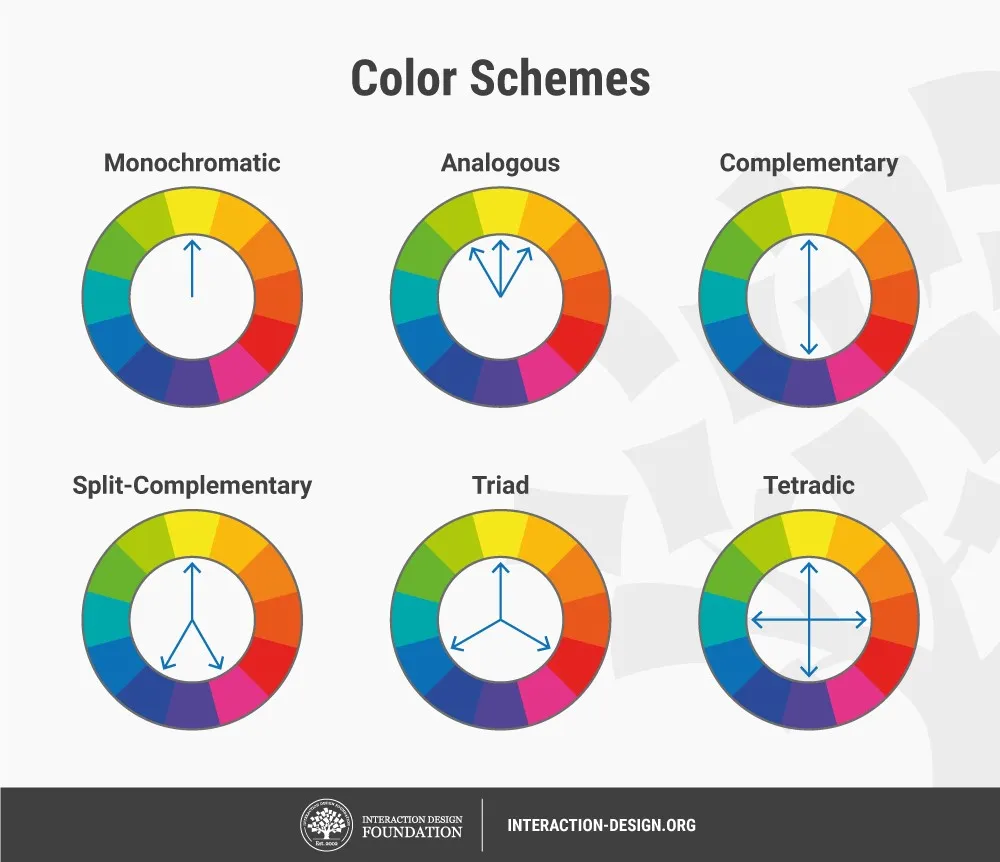
Complementary, Analogous and Split Complementary Color Schemes
Part 3 – In the Studio – Paper Sculpture
1. After discussing your ideas with the instructor, start creating your Paper Sculpture. This piece may hang on the wall, sit on the floor or sit on a pedestal but the overall size should not be more than 2 feet.
2. Work out several sketches in your sketchbook. Think about contrasts like geometric vs organic, small vs large details. Look around you for inspiration – leaves collected on the sidewalk, overhead power lines, stacks of stuff on your desk. Look for the patterns that already exist in the spaces you inhabit as sources of inspiration. Try to gesture out as many sketches as you can while keeping in mind that this project is about color and pattern and should not be object based.
3. Develop a color scheme – try mixing different colors of paint and create unique color combinations that harmonize well and play off of each other. It is important to think about color early in your project. If you need help deciding on colors the Adobe Color website is a great resource.
4. It will be easier and cleaner to paint the paper pieces first and then cut or fold them into the shapes you need.
5. Consider many different options when building your work – weaving, folding, shredding, tearing, etc will all produce unique textures and patterns.
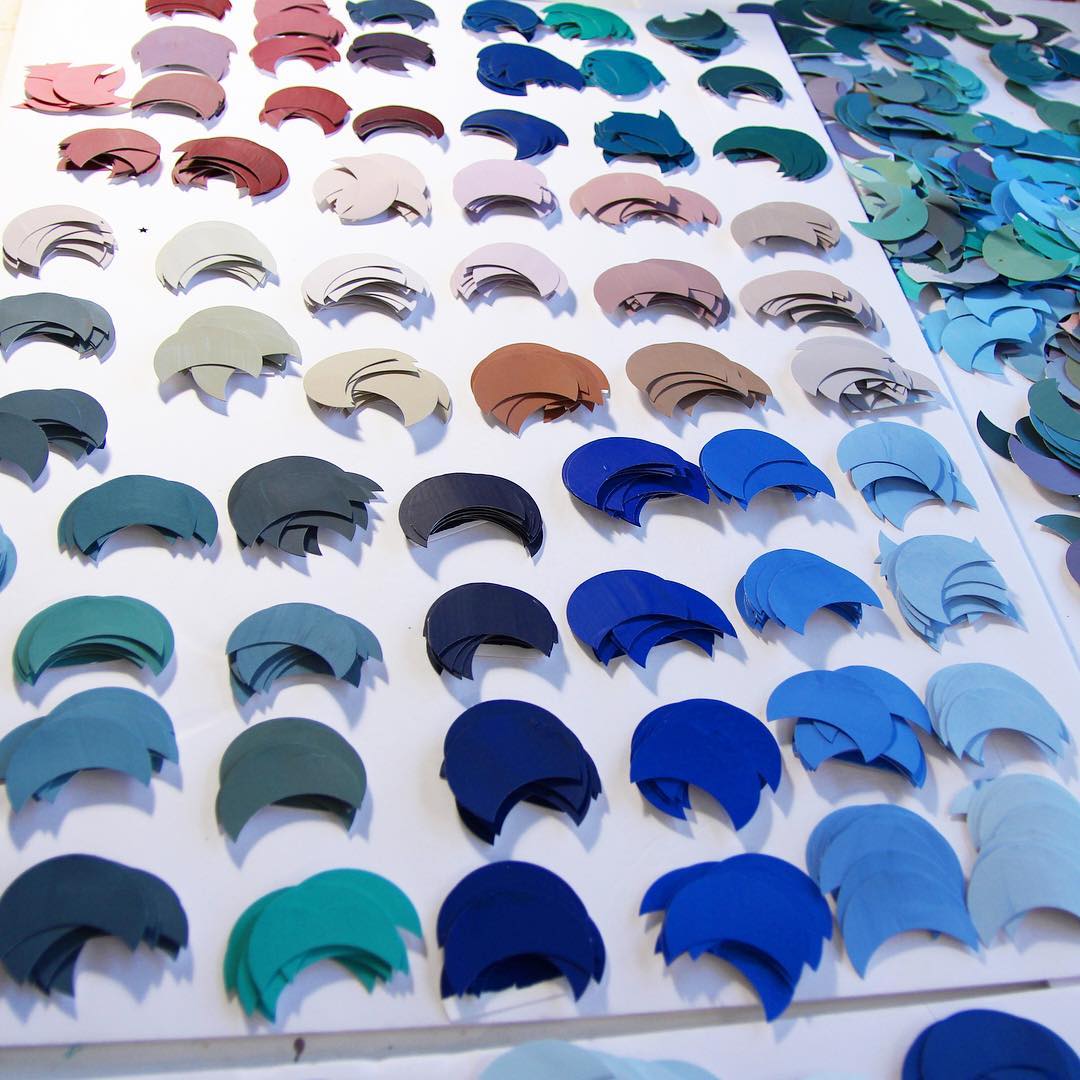
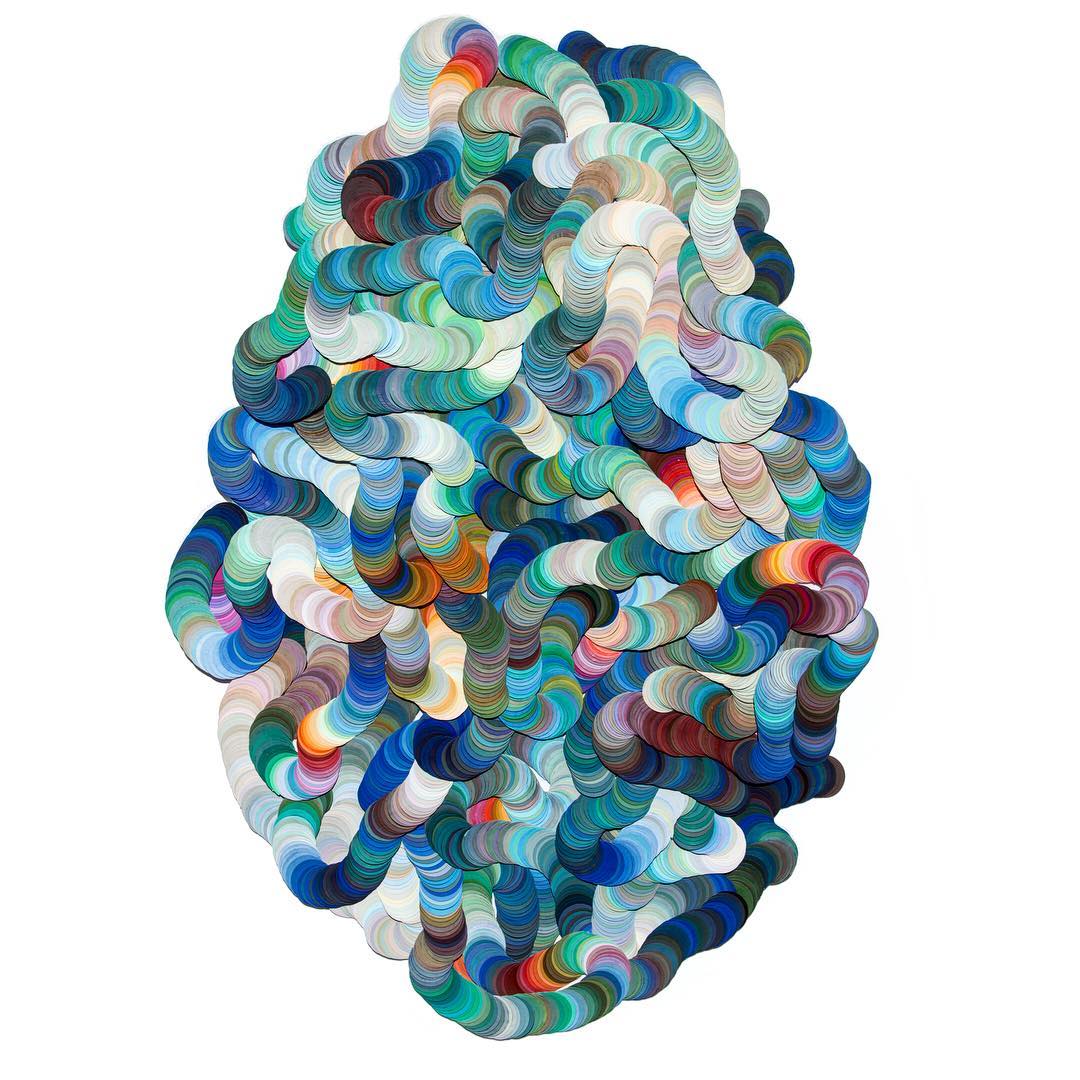
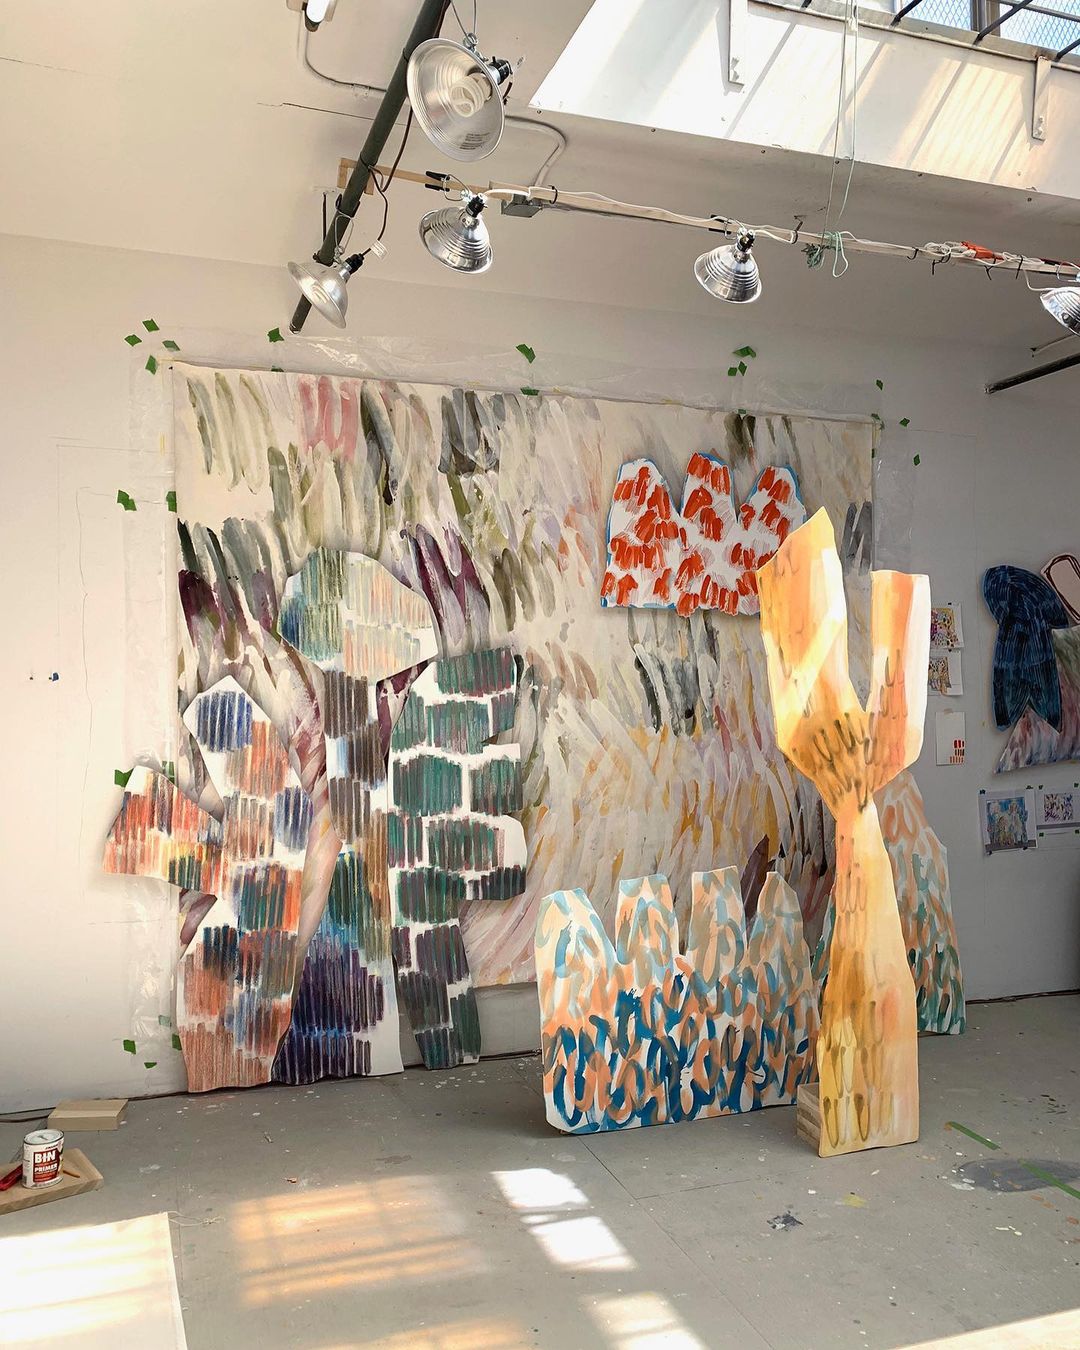
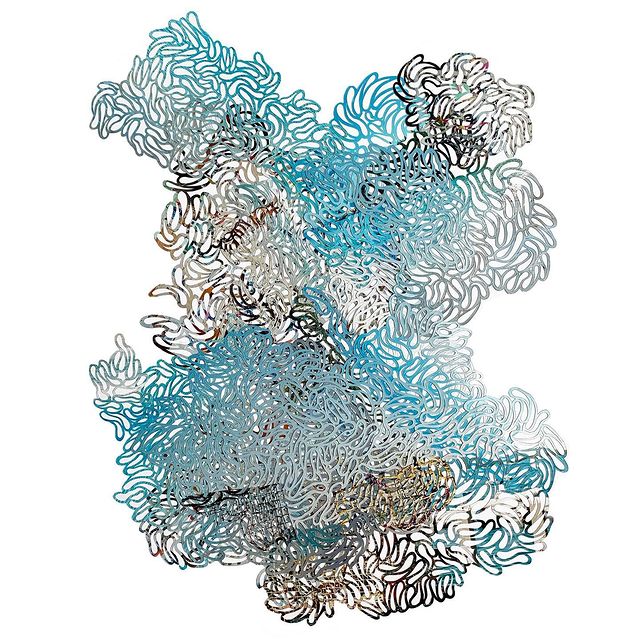
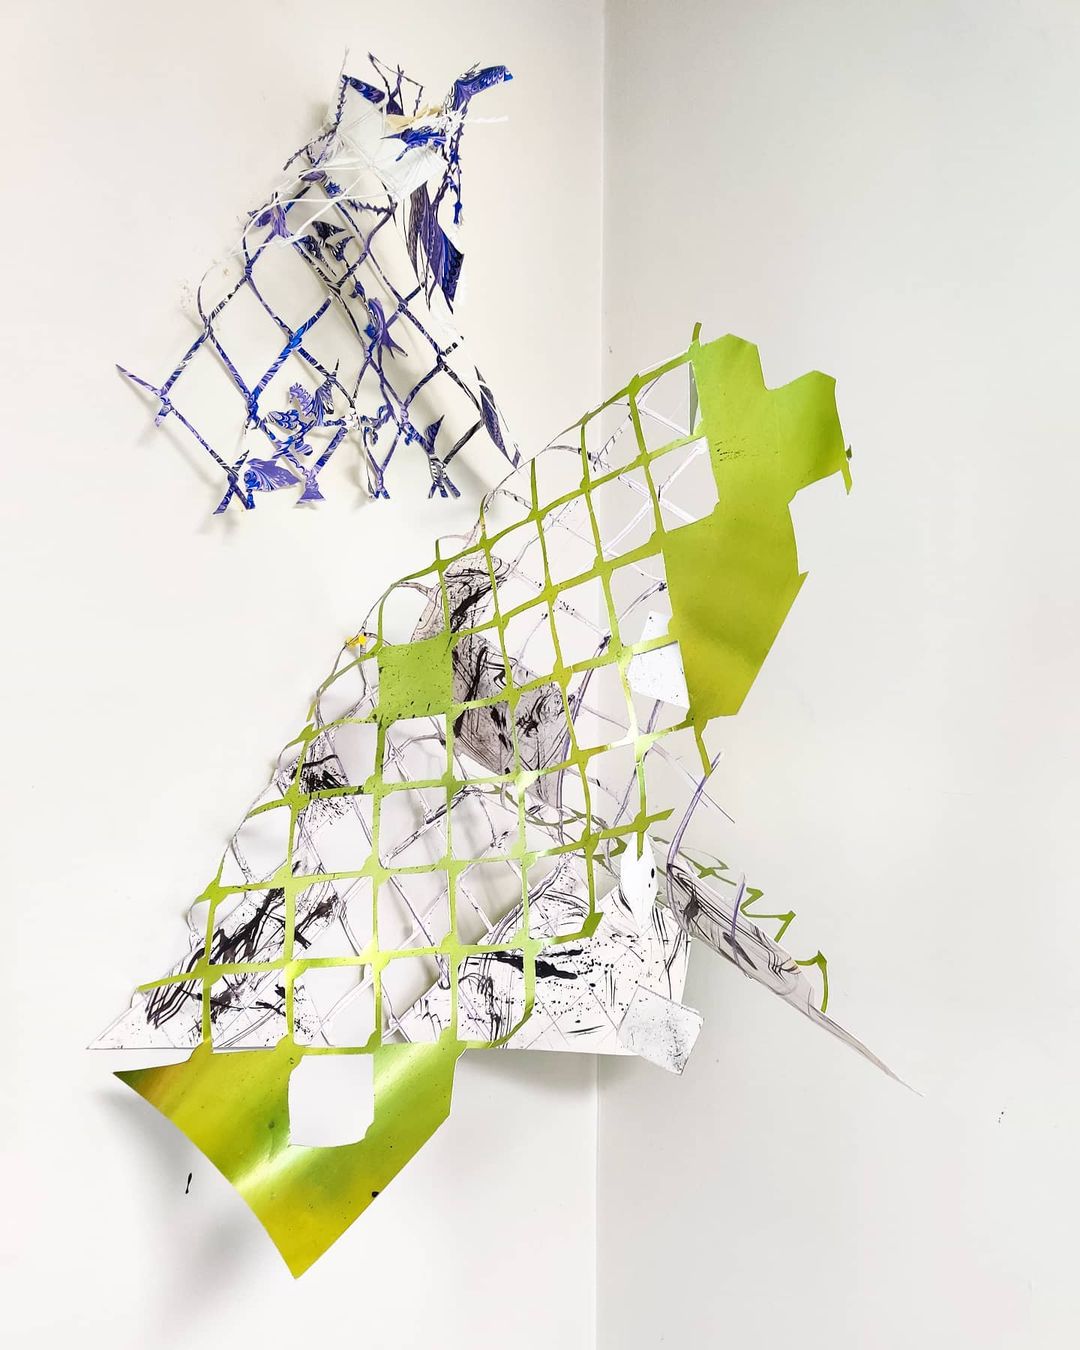
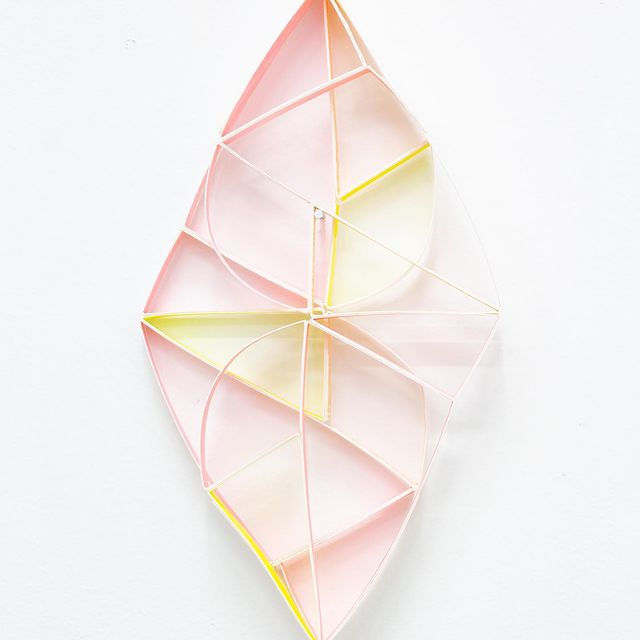
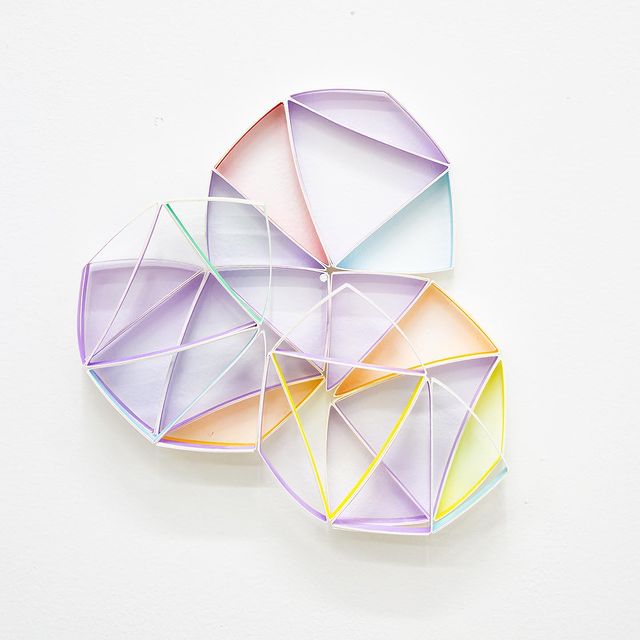
Paper Sculpture Examples


Part 4 – In your sketchbook – Augmented Reality Sculpture
1. Take notes on the artists, articles, videos, and student examples linked below. What sparks your curiosity?
2. This assignment was developed during the height of the COVID pandemic. Considering events that force us to reconsider crowded gallery spaces, what are the roles of art, artists, and designers? How do we adapt and find our niche in an environment that demands social distancing? Does art suffer or benefit from a virtual space?
3. Using either digital means or your sketchbook, work out some ideas for this project. What scale do you want your work to be viewed at? How will the environment affect the colors you choose? How will you use patterns to create engaging yet not overwhelming works of art?
Part 5 – In the studio – Augmented Reality Sculpture
1. If you have a laptop or tablet feel free to bring them to class but we will also be able to use the lab in TODD.
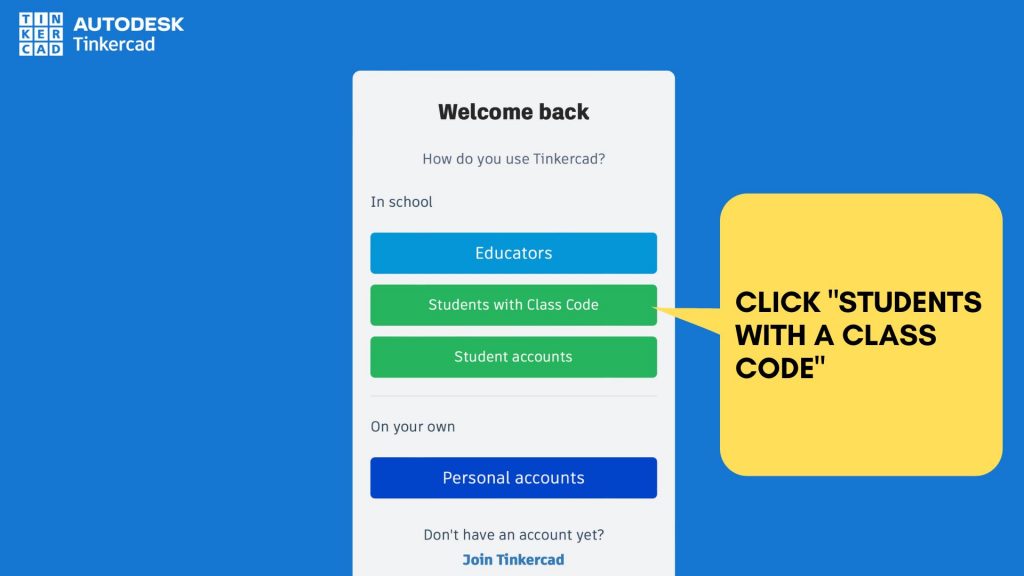
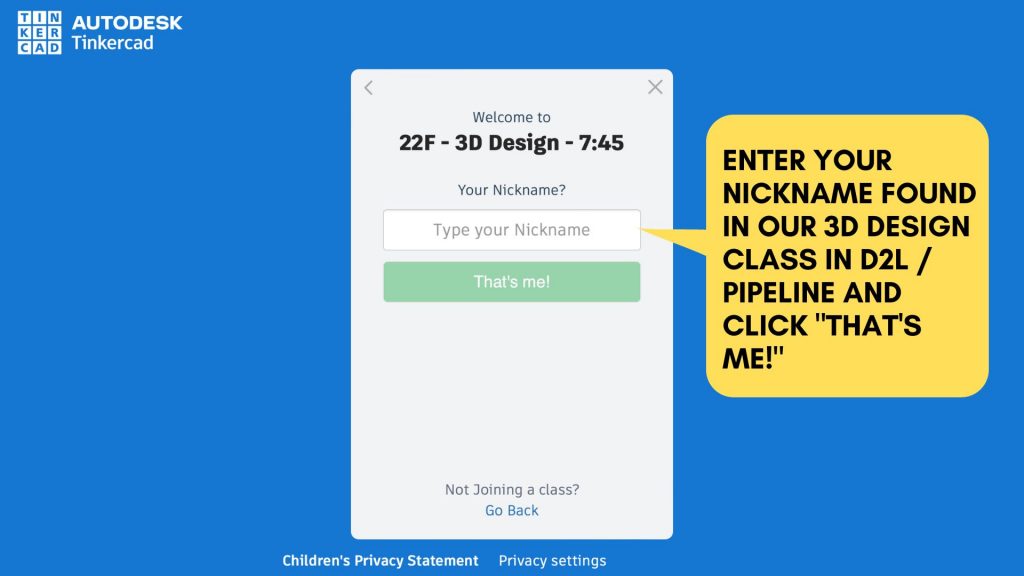
2. Create a Tinkercad account using the Login information provided in our 3D Design D2L / Pipeline Course. For step by step instructions on setting up an account click the images below.

3. Using the Tinkercad classroom I created, or other 3-dimensional modeling software, create a work that utilizes color, shapes, and forms to create engaging pattern-based sculptures. This work is about pattern and color and should not contain recognizable imagery. While it is ok to use some premade shapes, your sculpture should not be based on them. The majority of the work must be your own.
4. Feel free to use what you learned with your Paper Sculpture as inspiration for your Augmented Reality work. They can be individual works of art or they could play off of each other.
5. When your work is completed your file needs to be exported as both .glTF and .usdz. Make sure these files are sent to your instructor.
Part 6 – Documentation and Self-Reflection
1. Upload images of your Paper Sculpture and screenshots or video of your Augmented Reality Sculpture to your Google Slides Presentation.
Answer the following self-reflection questions –
1. How do the paper and the augmented reality sculptures work differently? How are they similar?
2. Is the virtual space an alternative to a traditional gallery space? Why or why not?
3. How do both of your pieces use pattern and color effectively?
4. How could both of your pieces be more effective?
Research / Examples and Artists
In Class Presentation on Color (pdf file)
Artists
Jeremy Bailey – Artist and AR pioneer (YouTube Page)
Rachel Rossin
Estella Tse
Sian Fan
Articles
Augmented Reality: Meet the artists creating the future of storytelling
The Critical Role of Artists in Advancing Augmented Reality
What is the Difference between AR vs. MR vs. VR vs. XR?
Polycount? Understanding model efficiency.
YouTube Playlists
Tinkercad Tutorials
Student Examples